When it comes to working with digital images, saving them with the right quality and file size is key. Images that exceed 150 KB can be large, making them less suitable for web use or slow to upload. However, saving high-quality images without compromising resolution is possible. In this guide, we’ll walk you through tips and methods to handle images above 150 KB while maintaining their clarity and quality.
Why Image Quality Matters When Saving Above 150 KB
Image quality is essential when you're saving files above 150 KB because larger images are typically used for detailed designs, high-resolution photographs, or artwork that demands crispness. If you reduce the size too much, you might end up with blurry, pixelated, or distorted images that are not visually appealing. The key is finding a balance between the file size and the quality of the image.
Here are a few reasons why image quality matters when saving files over 150 KB:
- Professional Presentation: High-quality images are crucial for creating a polished, professional look, especially for websites, portfolios, and marketing materials.
- Print Quality: Larger images are often used for printing. Lower quality can result in pixelation and a poor end product.
- Clarity in Detail: For images with fine details, such as textures or sharp lines, preserving quality helps maintain visual clarity.
- Brand Perception: Clear, crisp images reflect positively on a brand, while poor-quality visuals can harm its credibility.
By properly managing your image file sizes, you can retain the visual integrity and sharpness that large images demand while ensuring they remain functional for online use.
Also Read This: How to Insert YouTube Music into Google Slides Easily
How to Check the Image Size Before Saving
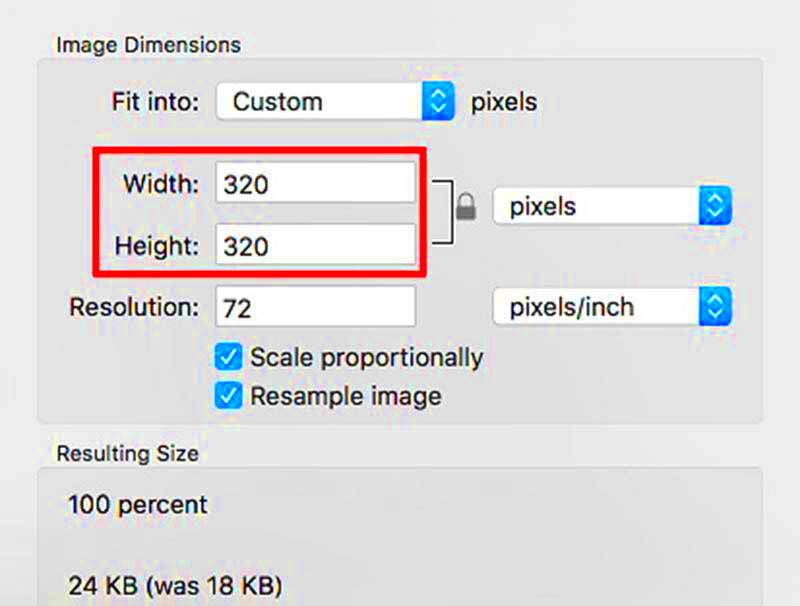
Before saving your image, it’s crucial to check its current size to avoid unintentional file bloat. Knowing the file size helps you make decisions about quality adjustments or compression methods. There are several ways to check the size of an image depending on the device or software you're using.
Here are the most common methods to check image size:
- On Windows: Right-click the image file, select "Properties," and under the "Details" tab, you’ll find the image’s file size listed in KB or MB.
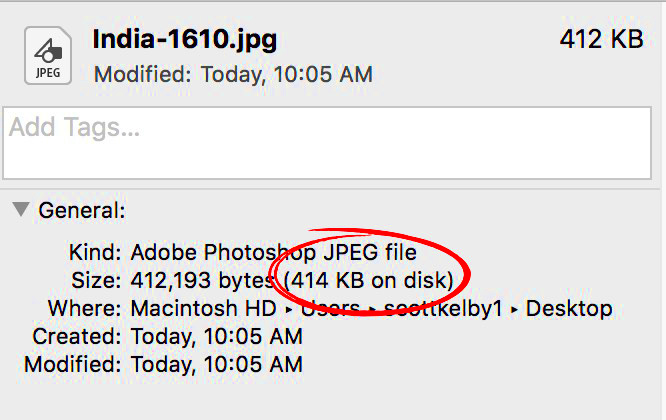
- On Mac: Right-click the image file, select "Get Info," and the file size will appear in the window that pops up.
- Using Image Editing Software: In programs like Photoshop or GIMP, you can check the image size by navigating to "File" > "Image Size" or "Properties." This will provide both the pixel dimensions and the file size.
- Online Tools: Websites like TinyPNG or ImageOptim allow you to upload an image to check its size and make adjustments before downloading it again.
Checking the image size before saving helps ensure that it is not unnecessarily large. If the image exceeds 150 KB and you don’t need such high resolution, it may be time to resize or compress it.
Also Read This: Guide to Adding an Outline to an Image in Photoshop
Choosing the Right File Format for Larger Images
Choosing the right file format is crucial when dealing with larger images, as it directly affects both the image quality and its file size. Each file format has its strengths and weaknesses depending on the type of image you’re saving. By selecting the most suitable format, you can keep your image's quality intact without unnecessarily inflating the file size.
Here are the most commonly used formats and when to use them:
- JPEG: This is the go-to format for most photos and images that don’t require transparency. JPEG files are highly compressed, which makes them smaller in size, but they can lose some detail due to this compression. Ideal for photographs and web images.
- PNG: PNG files are great for images that require transparency, like logos or graphics. They maintain high quality but are often larger than JPEGs. Use PNG when you need a transparent background or detailed graphics.
- GIF: Best for simple images or animations with fewer colors. GIFs can be very small in size, but the image quality can be sacrificed if it’s not a simple image.
- TIFF: TIFF is a lossless format, meaning no quality is lost when saving. However, the file sizes can be very large, so it’s not ideal for web use but is great for printing or archiving high-quality images.
- WebP: A newer format designed for the web. WebP provides high-quality images at smaller file sizes, making it perfect for web use while preserving clarity.
When saving images above 150 KB, you should choose a format based on whether you prioritize image quality or smaller file size. For most cases, JPEG and WebP are the best choices for web use, while PNG or TIFF may be better for print or specialized projects.
Also Read This: The Top Photography Trends to Watch in 2023
Methods to Reduce Image File Size Without Losing Quality
Reducing the size of a large image file without sacrificing quality can be a tricky balancing act. Fortunately, there are several methods and tools available to help you achieve this. Whether you're preparing an image for a website, a portfolio, or an email, these techniques will help you optimize your images while maintaining visual integrity.
Here are some effective methods to reduce image file size:
- Resize the Image: Sometimes, simply reducing the dimensions of an image can drastically cut down the file size. You don’t need a 4000 x 3000 pixel image for web use when a 1200 x 800 pixel image can serve the same purpose.
- Use Image Compression Tools: Tools like TinyPNG, JPEG-Optimizer, or ImageOptim are great for compressing images without noticeable loss in quality. These tools automatically reduce file sizes while preserving clarity.
- Adjust Image Quality Settings: When saving images in formats like JPEG, you can adjust the quality slider during saving. A setting between 70-85% typically offers a good balance between size and quality.
- Use Lossless Compression: If you want to maintain the full quality of your image, lossless compression methods such as those used in PNG or TIFF formats can be a great option. While they don’t reduce the file size as much as lossy formats, they maintain full image detail.
- Change the File Format: As discussed earlier, some formats are better suited for reducing file size. For example, saving a large image as a WebP file might reduce its size without a significant loss in quality.
By using these techniques, you can significantly reduce the file size of your images without compromising their overall quality. The key is finding the right balance for your specific needs, whether it's for web use, email, or printing.
Also Read This: Account Resurgence: Recovering Your Photobucket Account
Best Practices for Saving High-Resolution Images
Saving high-resolution images correctly ensures that you get the most out of their quality while also managing their file size. High-resolution images can be essential for print materials, portfolios, or even professional photography. However, they can also be very large files, which can pose challenges for storage, sharing, or online use.
Here are some best practices to follow when saving high-resolution images:
- Use Appropriate Resolution: For web use, a resolution of 72-150 DPI (dots per inch) is sufficient. For printing, you’ll need a higher resolution, typically around 300 DPI. Always check the resolution requirements for your intended use before saving.
- Choose the Right File Format: As we discussed earlier, different file formats offer different benefits. JPEG is excellent for photos, PNG for transparency, and TIFF for preserving high quality with no compression.
- Compress Carefully: If you’re saving for web use, try to compress the image without losing too much detail. Use tools like TinyPNG or ImageOptim to strike the right balance between size and quality.
- Save in Layers (if Applicable): If you’re working with complex images in Photoshop or similar software, save your work in layers. This way, you can make adjustments later without affecting the quality of the entire image.
- Consider File Size Limits: When saving large images, always be mindful of the file size. If it’s too large to upload or share easily, consider resizing, compressing, or converting it into a more suitable format.
By following these practices, you can ensure that your high-resolution images are both high-quality and manageable in size, making them suitable for a variety of uses from online content to high-quality prints.
Also Read This: How to Upload Photos to Depositphotos for New Contributors
Common Mistakes to Avoid When Saving Large Images
Saving large images can be tricky, especially when you’re trying to maintain both quality and manageable file size. There are several common mistakes that can lead to images being unnecessarily large, low-quality, or incompatible with their intended use. Being aware of these pitfalls can help you avoid frustration and ensure your images look their best every time.
Here are some of the most common mistakes to watch out for when saving large images:
- Not Checking Image Resolution: One of the biggest mistakes is failing to check the resolution of your image. A high-resolution image (300 DPI for printing) may be far too large for web use, where 72 DPI is often sufficient. Always check the resolution before saving to ensure it's appropriate for the intended platform.
- Using the Wrong File Format: Different file formats serve different purposes. For example, saving a large, detailed image as a JPEG can cause it to lose quality due to compression. On the other hand, using PNG for simple images can unnecessarily increase the file size. Choose the correct format based on the image type and your intended use.
- Overcompressing the Image: While compressing an image can help reduce file size, overdoing it can lead to visible artifacts, such as blurring or pixelation. Be mindful of how much compression you apply, and try to find a good balance between size and quality.
- Ignoring Metadata: Images often contain metadata (like camera settings or location data) that can add to the file size. If you're not using this information, consider removing the metadata before saving to reduce the file size.
- Saving Multiple Copies Without Optimization: Sometimes, people save multiple versions of the same image without optimizing them for specific uses. If you plan to use an image for both print and web, create separate versions optimized for each purpose to avoid wasting storage space or compromising quality.
Avoiding these mistakes will help you keep your images both high-quality and appropriately sized for whatever project you're working on.
Also Read This: Mirroring Images in Paint.NET: Step-by-Step Guide
FAQ
Here are some frequently asked questions about saving images above 150 KB:
- What file format should I use for large images?
The choice of file format depends on the image's use. JPEG is great for photos, PNG is better for images that require transparency, and WebP is ideal for the web due to its smaller file size without compromising quality.
- Can I reduce file size without affecting quality?
Yes, by using tools that apply compression without noticeable loss of quality, like TinyPNG or JPEG-Optimizer. Additionally, resizing the image or changing the file format can help reduce the size while preserving clarity.
- Why is my large image taking forever to upload?
Large images take longer to upload, especially if their resolution is higher than necessary. Consider resizing or compressing the image before uploading it. Also, check the internet connection speed, as this can affect upload times.
- Should I always use high resolution for images online?
Not necessarily. High-resolution images (300 DPI) are better for print but can slow down website performance. For online use, 72 DPI is usually sufficient for a sharp image without unnecessary load time.
- How do I remove metadata from an image?
You can use online tools like ImageOptim or ExifTool to strip metadata from your image, reducing file size without affecting the visual quality of the image.
Conclusion
Saving images above 150 KB doesn’t have to be a hassle if you follow the right steps. The key is balancing image quality with file size, depending on the purpose of the image—whether it’s for web use, print, or storage. By choosing the right file format, avoiding common mistakes, and using tools for compression, you can manage large image files efficiently without compromising quality.
Remember to check image resolution, pick the best file format for your needs, and compress files carefully. Always be mindful of metadata and avoid saving unnecessary copies. With these tips, you can save large images with ease, ensuring they look their best in any setting.
 admin
admin


