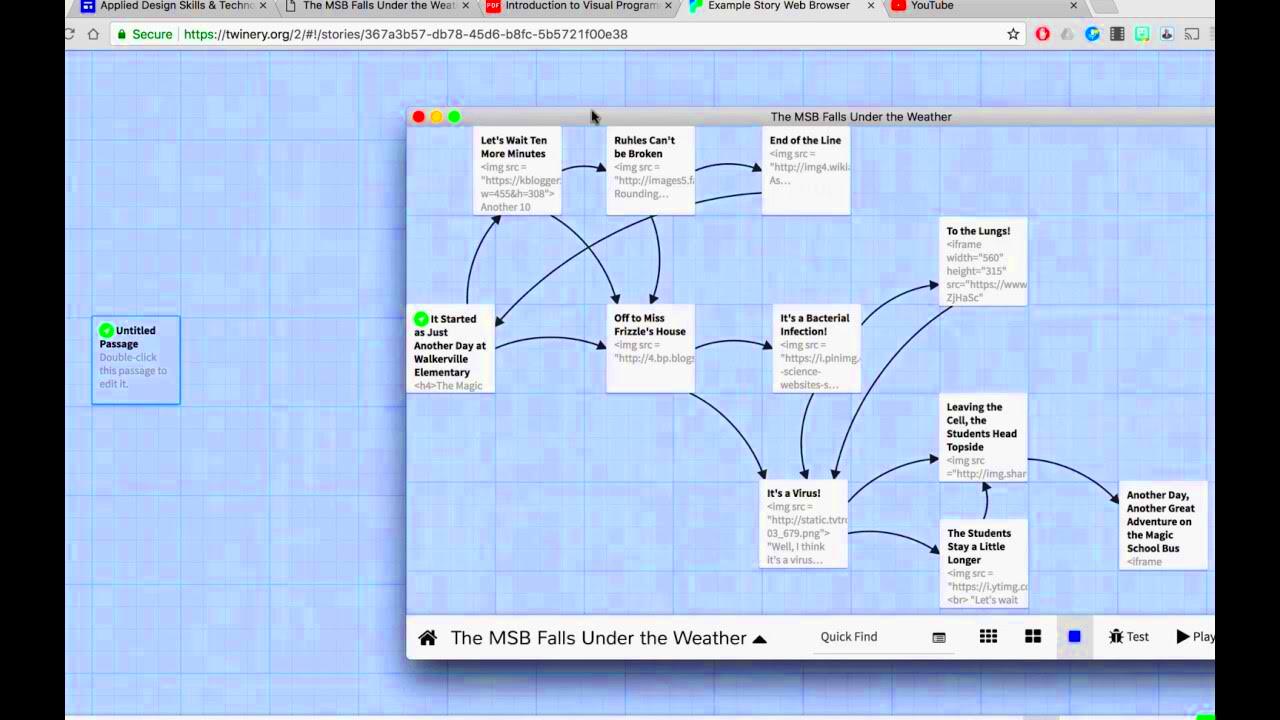
Twine is a powerful tool for creating interactive stories, and adding images can significantly enhance your storytelling experience. By incorporating visuals, you can bring your narrative to life, making it more immersive and engaging for your audience. Whether you're building a simple text-based story or a complex interactive adventure, images can help clarify your plot, showcase characters, or set the mood for different scenes. In this section, we’ll explore how you can easily add images to your Twine story to take your creativity to the next level.
Understanding the Role of Visuals in Twine Stories

Visual elements are essential in modern storytelling, especially in interactive platforms like Twine. Here’s why visuals matter in Twine stories:
- Enhance the Narrative: Images allow you to express ideas that words alone might not fully capture. A picture of a dark forest, for instance, instantly sets a tone that may take paragraphs of description to achieve.
- Create Mood: The right image can evoke emotions in the reader. Whether it’s a serene landscape or a dark, foreboding image, visuals help convey the intended atmosphere.
- Provide Clarity: Sometimes, an image can clarify what text alone cannot. For example, showing a map or a character's portrait can help the reader visualize complex concepts or follow the storyline more easily.
- Engagement and Interaction: In Twine, the reader’s interaction is crucial. Well-placed images encourage deeper involvement in the story and provide a more memorable experience.
Ultimately, integrating visuals into your Twine project allows you to create a more dynamic and engaging experience that resonates with your audience.
Also Read This: How Technology Startups Can Benefit from Modern Visuals on Imago Images
Choosing the Right Image Formats for Twine
When it comes to choosing images for Twine, the format is just as important as the image itself. The right file format ensures compatibility, fast loading times, and overall quality. Here are some of the most common image formats used in Twine:
| Format | Best For | Pros | Cons |
|---|---|---|---|
| JPG | Photographs, detailed images | Small file sizes, good for high-quality images | Lossy compression, may lose some quality after saving multiple times |
| PNG | Images with transparency, logos, icons | Supports transparency, high quality | Larger file size compared to JPG |
| GIF | Simple animations | Supports animation, small file size | Limited to 256 colors, not suitable for detailed images |
| SVG | Scalable vector images, icons | Scalable without losing quality, smaller file sizes for simple designs | Not supported by all browsers or platforms |
Here’s a quick guide for choosing the right format:
- Use JPG for photographs or detailed images that don’t need transparency.
- Use PNG for images that require transparency or need to retain quality.
- Use GIF for simple animations or smaller image sets.
- Use SVG for vector-based images or logos that need to scale across different screen sizes.
Ultimately, the format you choose will depend on the type of image you're using and the role it plays in your story. It’s important to consider both visual quality and loading times to give your readers the best experience.
Also Read This: Enhancing Education with Imago Images for Engaging and Informative Content
Steps to Upload and Embed Images in Twine
Adding images in Twine is a simple process, but it requires a few steps to ensure everything works smoothly. Here’s how you can upload and embed images in your Twine story:
- Step 1: Prepare Your Image – Before you upload, ensure your image is in the correct format (JPG, PNG, etc.) and is optimized for the web. A smaller file size ensures faster loading times for your readers.
- Step 2: Upload Your Image – In Twine, go to the “Story” menu, click on “Add New Image”, and choose the image file from your computer to upload it.
- Step 3: Embed the Image – Once uploaded, you can embed the image in your passages using HTML. The code looks like this:
<img src="imagefilename" alt="description">. Replace “imagefilename” with your actual file name and “description” with any text you want to appear if the image fails to load. - Step 4: Preview the Image – Always preview your story after embedding images to make sure they appear correctly and the layout looks as intended.
With these steps, you can add images to your Twine story easily. If you’re linking to external images, make sure the URLs are correct to avoid broken links.
Also Read This: The Role of Imago Images in Creating Eye-Catching Ad Campaigns
Customizing Image Sizes for a Better User Experience
Customizing the size of your images in Twine helps ensure they fit well within your story’s layout. Here’s how to adjust image sizes for a better user experience:
- Adjust via HTML – Use the
widthandheightattributes within the<img>tag to control the size of your image. For example:<img src="image.jpg" width="400" height="300">. - Use CSS for Responsive Design – You can also use CSS to ensure your images are responsive (adapt to different screen sizes). A simple CSS rule like
img { max-width: 100%; height: auto; }ensures the image resizes according to the screen. - Maintain Aspect Ratio – To keep the image’s proportions correct, use either the width or height attribute but not both. Twine will automatically adjust the other dimension based on the image’s original aspect ratio.
- Consider File Size – Large images can slow down loading times, which can disrupt the user experience. Always optimize your images by reducing their file size without compromising too much on quality.
By customizing image sizes, you ensure that your images look great on any device while maintaining quick loading times and a seamless user experience.
Also Read This: What Should I Shoot for Shutterstock? Tips for Capturing Marketable Images
Best Practices for Using Images in Twine for Effective Storytelling
Images play a crucial role in storytelling within Twine. To make the most of them, follow these best practices for using images effectively:
- Use Images to Enhance the Story – Images should always serve a purpose. Whether it’s to create atmosphere, represent a character, or explain a concept, avoid adding images just for decoration. Make sure each image pushes the story forward.
- Keep Image File Sizes Optimized – Large image files can slow down your story, especially if there are many images. Use tools like TinyPNG or Photoshop’s “Save for Web” feature to compress images without sacrificing quality.
- Use Consistent Styles – Consistency in the style and color scheme of images helps maintain the tone of your story. Whether you’re using illustrations, photos, or icons, ensure they complement each other and the overall narrative style.
- Balance Text and Images – Don’t rely solely on images to tell the story. Text is still important, and images should support the narrative, not replace it. Strike a balance between visuals and text for the best storytelling experience.
- Test the Layout – Before publishing, test your Twine story on different devices and screen sizes. Images that look great on a desktop might not fit well on a mobile screen. Adjust accordingly to ensure your images are displayed correctly.
By following these best practices, you can create a visually engaging and well-balanced Twine story that enhances the narrative and keeps readers immersed in your interactive world.
Also Read This: The Growing Demand for Authenticity in Stock Photography and How Imago Images Delivers
Common Issues When Adding Images in Twine and How to Solve Them
While adding images in Twine is straightforward, you may run into some issues along the way. Here are some common problems and solutions to help you out:
- Images Not Displaying – This is a frequent issue. It usually happens because of incorrect file paths or missing images. Make sure the image is correctly uploaded and that the
srcattribute in your<img>tag points to the correct file location. If you’re using an external image, check the URL. - Image Size Issues – Images that are too large or too small can distort the layout of your story. To fix this, use HTML or CSS to set proper width and height for your images. Consider responsive design rules to make sure images adjust properly across devices.
- Slow Loading Times – Large image files can slow down your story, affecting the user experience. Compress images before uploading them to reduce file size without losing quality. Tools like TinyPNG or ImageOptim can help with this.
- Broken Links – If you’re linking to external images, ensure that the URL is correct. Double-check for typos or outdated links. If you host images on your own server, make sure the path is relative to your Twine project folder.
- Unsupported File Formats – Some browsers or Twine versions may not support certain file formats. If you’re using a format like TIFF, consider converting the image to JPG or PNG to ensure compatibility.
By identifying and addressing these common issues, you can ensure that your images appear correctly and your story runs smoothly for readers.
Also Read This: Enhance Your Brand Storytelling with Professional Photos from Imago Images
FAQ
Q1: Can I use animated images (GIFs) in Twine?
A1: Yes, Twine supports GIFs! They’re perfect for adding simple animations or creating dynamic scenes in your story. Just be mindful of file size to avoid slow loading times.
Q2: What is the best image format to use in Twine?
A2: PNG is great for images with transparency or sharp edges, while JPG is better for photos and detailed images. Choose the format that suits the type of image you're using.
Q3: How do I resize images in Twine?
A3: You can resize images directly in the HTML code using the width and height attributes. For responsive design, use CSS with rules like max-width: 100%; height: auto;.
Q4: My image isn't loading properly. What should I check?
A4: First, check the file path or URL to ensure it’s correct. If you're using external images, make sure the link is active. Also, confirm the image is uploaded properly within Twine.
Q5: Are there any size limitations for images in Twine?
A5: While there’s no specific limit, larger images can cause slow load times. It’s best to compress images and keep file sizes manageable, ideally under 1MB each for faster loading.
Conclusion
Adding images in Twine can truly elevate your storytelling by making your interactive project more immersive and engaging. By following the steps to upload and embed images, customizing their sizes, and adhering to best practices, you can create a visually captivating experience for your readers. However, as with any tool, you may encounter some common issues along the way, but don’t worry—they can easily be solved by double-checking your file paths, image sizes, and formats. With a bit of attention to detail, your Twine story can become a dynamic and visually rich narrative that pulls readers in and keeps them hooked.
Remember, the key is to use images that enhance your story, not overwhelm it. Strike the right balance, and your audience will appreciate the thought you’ve put into creating a compelling, interactive experience. Happy storytelling!

 admin
admin


