Google Slides allows you to work with multiple images and objects in your presentation. To ensure everything looks organized, it uses a layering system. This means that some images or objects can sit on top of others, depending on their layer position. Understanding how to manage these layers can help you create a clean, visually appealing slide.
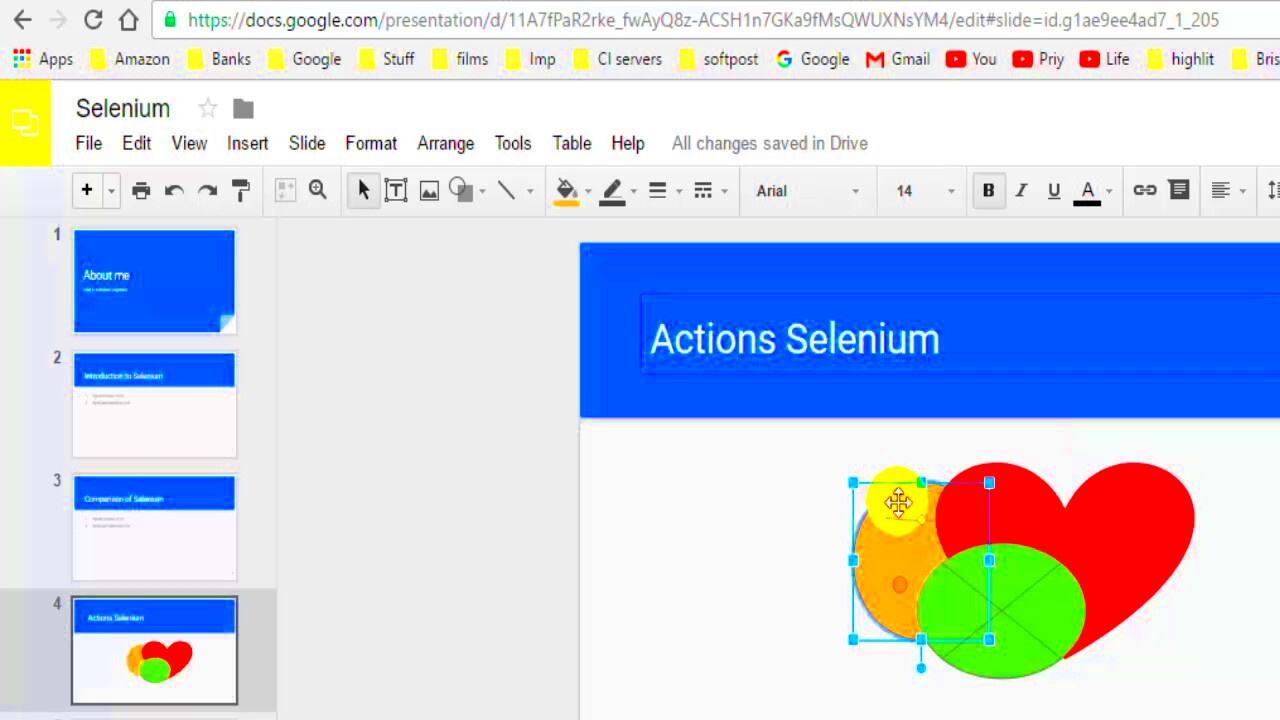
Each object in Google Slides has its own "layer" or position relative to other items. When you add an image, it is placed on a layer, either in front of or behind other content. You can adjust this layering order to control which objects appear in the foreground or background. This feature is especially useful when you have multiple images or shapes that overlap on the same slide.
The concept of layers is crucial when you're trying to arrange elements on your slide. For instance, if you want one image to be the focal point, you’ll need to bring it to the front. Google Slides allows you to move objects forward or backward through the layers, ensuring you have complete control over the arrangement of items on your slide.
Steps to Bring an Image to the Front

If you're looking to make sure an image stands out in your presentation, bringing it to the front is the way to go. Here's how you can easily bring an image to the front in Google Slides:
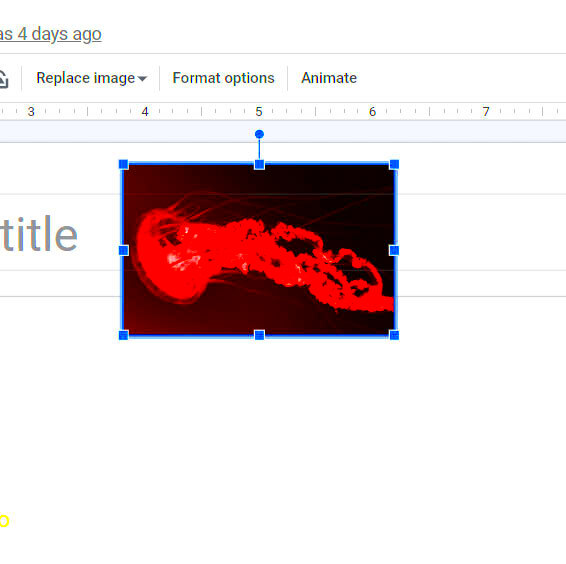
- Click on the image: First, select the image you want to bring to the front by clicking on it.
- Open the toolbar: After selecting the image, go to the toolbar at the top of the screen.
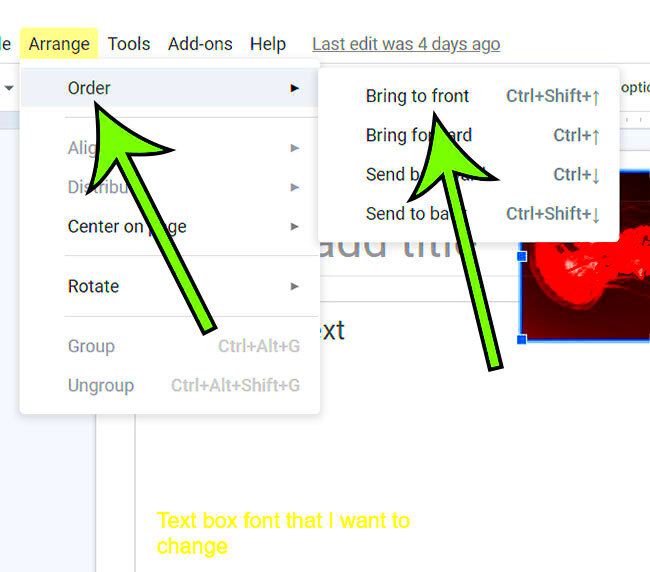
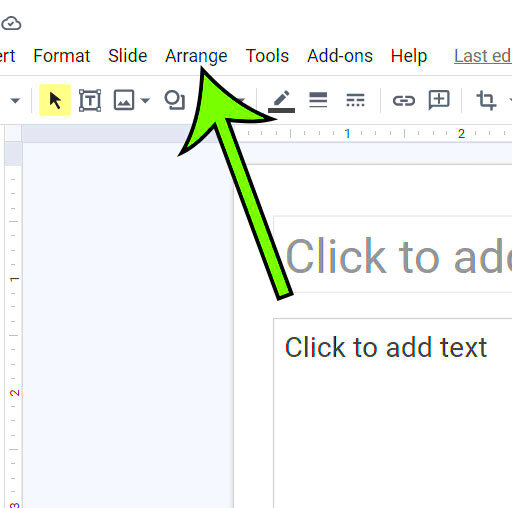
- Click on "Arrange": In the toolbar, find the "Arrange" option. This will open a drop-down menu with different positioning options.
- Select "Order": Hover over the "Order" option to reveal a submenu with more choices.
- Choose "Bring to front": In the submenu, click "Bring to front" to move your image to the top layer.
After completing these steps, your image will be positioned at the front of all other objects on the slide. This ensures that it won't be hidden behind other content like text boxes or shapes.
Using the Right-Click Menu for Image Positioning

In addition to using the toolbar, Google Slides also gives you the option to manage image layers using the right-click menu. This can be a quicker way to move images around without having to navigate through the top menu. Here’s how to use it:
- Right-click on the image: Start by right-clicking directly on the image you want to move. This will open a context menu.
- Find "Order": In the context menu, look for the "Order" option. This is where you'll find layer management options.
- Choose the desired option: Under "Order," you’ll see options like "Bring to front," "Send to back," "Bring forward," and "Send backward." You can select "Bring to front" to place the image in the foreground.
The right-click method is particularly useful when you want to quickly adjust the layer order without using the toolbar. By right-clicking, you have instant access to all the layer options you need to control your image's positioning.
Alternative Methods to Bring an Image to the Front

If you prefer not to use the toolbar or right-click options, there are other ways to bring an image to the front in Google Slides. These alternative methods can be helpful if you're looking for a quicker or more intuitive way to rearrange the layers of your presentation. Here are some methods to try:
- Using the "Arrange" Menu from the Top Toolbar: You can also access the "Bring to front" option from the "Arrange" menu in the toolbar. Simply click on the image, go to the top toolbar, and click "Arrange." In the drop-down menu, select "Order" and then "Bring to front."
- Keyboard Shortcuts: If you prefer using shortcuts, Google Slides offers a fast way to move an image to the front. For Windows, press Ctrl + Shift + Up Arrow, and for Mac, press Cmd + Shift + Up Arrow to bring the image to the top of the layer stack.
- Drag the Image Above Other Elements: Sometimes, simply dragging the image and positioning it over other objects will automatically bring it to the front. This can be a quick way to reorder images if you want to avoid using menus or keyboard shortcuts.
These alternative methods provide flexibility when you're working with multiple layers of content, making it easier to position your images exactly where you want them. Whether you prefer the toolbar, right-click menu, or shortcuts, Google Slides ensures you have options to suit your workflow.
What to Do If Image Doesn't Move
Sometimes, even after trying to bring an image to the front, it might not seem to move as expected. This can be frustrating, but there are several things you can check to resolve the issue:
- Check for Grouping: If your image is part of a group (i.e., it's grouped with other images or shapes), it might not move independently. To fix this, select the image and click on "Group" in the toolbar, then choose "Ungroup" so you can move the image freely.
- Unblock Hidden Layers: Sometimes, another object or shape might be blocking your image. Double-check that there aren't any invisible objects or locked layers obstructing your image. You can use the "Order" options to move objects in front of or behind others as needed.
- Ensure It's Not a Background Image: If your image is set as a background (which can be done via "Slide" > "Change background"), it cannot be moved in the same way as regular images. You'll need to adjust the background settings or remove the image and re-add it as a regular object.
- Refresh Google Slides: Sometimes, Google Slides can glitch. If your image still won't move, try refreshing the page or restarting the browser to see if that resolves the issue.
By following these steps, you can troubleshoot and fix any issues that might prevent your image from being brought to the front. It’s all about understanding how the layers and settings work to give you the control you need.
Tips for Layering Multiple Images in Google Slides
When you're working with multiple images in Google Slides, layering them correctly can help you create a neat and professional-looking presentation. Here are some tips to keep in mind when layering images:
- Plan the Order of Your Images: Before adding images, think about the layering order. Decide which image should be at the front, and which ones should be behind. This helps avoid confusion later and allows for a cleaner design.
- Use "Send Backward" and "Bring Forward" for Fine-Tuning: Instead of always bringing an image to the front or sending it to the back, try using the "Send backward" or "Bring forward" options to move images one layer at a time. This gives you more control and prevents shifting everything out of place.
- Group Similar Images: If you're working with a set of images that need to stay together, group them. This way, you can move them around as one unit without worrying about each individual image’s position.
- Keep the Slide Balanced: When layering multiple images, make sure the layout remains visually balanced. Avoid overcrowding a single area with too many images, and allow space for each image to stand out.
- Use Transparent Backgrounds: If your images have backgrounds, consider removing them (making the background transparent). This can make the layering look more professional, as the images won't have distracting borders or backgrounds overlapping with other elements.
By following these layering tips, you can effectively manage multiple images in Google Slides, ensuring that your presentation looks polished and well-organized. Whether you’re creating a simple slide or something more complex, good layering helps keep everything in place and easy to view.
How to Control Image Order for Clean Presentations
When you're working with multiple images in Google Slides, it’s important to control the image order to ensure that your presentation looks neat and professional. Properly managing the order of your images allows you to highlight the most important elements and avoid cluttering your slides. Fortunately, Google Slides offers several ways to control how images appear in relation to one another.
To manage image order, you can adjust the layer positioning of your images so that the ones you want in the foreground are at the top, and those you want in the background are at the bottom. This can help avoid overlapping images that distract from your content.
Here are a few tips for controlling image order:
- Use the "Arrange" Menu: In the toolbar, the "Arrange" menu offers the "Order" option where you can choose "Bring to front" or "Send to back" to quickly change the image order.
- Fine-Tune with "Send Backward" and "Bring Forward": Instead of jumping to the front or back, use "Send backward" or "Bring forward" to move images one layer at a time. This allows for precise control.
- Group Images for Consistency: If you're working with multiple images that should stay together, consider grouping them. Grouping keeps the order intact while letting you move the entire set around as a unit.
- Use the Right-Click Menu: Right-clicking on an image provides quick access to ordering options, which makes it easier to move your images as needed.
With these techniques, you'll be able to control the image order, ensuring your presentation is visually appealing and easy to follow. Organizing your images correctly can make a significant difference in the overall flow of your slides.
Common Issues and How to Fix Them
Despite its simplicity, Google Slides can sometimes present issues when working with images, especially when managing their order and layers. Don’t worry; most of these problems are easy to fix once you know what to look for. Here’s a guide to some of the most common issues you might face when working with images in Google Slides and how to resolve them:
- Image Not Moving: If your image doesn’t seem to move, it could be grouped with other elements or set as a background. To fix this, ungroup the objects or adjust the background settings. Right-click the image, select "Ungroup" or remove it from the background settings.
- Images Are Stuck Behind Text or Other Objects: Sometimes, images get stuck behind text boxes or other objects. Use the "Order" options in the "Arrange" menu or right-click to "Bring to front" or "Send to back" to reorder layers.
- Overlapping Images: If images overlap in a way that you didn’t intend, adjust the layers by moving them forward or backward. This can help ensure that each image is displayed properly and does not block the view of other important elements.
- Images Are Out of Place After Adjusting Order: If an image appears in the wrong place after changing its order, try refreshing the slide. If the issue persists, consider undoing the changes and repeating the steps slowly to see where the issue arises.
- Images Not Showing in Slideshow: In rare cases, images may not display properly during the slideshow view. Check that all images are in their correct layers and that no objects are hidden behind others. Also, ensure your internet connection is stable as Google Slides requires an active connection to load content properly.
By troubleshooting these common issues, you can maintain smooth control over your images in Google Slides, ensuring your presentation remains flawless.
FAQ
Q: How do I move multiple images at once in Google Slides?
A: To move multiple images, simply click and drag to select all the images you want to move. Once selected, group them by right-clicking and choosing "Group" from the menu. Then, you can move them as one unit.
Q: Why is my image not displaying correctly on the slide?
A: If your image isn't showing properly, make sure it isn't set as a background or hidden behind other objects. Check its layer position by using the "Bring to front" or "Send to back" options.
Q: Can I use keyboard shortcuts to reorder images in Google Slides?
A: Yes, you can use keyboard shortcuts. On Windows, press Ctrl + Shift + Up Arrow to bring an image to the front, and Ctrl + Shift + Down Arrow to send it to the back. On Mac, use Cmd + Shift + Up Arrow or Cmd + Shift + Down Arrow.
Q: How do I fix an image that won’t move?
A: If your image isn’t moving, it might be grouped with other elements, set as a background, or blocked by another object. Ungroup the items, adjust the background settings, or move the blocking objects using the "Order" options.
Q: Can I adjust the transparency of an image in Google Slides?
A: Yes, you can adjust the transparency of an image by selecting it, clicking on the "Format" menu, and then choosing "Format options." Under the "Adjustments" section, you can adjust the transparency slider to make the image more transparent.
Conclusion
Managing image order in Google Slides is an essential skill for creating professional and visually appealing presentations. Whether you're bringing an image to the front, layering multiple images, or troubleshooting common issues, understanding how to control the placement of images ensures a smooth and clean design. By using the available tools like the "Arrange" menu, right-click options, and keyboard shortcuts, you can easily organize and layer your content to highlight the most important elements. Remember to also address any potential issues that might arise, such as images not moving or overlapping, by following simple steps to adjust the layer order. With these tips, your presentations will be more polished and easy to follow, giving your audience the best viewing experience possible.

 admin
admin


