Embedding images in Adobe Illustrator is crucial for several reasons. When you embed an image, you include it directly within your Illustrator file, making it self-contained. This means you don’t need to worry about linking to external files, which can lead to broken links and missing images. Here are a few key benefits:
- Portability: An embedded image stays with your document, so sharing the file becomes easier.
- Editing Flexibility: You can edit the image within Illustrator without relying on outside software.
- Quality Preservation: Keeping images embedded helps maintain their resolution and quality.
Overall, embedding ensures that your designs remain intact and look great, no matter where you open them.
Preparing Your Images for Adobe Illustrator
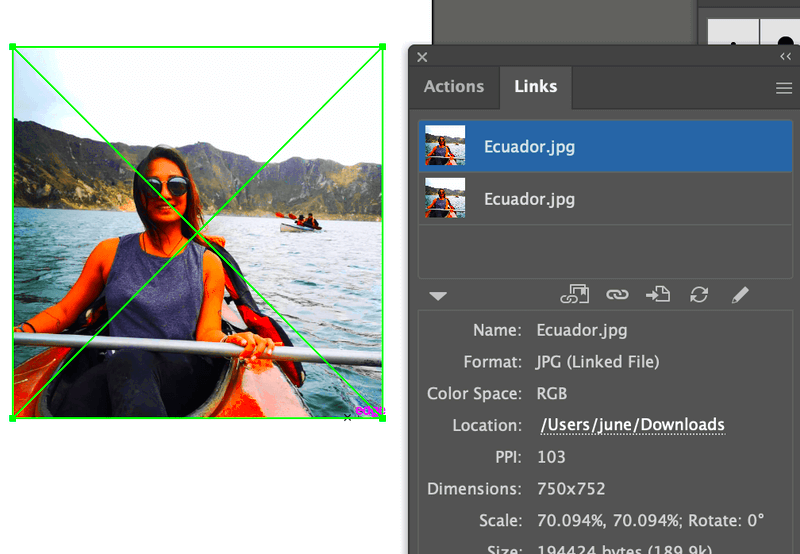
Before you start embedding images, it’s essential to prepare them properly. Here are some steps to follow:
- Choose the Right Format: Use formats like JPEG, PNG, or TIFF for better compatibility.
- Check the Resolution: Ensure your images have a resolution of at least 300 DPI for print or 72 DPI for web use.
- Edit Before Importing: Consider cropping or adjusting brightness and contrast in image editing software before bringing your images into Illustrator.
By preparing your images in advance, you set the stage for a smoother design process in Adobe Illustrator.
Also Read This: Account Archeology: Recovering Your Old Photobucket Account
Opening Your Document in Adobe Illustrator
To get started with embedding images, first, you need to open your document in Adobe Illustrator. Follow these steps:
- Launch Adobe Illustrator: Open the program from your applications folder or desktop.
- Select Your Document: Click on “File” in the menu bar, then choose “Open.” Browse to find your document and select it.
- Check Your Artboard: Ensure your artboard is set up the way you want before embedding any images.
Once your document is open, you’re ready to move on to the next steps in the image embedding process. A well-prepared document helps you focus on creativity and design.
Also Read This: How to Make a YouTube Video on iPad With a Complete Guide for Beginners
Using the Place Command for Embedding
Now that your document is open, it's time to embed your images using the Place command. This feature makes it super easy to bring images into your Illustrator project. Here’s how you can do it:
- Navigate to the File Menu: Click on “File” in the top menu bar.
- Select Place: From the dropdown, choose “Place.” This will open a dialog box where you can locate your image.
- Choose Your Image: Find the image you want to embed and click “Place.” You’ll see a thumbnail preview in the dialog.
- Click to Place: After selecting, click anywhere on your artboard to place the image. You can also click and drag to set the size of the image as you place it.
And just like that, your image is now embedded in your document! Using the Place command is a straightforward method that ensures your image is part of your design file, making it easy to manage.
Also Read This: how to enlarge image to print
Resizing and Adjusting Embedded Images
After embedding your image, you might need to resize or adjust it to fit perfectly within your design. Illustrator provides several tools to help you with this. Here’s how:
- Selection Tool: Use the Selection Tool (V) to click on your image. Small handles will appear around the image.
- Resize by Dragging: Click and drag the corner handles to resize while maintaining the aspect ratio. Hold the Shift key while dragging to keep proportions.
- Using Transform Options: For precise adjustments, go to “Window” then “Transform.” Enter exact dimensions or percentages to resize your image.
- Clipping Masks: If you want to display only part of your image, create a shape over the area you want to show, select both the shape and the image, right-click, and choose “Make Clipping Mask.”
These tools allow you to create a polished look that aligns with your overall design.
Also Read This: How to Make an Image Pulse Over a Video for Eye-catching Effects
Editing Embedded Images in Illustrator
Editing embedded images in Illustrator gives you a lot of flexibility to make changes on the fly. Here are some editing options you can explore:
- Double-Click to Edit: Simply double-click on the embedded image to open it in the editing mode, where you can apply various adjustments.
- Apply Effects: Go to the “Effect” menu to add effects like shadows, glows, or distortions that can enhance your image.
- Color Adjustments: Use the “Edit” menu to adjust brightness, contrast, and color balance, allowing you to fine-tune your image directly in Illustrator.
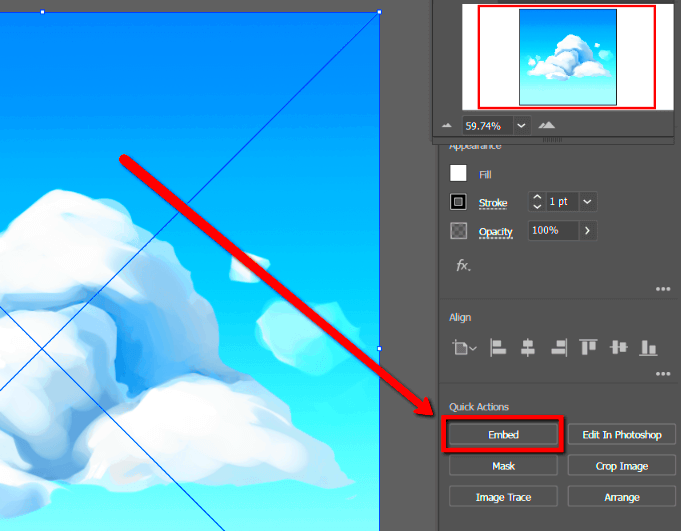
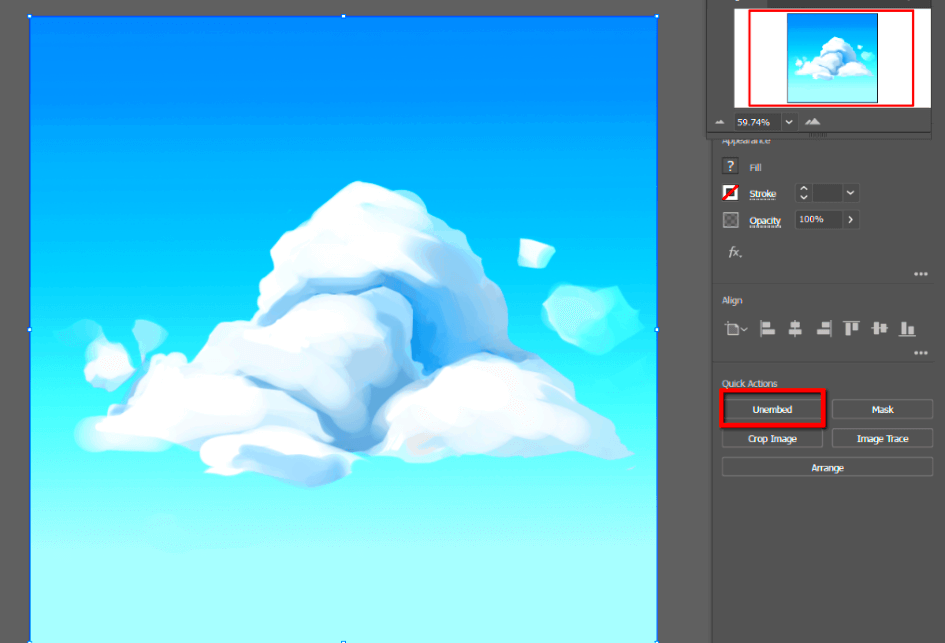
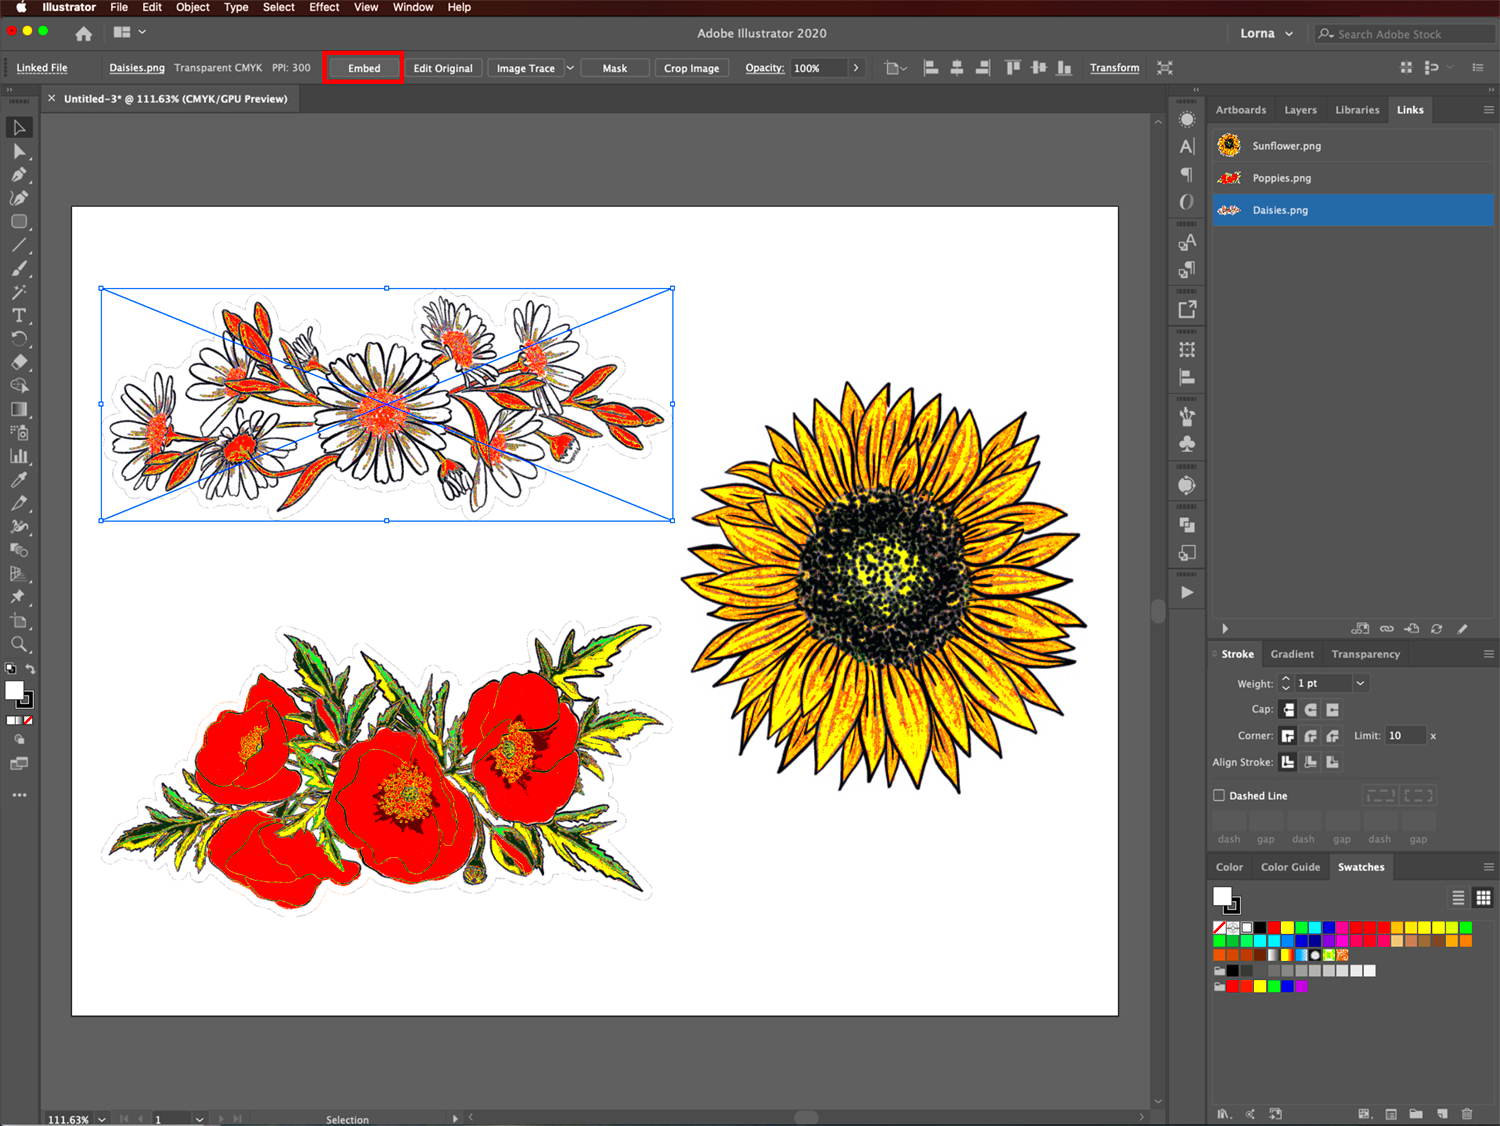
- Link or Embed Options: If you want to change the way your image is stored, right-click on it and select “Embed” or “Link” to switch between these options.
With these editing capabilities, you can ensure that your embedded images not only fit well but also complement your design style. Experimenting with different edits can bring your visuals to life.
Also Read This: Understanding the Importance of Adobe Stock
Saving Your Work with Embedded Images
Once you've embedded and edited your images, it’s time to save your work. Saving is crucial to ensure you don’t lose any of your hard work. Here’s how to do it effectively in Adobe Illustrator:
- Save Regularly: Make it a habit to save your work frequently to avoid losing any changes. You can use the shortcut Ctrl + S (Cmd + S on Mac) to save quickly.
- Choosing the Right Format: When you save your document, you can choose between several formats. The most common is AI (Adobe Illustrator) for preserving layers and editability. If you plan to share your work, consider saving as a PDF or EPS.
- Using the Save As Option: To create a copy of your file or save it in a different format, go to “File,” then select “Save As.” You can rename your file and choose your desired format in the dialog box.
- Backing Up Your Work: It’s also wise to create backups of your files. Save a copy on an external drive or a cloud service to ensure you have access in case of a computer crash.
By following these steps, you’ll keep your embedded images and designs safe and secure, ready for any future edits or sharing.
Also Read This: How to Remove the Open to Work Banner from Your LinkedIn Profile
FAQ
Let’s address some common questions about embedding images in Adobe Illustrator:
- Can I edit an embedded image later? Yes, you can edit an embedded image anytime by double-clicking it or using the editing tools available in Illustrator.
- What happens if I forget to embed my images? If you don’t embed images, they remain linked. If the linked file is moved or deleted, your document will show a missing image error.
- Is there a limit to how many images I can embed? There is no specific limit, but be mindful of file size. Embedding too many large images can slow down Illustrator.
- How do I convert a linked image to an embedded one? Right-click on the linked image and select “Embed” from the context menu. This action will incorporate the image into your document.
These FAQs can help clarify any concerns you may have about working with images in Illustrator.
Conclusion
Embedding images in Adobe Illustrator is a straightforward process that enhances your design workflow. By embedding images, you ensure that your files are portable and self-contained, making sharing and editing easier. Remember to prepare your images, use the Place command effectively, resize and adjust as needed, and edit them directly within Illustrator. Most importantly, save your work regularly and create backups. With these tips, you can confidently create stunning visuals that stand out. Happy designing!
 admin
admin


