Crediting images is more than just a good practice; it’s a crucial aspect of respecting creators’ rights. When you use someone else's image, whether for a blog post, social media, or any other platform, you are benefiting from their hard work. Failing to credit images can lead to legal issues and harm your reputation.
Here are a few reasons why you should always credit images:
- Respect for Creators: Every image represents the effort and creativity of its creator. Crediting acknowledges their contribution.
- Legal Protection: Proper attribution can protect you from copyright infringement claims.
- Building Trust: Providing credits enhances your credibility and shows your audience that you value original content.
- Encouraging Creativity: When you credit creators, you support a culture of sharing and inspiration.
Identifying the Different Types of Image Licenses

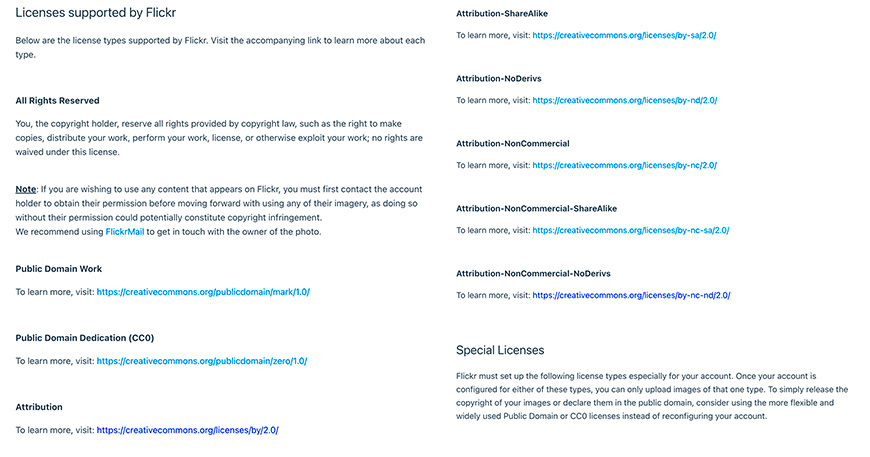
Not all images are created equal, and understanding the different types of image licenses is essential for proper crediting. Here are the main types you will encounter:
| License Type | Description |
|---|---|
| Royalty-Free | Allows you to use the image without paying royalties, but usually requires attribution. |
| Rights Managed | Usage is restricted to specific terms and requires direct permission from the creator. |
| Creative Commons | Images can be used for free under certain conditions, often requiring credit to the creator. |
| Public Domain | No copyright restrictions apply; these images can be used without attribution. |
Also Read This: Tips and Tricks to Survive the YouTube Platform as a Creator
How to Credit Images from Stock Photography Websites
When using images from stock photography websites, proper crediting often comes with specific guidelines. Here’s a straightforward approach to crediting images:
- Read the Licensing Agreement: Always check the terms of use for the specific image you are using. Different stock sites have varying requirements.
- Include the Creator’s Name: For most stock images, you’ll need to mention the photographer or creator's name alongside the image.
- Add the Source: Provide a link back to the stock photography website where you found the image. This is essential for transparency.
- Use Proper Formatting: Use a format like “Image by [Creator's Name] from [Website Name]” to keep it clear and professional.
By following these steps, you ensure that you respect copyright laws while also enhancing your content’s integrity.
Also Read This: Are iStock Photos Royalty Free
Giving Credit to Creative Commons Images
Creative Commons (CC) images are a fantastic resource for anyone looking to use visuals without breaking the bank. These images are shared by their creators with specific usage rights, allowing you to incorporate them into your work. However, it's essential to give proper credit to uphold the terms of these licenses. Let’s explore how to do this effectively.
When using CC images, follow these steps for proper attribution:
- Identify the License: CC images come with various licenses. Check the specific license type to understand what is required for crediting.
- Include the Creator's Name: Always credit the original creator. This could be a photographer, artist, or designer.
- Link Back: If possible, include a link to the original image. This not only helps others find the source but also shows respect for the creator's work.
- State the License: Mention the specific Creative Commons license the image falls under. This provides clarity on how others can use the image.
For example, a proper credit line could look like this: “Image by [Creator's Name] from [Source] under [CC License Type].” Following these guidelines not only complies with legal requirements but also supports a community of creators sharing their work.
Also Read This: How to Add Captions to Videos on Dailymotion
Best Practices for Image Attribution in Blogs
Attributing images correctly in your blog is crucial for maintaining credibility and avoiding legal issues. Here are some best practices to ensure you get it right:
- Be Consistent: Use a consistent format for image credits throughout your blog. This makes it easier for readers to identify sources.
- Position Your Credits Wisely: Place image credits directly below the image or at the end of the post. This makes it clear which credit belongs to which image.
- Utilize Alt Text: Include image credits in the alt text as well. This not only improves accessibility but also ensures that credit is maintained if the image is shared.
- Keep a Record: Maintain a list of all images used and their sources. This can be invaluable if you need to revisit your credits later.
By implementing these practices, you’ll not only protect yourself legally but also build trust with your audience by being transparent about your image sources.
Also Read This: Email Evolution: Changing Your Email on Photobucket
Common Mistakes to Avoid When Crediting Images
While crediting images might seem straightforward, there are several common pitfalls that people often fall into. Avoiding these mistakes can save you from legal troubles and ensure that you respect the original creators. Here are some errors to watch out for:
- Not Crediting at All: Failing to give credit is the biggest mistake you can make. Always provide attribution, even if the image is free to use.
- Improper Format: Using an unclear or inconsistent format for credits can confuse readers. Stick to a simple and clear format.
- Ignoring License Terms: Each image has its licensing terms. Ignoring them can lead to infringement. Always check the requirements.
- Credit Stacking: If using multiple images, avoid cramming all credits into one small section. Provide credits for each image directly below or next to them.
By being aware of these common mistakes, you can ensure that your image crediting is both effective and respectful. Remember, taking the time to credit properly reflects well on you and your content!
Also Read This: How to Do a Hair Cut on Dailymotion with Simple Steps for Perfect Results
Tips for Managing Image Credits Effectively
Managing image credits can sometimes feel overwhelming, especially when you're using multiple visuals across various platforms. However, with a few simple strategies, you can streamline the process and ensure you’re giving proper credit every time. Let’s dive into some practical tips to help you manage image credits more effectively.
Here are some helpful strategies:
- Create a Credit Template: Design a standard template for image credits that you can easily modify. This could include fields for the creator’s name, image source, and license type.
- Organize Your Images: Use folders or digital asset management tools to keep your images organized. This can help you quickly find both the image and its credit details when needed.
- Use a Spreadsheet: Maintain a spreadsheet that lists all images, their sources, and credit information. This not only keeps everything in one place but also allows for quick updates.
- Set Reminders: If you’re working on multiple projects, set reminders to check that all images have been credited before publication.
By following these tips, you can reduce the stress of managing image credits and focus more on creating great content. Remember, effective management leads to better compliance and respect for the creators behind the images you use.
Also Read This: How to Stretch Images on an iPhone for Full-Screen Views
FAQs About Crediting Images Online
Crediting images can raise a lot of questions, especially if you’re new to using visuals in your work. Here are some frequently asked questions to help clarify the process:
- Do I have to credit images that are free to use? Yes, even if an image is free, it's important to give credit to the creator as a sign of respect and compliance with the licensing terms.
- What if I can't find the creator's name? If the creator's name isn't available, make sure to credit the source or platform where you found the image.
- How do I credit images from social media? When using images from social media, credit the creator and include a link to their profile. Always respect the platform's guidelines for sharing.
- Can I modify images I credit? It depends on the license type. Always check the licensing terms to see if modifications are allowed.
These FAQs cover some common concerns, but if you have specific questions, don’t hesitate to research or ask the community for guidance!
Conclusion on Proper Image Credit Practices
Proper image credit practices are vital in today’s digital world. They not only protect you from potential legal issues but also foster a culture of respect and collaboration among creators. Remember, each image you use tells a story and reflects the effort of its creator. By crediting images accurately, you contribute to a community that values original work.
In summary, always:
- Understand the licensing terms of images you use.
- Be consistent in your crediting format.
- Avoid common mistakes that can lead to legal trouble.
- Manage your image credits effectively to streamline the process.
By following these guidelines, you not only enhance your credibility but also help promote a culture of appreciation for creative work. Happy blogging!

 admin
admin


