Flattening an image in Photoshop is a straightforward yet essential process for many graphic designers and photographers. It involves merging all layers in an image into a single background layer. This step is crucial when preparing images for final output, whether for print or digital use. By flattening your images, you simplify the file, reduce its size, and ensure compatibility with various software and platforms.
Before you flatten an image, it's helpful to understand a few key concepts:
- Layers: Layers are like transparent sheets stacked on top of each other, each containing different elements of your design.
- Editing: Keeping layers allows for easy editing, but sometimes you need a flat image for final use.
- Quality: Flattening can affect image quality, so it’s essential to finalize all edits beforehand.
Exploring the Benefits of Flattening Images

Flattening images comes with several advantages that can make your workflow more efficient. Here are some key benefits:
- Reduced File Size: A flattened image typically takes up less storage space, making it easier to save and share.
- Enhanced Compatibility: Some platforms or software may not support layered files. Flattening ensures that your image displays correctly across different mediums.
- Improved Performance: Working with fewer layers can speed up Photoshop’s performance, especially with complex projects.
- Simple Finalization: Flattening is often the last step before exporting an image, making it clear that your design is complete.
Also Read This: Can You Reupload a YouTube Video? Rules and Best Practices
Steps to Flatten an Image in Photoshop

Flattening an image in Photoshop is a quick process. Follow these simple steps to get it done:
- Open Your Image: Start by opening the image you want to flatten in Photoshop.
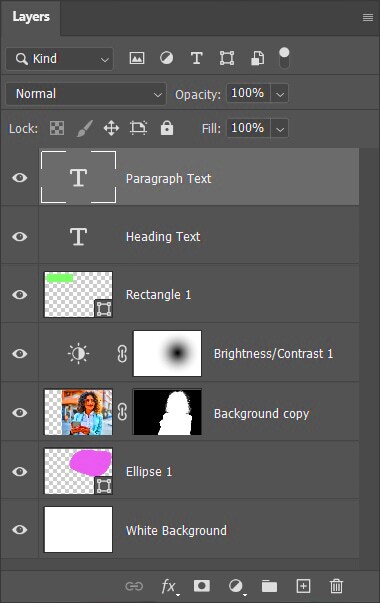
- Check Your Layers: Go to the Layers panel to review all layers. Ensure that all edits are finalized.
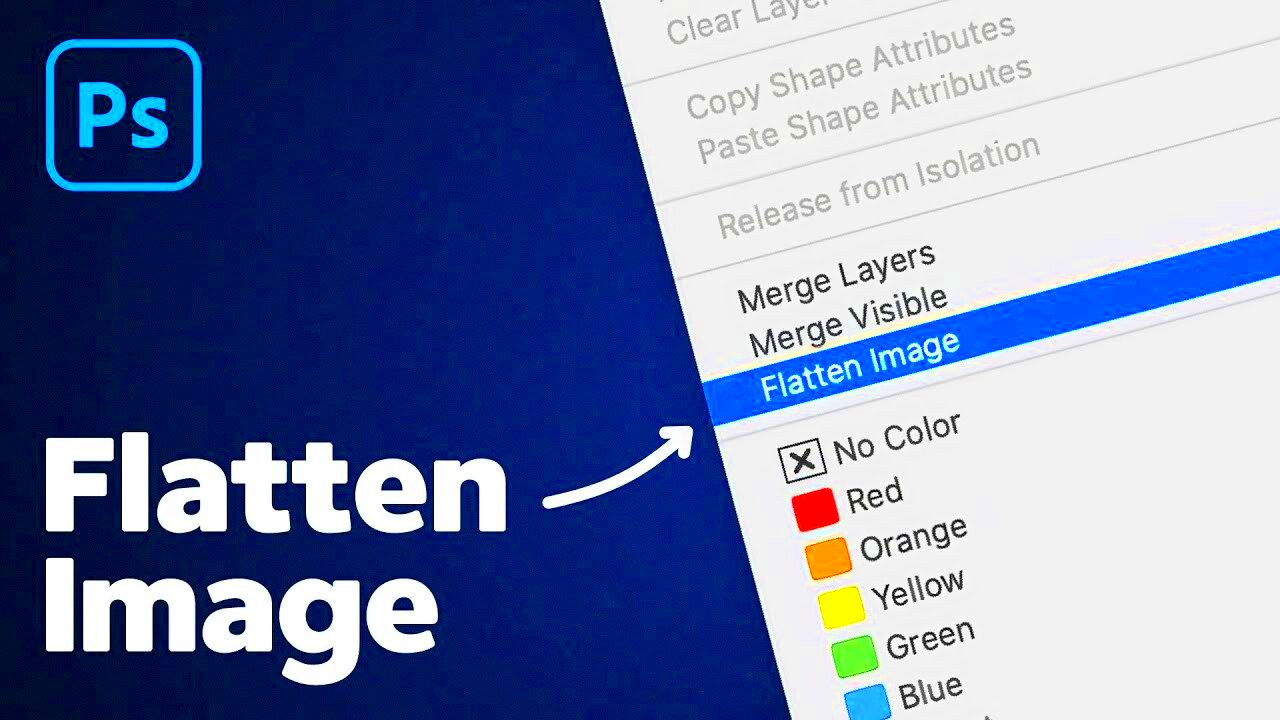
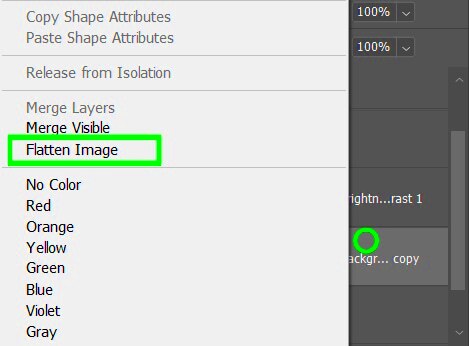
- Select the Flatten Image Option: Click on Layer in the top menu, then select Flatten Image from the dropdown menu.
- Save Your Image: After flattening, save your image using File > Save As. Choose the appropriate file format (like JPEG or PNG) for your needs.
And that's it! Your image is now flattened and ready for use. Remember to keep a copy of the original layered file if you need to make future adjustments.
Also Read This: Printing Large Sublimation Images Using Cricut
Using Keyboard Shortcuts for Faster Flattening

In a busy design environment, every second counts. Using keyboard shortcuts in Photoshop can significantly speed up your workflow, especially when it comes to flattening images. Instead of navigating through menus, a simple key combination can save you time and keep your creative flow intact. Let’s explore the most efficient shortcuts for flattening images in Photoshop.
The primary keyboard shortcut for flattening an image is:
- Ctrl + Shift + E (Windows) or Command + Shift + E (Mac): This command flattens all layers into a single layer while retaining the visibility of the current layer.
Additionally, here are a few tips to keep in mind when using shortcuts:
- Customize Shortcuts: Photoshop allows you to customize your keyboard shortcuts. If the default ones don’t work for you, feel free to change them in the Edit > Keyboard Shortcuts menu.
- Practice Makes Perfect: The more you use shortcuts, the more intuitive they become. Try to incorporate them into your daily routine.
- Combine with Other Shortcuts: Pair the flattening shortcut with other useful shortcuts, like Ctrl + S to save your work immediately after flattening.
Also Read This: Can You Post YouTube Videos on Instagram and What to Keep in Mind
Common Issues When Flattening Images
While flattening images is generally a straightforward task, there are a few common issues that can arise during the process. Being aware of these can help you troubleshoot and avoid potential pitfalls.
Here are some frequent problems you might encounter:
- Loss of Layer Effects: Flattening can sometimes cause the disappearance of layer styles or effects. Always double-check the flattened image to ensure everything looks right.
- Image Quality Degradation: Depending on the file format you choose, you might experience a loss in quality after flattening. Using formats like PNG can help retain quality.
- Unintended Changes: If you haven’t saved your work before flattening, you might lose any last-minute edits. Always save a copy of the layered file.
- Color Changes: Some users report changes in color when flattening. Ensure your color settings are consistent before and after flattening.
Also Read This: Creating Curved Images in Canva
Tips for Maintaining Quality After Flattening
After flattening an image, you want to ensure that it retains the best possible quality. Here are some handy tips to help you maintain quality in your final output:
- Save in the Right Format: Choose formats like TIFF or PNG for higher quality. JPEG is great for smaller file sizes but can lead to compression artifacts.
- Check Resolution: Before flattening, check the resolution of your image. A higher DPI (dots per inch) will ensure better quality, especially for print.
- Use Adjustment Layers: Instead of applying direct adjustments, use adjustment layers. This way, you can maintain original image quality until you’re ready to flatten.
- Perform a Final Review: After flattening, zoom in and inspect the image closely for any quality issues. It’s better to catch problems now than to find them later.
By following these tips, you can enjoy the benefits of flattening while keeping your images looking sharp and professional.
Also Read This: How to Add a Link to an Image in Word for Convenient Navigation
How Flattening Affects Image Layers
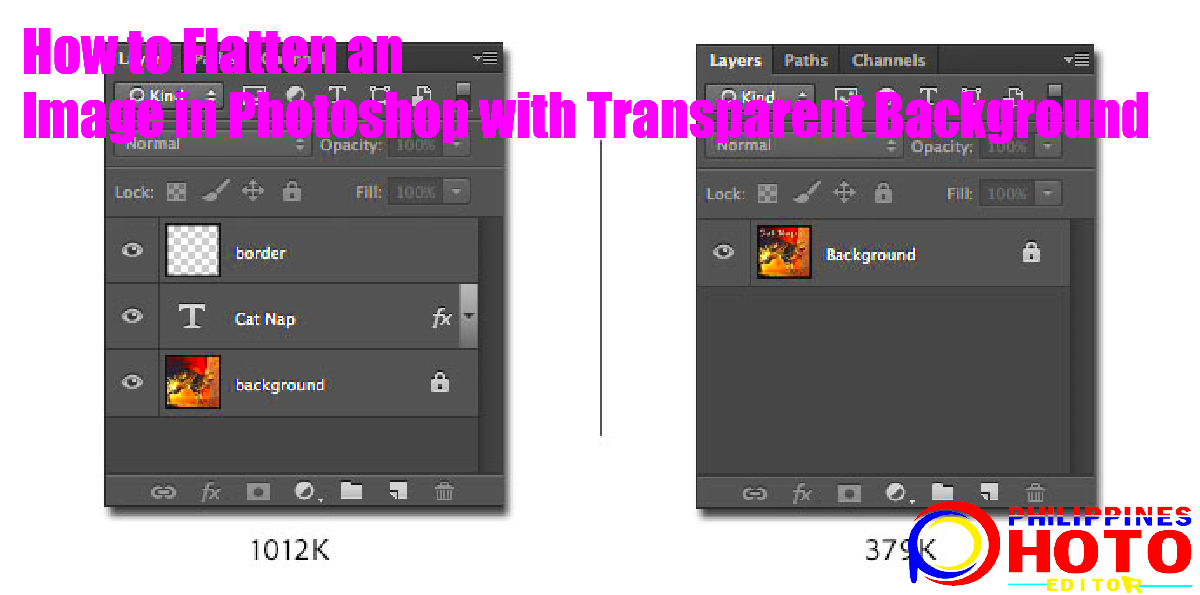
Flattening an image in Photoshop is a crucial step that impacts your layers significantly. When you flatten an image, all visible layers merge into a single background layer. This means that any individual adjustments made to separate layers will be combined, which can affect the overall look of your image. Understanding how this process works can help you make informed decisions when editing.
Here’s what happens to your image layers when you flatten:
- Merging Layers: All visible layers come together into one. This includes adjustments, effects, and any visible elements.
- Loss of Editability: Once layers are flattened, you can no longer edit individual elements. If you need to change something, you’ll have to revert to your original layered file.
- Layer Effects are Combined: Layer styles, blending modes, and adjustments are merged, which can sometimes change how colors and effects appear.
- File Size Reduction: The overall file size decreases since you’re no longer saving multiple layers, making it easier to share and store.
So, while flattening simplifies your workflow, it’s essential to ensure that you’ve finalized all your edits before proceeding. Always keep a backup of the original layered file for any future adjustments.
Also Read This: Capturing the Iconic Gandhi Statues Across the USA in Photos
Frequently Asked Questions
When it comes to flattening images in Photoshop, many users have questions about the process and its implications. Let’s address some of the most common queries:
- What is the difference between flattening and merging layers?
Flattening combines all layers into one, while merging layers allows you to combine selected layers while leaving others intact. - Can I undo flattening?
No, once you flatten and save your image, you cannot revert back to the original layers unless you have saved the layered file separately. - Is it better to flatten images for printing?
Yes, flattening is often recommended before printing to ensure that all elements display correctly on the final print. - How can I maintain quality after flattening?
Use high-resolution settings and save your file in formats like TIFF or PNG to maintain image quality.
Conclusion on Flattening Images in Photoshop
Flattening images in Photoshop is a valuable process that simplifies your work while ensuring your designs are ready for final output. By merging all layers into one, you enhance compatibility and reduce file size, making it easier to share your work. However, it’s crucial to approach this step with care, as it means sacrificing the editability of your layers.
Remember to always check your work, save your layered file separately, and ensure all adjustments are complete before flattening. With the right practices in place, you can confidently use flattening as a powerful tool in your Photoshop workflow. So go ahead, embrace the process, and enjoy the benefits it brings to your creative projects!

 admin
admin


