Have you ever tried to add an image to your Google Doc and found that it just didn’t fit the way you wanted? Rotating images can help you showcase your visuals better, making your document look more polished and professional. In this guide, we’ll walk you through the steps to easily rotate images in Google Docs. Whether you’re working on a presentation, a report, or just a personal project, mastering this simple skill can enhance your document’s appeal.
Understanding Image Rotation Features
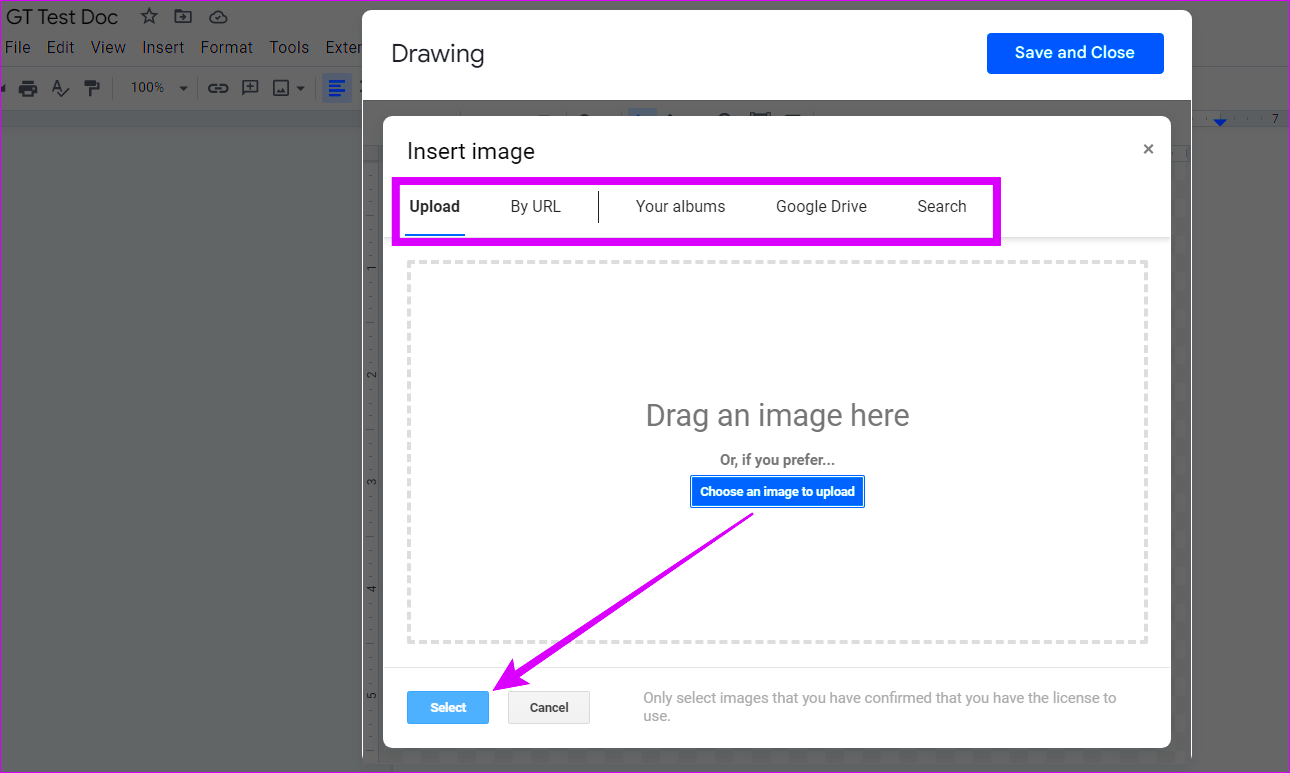
Google Docs provides several features that make rotating images straightforward. Here are some key points to keep in mind:
- Rotation Options: You can rotate images by specific angles or freely drag them to your desired orientation.
- Toolbar Functions: The toolbar offers easy-to-access rotation tools for quick adjustments.
- Image Anchoring: Images can be anchored in different ways, affecting how they rotate with text or other elements.
- Aspect Ratio: Maintaining the aspect ratio is essential when resizing and rotating to avoid distortion.
Understanding these features will help you utilize Google Docs more effectively when incorporating images into your projects.
Also Read This: How to Create an Outline for an Image in Canva
Steps to Rotate Images in Google Docs
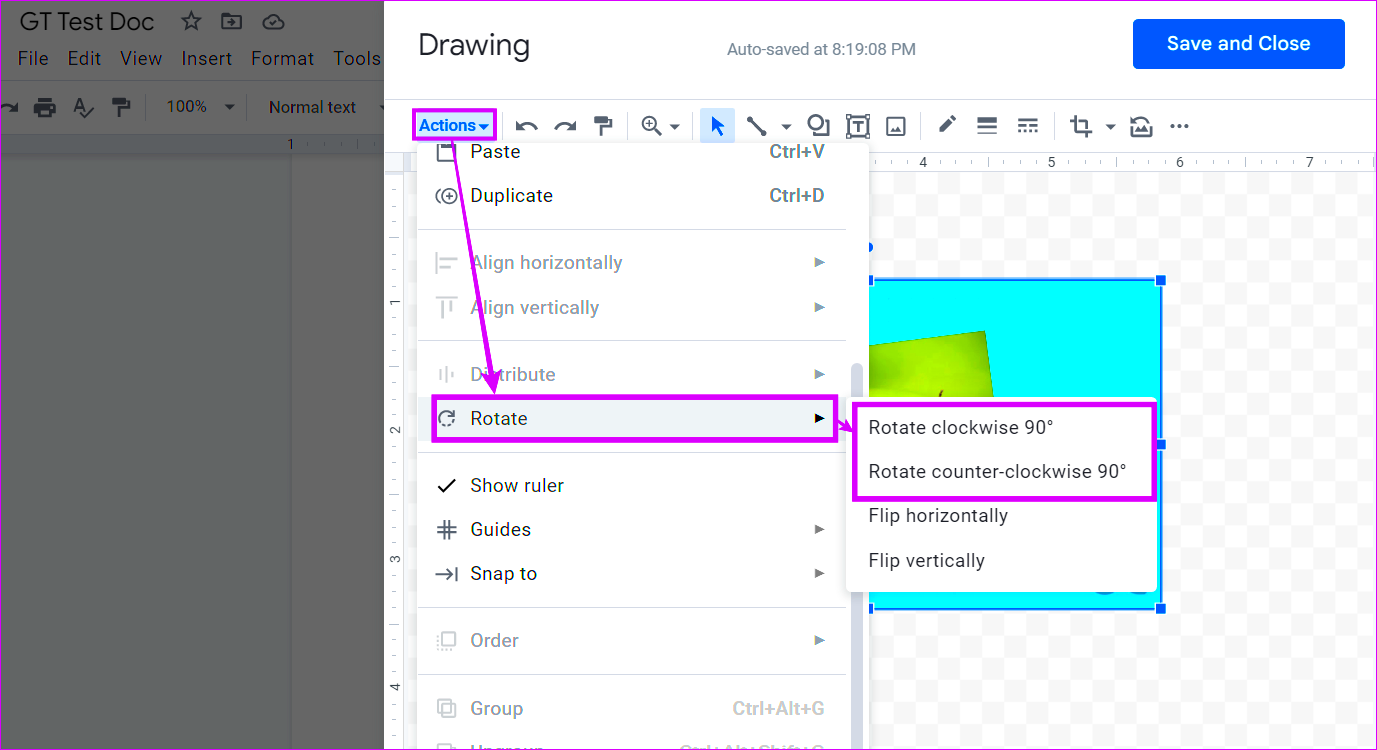
Rotating an image in Google Docs is a simple process. Here’s how you can do it:
- Insert the Image: Click on “Insert” in the menu, then select “Image.” You can upload from your computer, use a URL, or choose from Google Drive.
- Select the Image: Once the image is inserted, click on it to select it. You’ll see a blue border around the image.
- Rotate the Image: To rotate, move your cursor to the circular handle at the top of the image. Click and drag to rotate freely or use the following steps for precise rotation:
- Using the Toolbar: Click on “Format” in the menu, then hover over “Image rotation.” You’ll see options to rotate clockwise, counterclockwise, or by a specific angle.
- Keyboard Shortcuts: For quick rotation, you can also use keyboard shortcuts. For example, press “Alt + Shift + Left Arrow” for counterclockwise and “Alt + Shift + Right Arrow” for clockwise rotation.
By following these steps, you can easily rotate images to fit your needs in Google Docs!
Also Read This: Ultimate Guide to Downloading YouTube Subtitles
Adjusting Image Rotation Angles
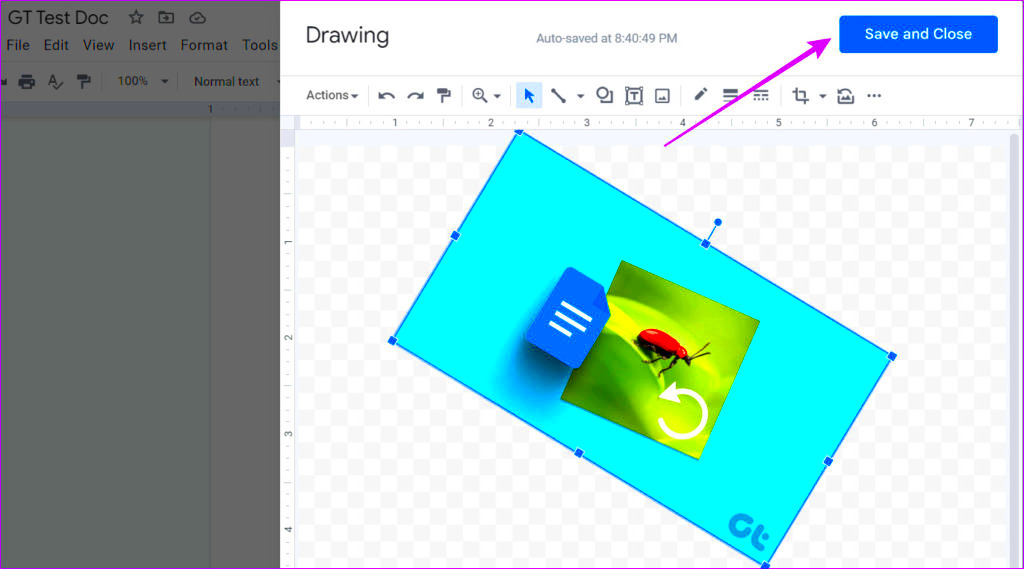
Once you’ve learned how to rotate images in Google Docs, the next step is to adjust the rotation angles precisely. This can be particularly useful when you want to achieve a specific look or align images with text. Here’s how you can do it:
- Manual Adjustment: After selecting your image, click and drag the circular handle at the top of the image. This allows you to rotate it freely. Pay attention to the angle as you rotate; you’ll notice a slight change in the image’s orientation.
- Using the Format Menu: If you want a precise angle, click on the image and then go to the menu. Select “Format” > “Image rotation.” You can choose options like “Rotate clockwise 90 degrees,” “Rotate counterclockwise 90 degrees,” or enter a custom angle. Here’s a quick look:
- 0°: Original Position
- 90°: Vertical Orientation
- 180°: Upside Down
- 270°: Inverted Vertical Orientation
Adjusting the rotation angles of images gives you the creative control you need to make your documents visually appealing.
Also Read This: Should You Premiere or Publish Your YouTube Video? Exploring the Advantages and Disadvantages
Using the Toolbar for Image Rotation
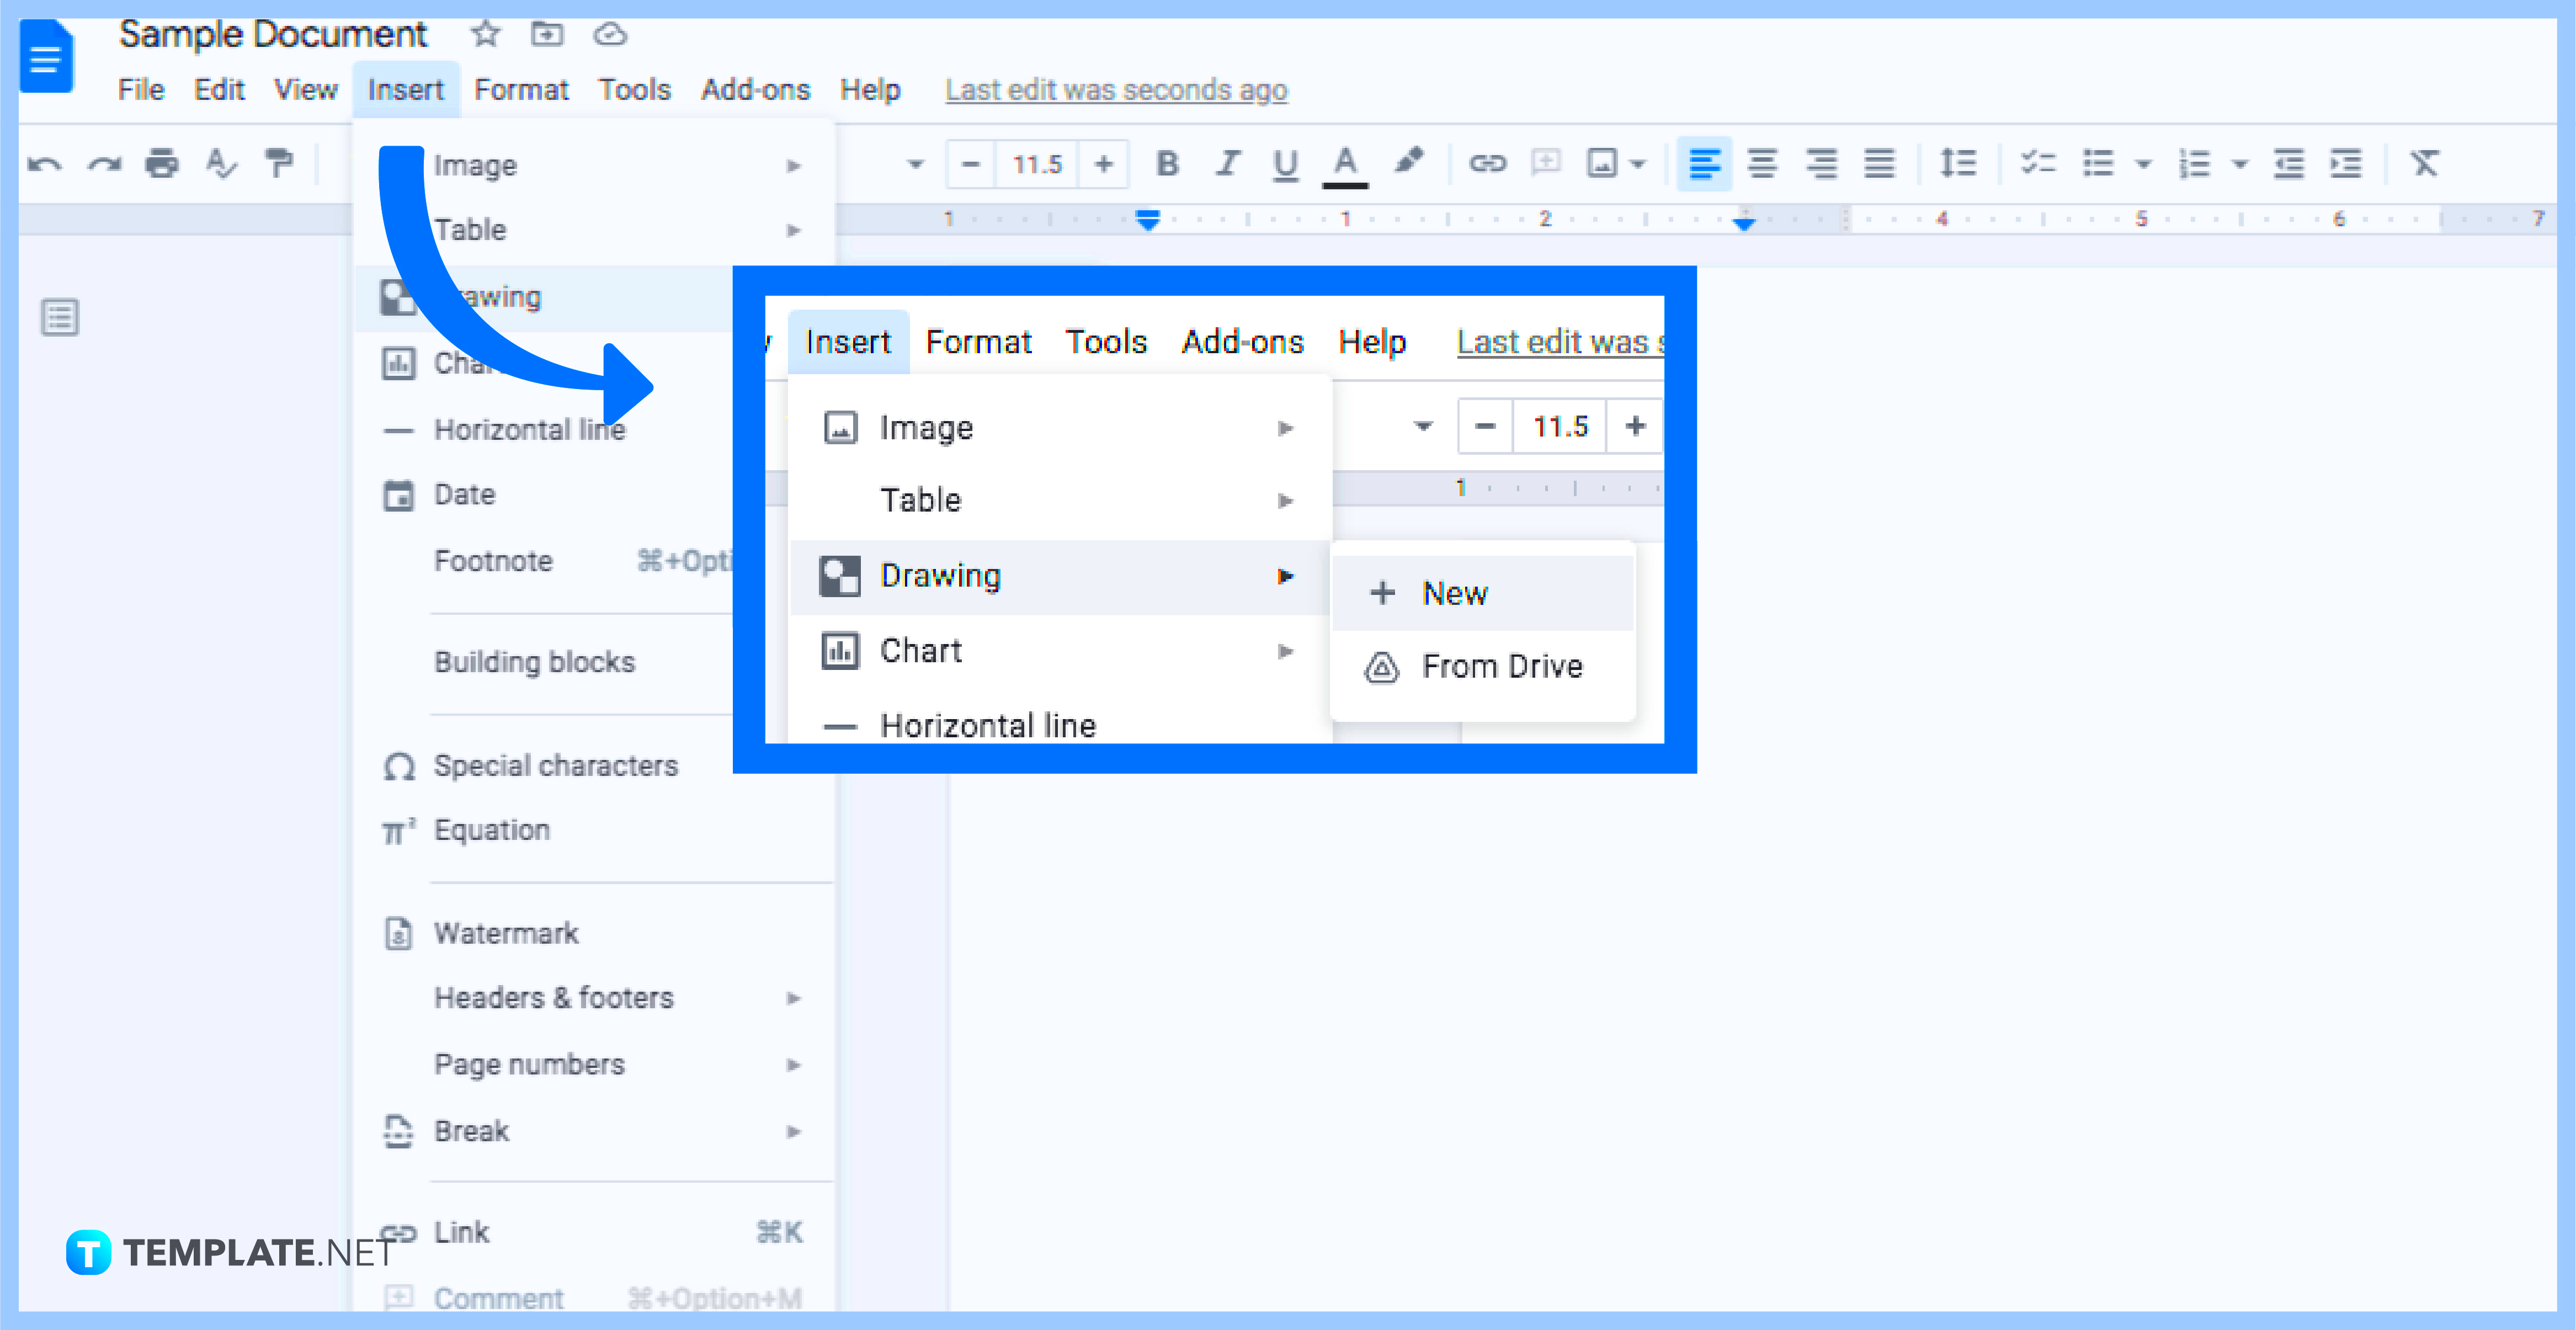
The toolbar in Google Docs is a powerful ally when it comes to image editing, including rotation. It provides quick access to various image tools, making your editing process smooth and efficient. Let’s explore how to use it for rotating images:
- Select Your Image: First, click on the image you want to rotate. You should see a blue border around it, indicating that it’s selected.
- Access the Toolbar: Look for the toolbar at the top of your Google Docs window. You’ll find options for formatting, including image adjustments.
- Find Image Rotation Options: Click on the “Format” menu. Hover over “Image rotation.” You’ll see a dropdown menu with options like:
- Rotate clockwise 90 degrees
- Rotate counterclockwise 90 degrees
- Flip horizontally
- Flip vertically
Using the toolbar for image rotation not only saves time but also keeps your workflow seamless, allowing you to focus on creating great content!
Also Read This: Playlist Puzzle: Moving Songs Around in Your Spotify Playlist – Organize with Ease
Keyboard Shortcuts for Quick Rotation
If you're looking to speed up your image editing process in Google Docs, keyboard shortcuts can be your best friend. They provide quick access to rotation options without needing to navigate through menus. Here’s how to use them effectively:
- Activate the Image: First, click on the image you wish to rotate to ensure it’s selected.
- Using Shortcuts: Here are some handy shortcuts you can use:
- Rotate Clockwise: Press Alt + Shift + Right Arrow
- Rotate Counterclockwise: Press Alt + Shift + Left Arrow
Using keyboard shortcuts for image rotation in Google Docs can significantly enhance your productivity, making the editing process faster and more intuitive!
Also Read This: Is YouTubing a Viable Career Choice for the Future
Troubleshooting Common Issues
Sometimes, you might encounter issues while rotating images in Google Docs. Don’t worry; these problems are usually easy to fix! Here’s a list of common issues and how to resolve them:
- Image Not Rotating: If your image isn’t rotating, make sure it’s selected. Click on the image to see the blue border. If the border isn’t visible, it’s not selected.
- Image Disappears: Occasionally, an image might seem to disappear after rotation. This could be due to its position. Check if it’s behind other elements or off the visible area. Use the “Arrange” menu to bring it to the front.
- Aspect Ratio Distortion: If your image looks stretched or squished after rotation, you might be resizing it incorrectly. Remember to hold down the Shift key while resizing to maintain the aspect ratio.
- Rotation Handles Missing: Sometimes, you may not see the rotation handle on the image. This can happen if the image is locked in place. Right-click on the image and select “Unlock” or check the image options to enable rotation.
By keeping these common issues and solutions in mind, you can troubleshoot problems quickly and continue working on your documents without frustration!
Also Read This: Mastering Viral Success on Rumble to Amplify Your Video Reach
FAQ about Rotating Images in Google Docs
Got questions about rotating images in Google Docs? You’re not alone! Here are some frequently asked questions and their answers:
- Can I rotate multiple images at once?
- Unfortunately, Google Docs doesn’t allow you to rotate multiple images simultaneously. You’ll need to rotate each image individually.
- What formats of images can I rotate?
- You can rotate most image formats, including JPEG, PNG, and GIF. Just make sure the image is uploaded correctly.
- Is there a limit to how much I can rotate an image?
- No, you can rotate an image 360 degrees or more. However, excessive rotation may result in pixelation or distortion, so it’s good to keep that in mind.
- Can I rotate images in a Google Slides presentation the same way?
- Yes! The process is similar in Google Slides, so you can apply the same techniques to rotate images there.
Hopefully, these FAQs help clarify any confusion you may have had about rotating images in Google Docs!
Conclusion on Mastering Image Rotation
Mastering image rotation in Google Docs is a valuable skill that can significantly enhance your document’s visual appeal. By understanding the various rotation features, utilizing the toolbar, and employing keyboard shortcuts, you can easily adjust images to fit your creative vision. Remember to troubleshoot common issues and refer to the FAQ section whenever you encounter problems. With practice, rotating images will become second nature, allowing you to focus on the content of your document rather than the technical details. Happy editing!
 admin
admin


