The size of an image is really crucial for how perceive it, as you know. Some people will have a picture that has larger dimensions while others may have pictures with smaller dimensions but they are clearer than those with larger sizes. Does it mean if something has more weight it is better? With this assumption, we can allow ourselves some liberty while dealing with this issue in a more scientific manner than ever before. Balancing between these two elements helps us manage our images well.
Here are several essential things to bear in mind:
- Dimensions: This refers to the width and height of the image, usually measured in pixels.
- File Size: This is the amount of data in the image file, often measured in kilobytes (KB) or megabytes (MB).
- Resolution: Higher resolution means more detail, but also a larger file size.
Unquestionably, having knowledge on size and quality management aids in improving an audience’s content without necessarily compromising on its performance.
Reasons for Reducing Image Size

Several reasons necessitate in minimalizing the images. It improves not just web page presentation but also increases customer satisfaction. To help you in understanding why you have to minimize the size of your images, here are some key points:
- Faster Loading Times: Smaller images load quicker, making your website more responsive.
- Better User Experience: Users appreciate faster websites, leading to longer visits and lower bounce rates.
- Optimized Storage Space: Reducing image sizes frees up valuable storage on your devices and servers.
- Improved SEO: Search engines favor websites that load quickly, potentially improving your rankings.
Concentrating on shrinking the size of images helps in crafting an outstanding and pleasurable experience for the visitors.
Also Read This: how much can you make using adobe stock as contributor
Choosing the Right File Format

Depending on the file format you choose for your images, it can greatly influence their size and quality. It is imperative that there is a suitable choice made since all formats have their weaknesses and strengths. Here are some popular image formats:
| File Format | Best For | Quality | Compression |
|---|---|---|---|
| JPEG | Photographs and images with many colors | Good | Lossy |
| PNG | Images requiring transparency | Excellent | Lossless |
| GIF | Simple animations | Limited | Lossless |
| BMP | High-quality images | Excellent | None |
Selecting the perfect format really rests on what you actually require. The best part is that JPEG and PNG are more common for online apps because they balance fine quality and also smaller sizes of the file. Thus, whenever you want to choose a format, consider how you intend to use your images.
Also Read This: How to Upload Your Creative Work on Behance
Using Online Tools for Compression

Image compression process is shortened for all online tools helping beginners or professionals alike to perform it without much hassle. With these types of utilities which are available free of charge, one can shrink their pictures easily without any need to download a complex program. In addition, it saves time and effort when dealing with several photos at once. Only several clicks are needed for most of these tools to optimize your images.
Some well-known online instruments are listed below for your trial:
- TinyPNG: This tool uses smart lossy compression techniques to reduce the file size of your PNG and JPEG images while preserving quality.
- Compressor.io: A robust tool that supports JPEG, PNG, GIF, and SVG formats, offering both lossy and lossless compression options.
- ImageResize.org: Not only compresses images but also allows you to resize them easily.
- Kraken.io: A powerful image optimizer that provides both web interface and API options, perfect for developers.
Using these instruments is a piece of cake. In most cases, you only need to upload your photo, choose the compression settings and then download the processed image. It significantly contributes to the speed of your website without compromising its quality.
Also Read This: How to Insert Images in Krita for Digital Art
Applying Software Solutions for Image Reduction

Software solutions offer an opportunity to control the image compression more. Many software programs include sophisticated features that enable you to adjust the quality and size of your images just right. Online tools might be easier, but dedicated applications can process bigger groups and give more ways for modifying images.
Some widely used software options are:
- Adobe Photoshop: With its “Save for Web” feature, Photoshop allows you to adjust quality settings and see the impact on file size in real-time.
- GIMP: This free, open-source software provides various tools for image manipulation, including resizing and exporting in different formats.
- ImageOptim: Available for macOS, this app compresses images without sacrificing quality by removing unnecessary metadata.
- Paint.NET: A simple yet powerful image editing tool that allows for easy resizing and format conversion.
Through the utilization of these applications, it is possible to improve your work flow significantly, especially when you are working constantly with images for your website or projects.
Also Read This: Best Practices for Incorporating Editorial Photos into Modern Newsrooms
Adjusting Image Dimensions and Resolution
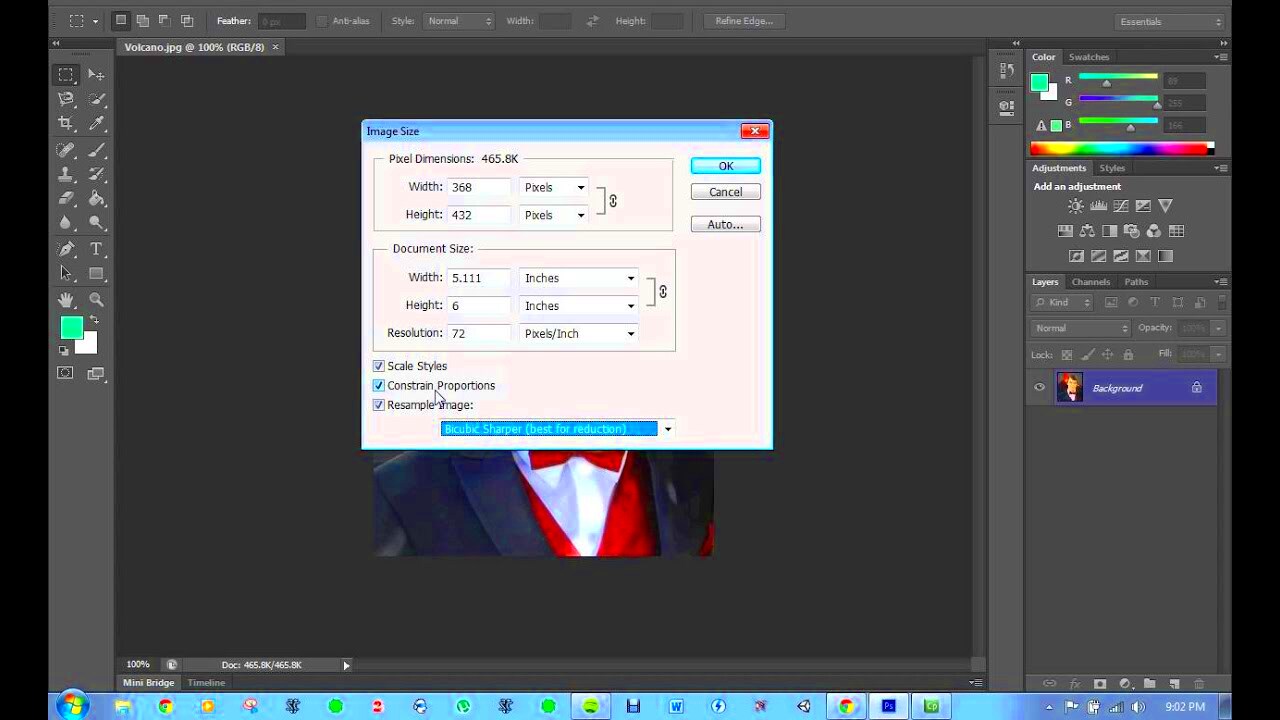
One the ways of reducing image size effectively involves changing its dimensions and resolution. This entails modifying the physical size of an image (that is, width and height) as well as its pixel density. Such actions will help in decreasing file size and increasing loading speed for your images on websites.
These are some things you should think about when changing sizes and resolutions:
- Choose the Right Dimensions: For web use, dimensions like 800x600 pixels or smaller often work well. Aim for the size that fits your design while still maintaining clarity.
- Set Appropriate Resolution: For web images, a resolution of 72 DPI (dots per inch) is sufficient. Higher resolutions are better suited for print.
- Maintain Aspect Ratio: When resizing, make sure to keep the original aspect ratio to avoid distortion. Most image editing tools have an option to lock this ratio.
- Preview Changes: Always preview your changes before finalizing to ensure the image quality meets your expectations.
Expose yourself by taking these steps, so that you can easily control your image size but still make them look admirable!
Also Read This: Stunning Graphics for Wedding Planners with VectorStock
Exploring Lossless Compression Techniques
When it comes to reducing image size, lossless compression is a fantastic option that allows you to decrease file size without losing any quality. This technique works by removing unnecessary data while keeping the original image intact. It's particularly useful when you want to maintain the highest visual standards, such as in professional photography or graphic design.
Below, we have compiled a list of common lossless compression methods:
- PNG Compression: PNG files are often used for images with transparency. Lossless compression reduces the file size without sacrificing quality.
- TIFF Compression: TIFF files can be compressed without loss of quality, making them ideal for print media and archiving.
- WebP Format: Google’s WebP format offers both lossy and lossless compression. It provides high-quality images at smaller file sizes.
- JPEG 2000: An advanced format that allows lossless compression, making it suitable for high-quality images.
Lossless compression is made simple by means of tools such as ImageOptim or OptiPNG. Just upload the images, select lossless option and let the tool do it for you. That way, file sizes get smaller but quality remains intact.
Also Read This: How to Remove Shutterstock Watermark from Video: A Comprehensive Guide
Maintaining Quality After Compression
Quality is an important aspect in downsizing an image, and that’s where most of the problems come in. Luckily, there are a number of ways in which you can maintain high-quality images even if they are compressed. Hence knowing these techniques save you from having a poor visual representation while attaining good results at the same time.
In this case, here are some useful tricks:
- Test Different Compression Levels: Experiment with different levels of compression to find the perfect balance between size and quality.
- Use High-Quality Source Images: Always start with the highest quality image possible. The better the source, the more flexibility you have when compressing.
- Check Image Formats: Some formats, like PNG and WebP, are better at preserving quality during compression than others.
- Preview Before Saving: Always preview your images after compression to ensure that quality is up to par.
These tips will help you compress your images without compromising on their quality.
Also Read This: how to download image with transparent background
FAQ About Reducing Image Size
You may have a few questions if you are new to image compression. Some questions and answers are frequently asked to make sure that you understand how it works and why we compress images.
- What is image compression? Image compression is the process of reducing the file size of an image while maintaining its quality.
- What are the benefits of reducing image size? Smaller images load faster, consume less storage, and improve overall website performance.
- Can I reduce image size without losing quality? Yes, using lossless compression techniques allows you to maintain quality while reducing file size.
- What tools can I use for image compression? There are many online tools, such as TinyPNG and Compressor.io, as well as software solutions like Adobe Photoshop and GIMP.
- How do I choose the right file format for my images? Consider the intended use: JPEG for photos, PNG for images with transparency, and GIF for simple animations.
Via understanding these concepts image compression will be much easier for you!
Conclusion on Image Size Reduction
In the current digital environment, minimizing the size of photos without compromising on excellence is imperative. Not only does it enhance the performance of websites but also improves user interactions thereby making your content more reachable and captivating. By knowing various methods that are available in the form of tools with respect to guidelines for photo compression, one can control file dimensions while at the same time keeping clarity as well as details pertaining to pictures. Online apps, software programs or lossless compression methods could be opted from and what should be aimed at is achieving equilibrium that fits you. To get optimal outcomes, remember to try different formats, sizes and compression rates. Every time you practice hard enough you will learn how to fine-tune your pictures effortlessly so they appear beautiful and load fast on any online platform.

 admin
admin


