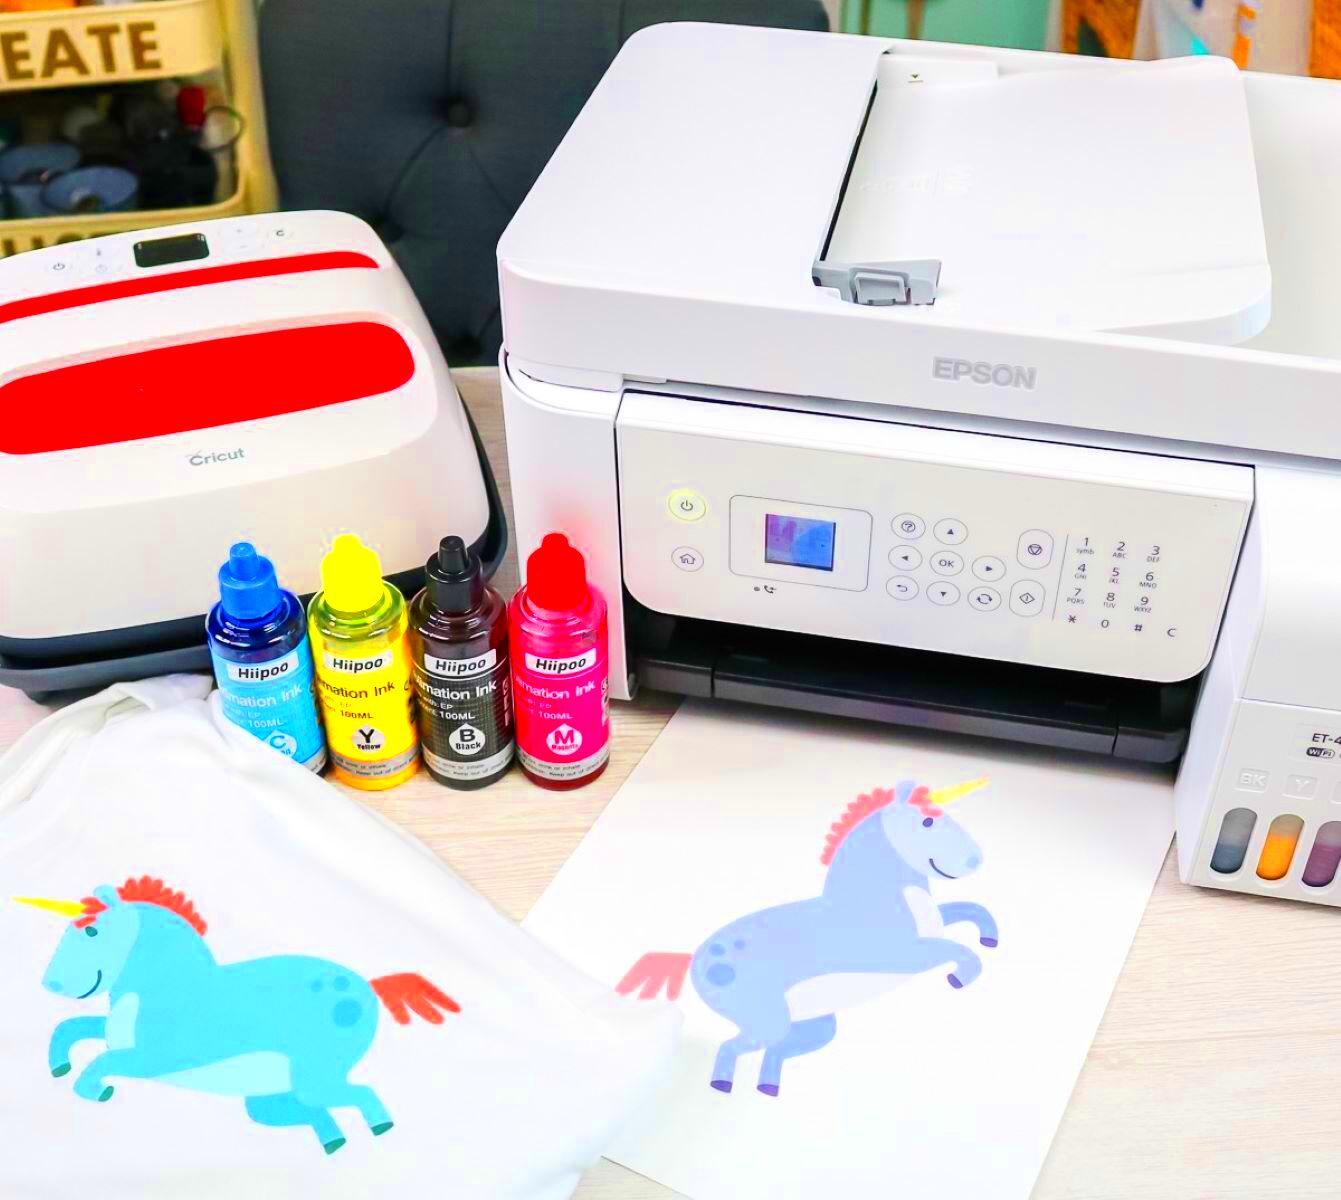
Image mirroring is a useful feature when you want to print images in reverse, which is especially handy for projects like transfers onto fabric or making decals. Epson printers have this capability, allowing users to produce mirrored images effortlessly. In this section, we will explore why mirroring is important, how it works, and what you need to keep in mind when using this feature.Mirrored images are essential for:
- Heat Transfer Projects: When transferring images onto t-shirts or other materials, you need the design to be printed in reverse so it appears correctly when applied.
- Decals and Stickers: For designs that will be applied to glass or transparent surfaces, mirroring ensures that the image shows correctly when viewed from the outside.
- Artistic Effects: Sometimes, you may want a unique look by presenting an image in a mirrored format, creating an artistic flair.
Preparing Your Epson Printer for Image Mirroring

Before diving into image mirroring, it's essential to ensure your Epson printer is ready for the task. Preparation steps include checking the printer's settings, ensuring you have the right media, and making sure your printer is in good working condition.Here’s a checklist to help you prepare:
- Update Printer Drivers: Make sure your printer drivers are up to date. You can do this by visiting the Epson website and downloading the latest software.
- Check Ink Levels: Low ink can affect print quality. Ensure your ink cartridges are full or replace them if needed.
- Use Compatible Paper: Select the right type of paper for your project, whether it’s transfer paper, glossy photo paper, or standard printer paper.
Following these steps will help ensure a smooth mirroring process without any hiccups.
Accessing the Print Settings on Your Device

Once your printer is prepared, the next step is to access the print settings on your device. This process may vary slightly depending on whether you're using a Windows or Mac operating system. However, the general steps remain the same.Here's how to access the print settings:
- For Windows:
- Open the image you want to print.
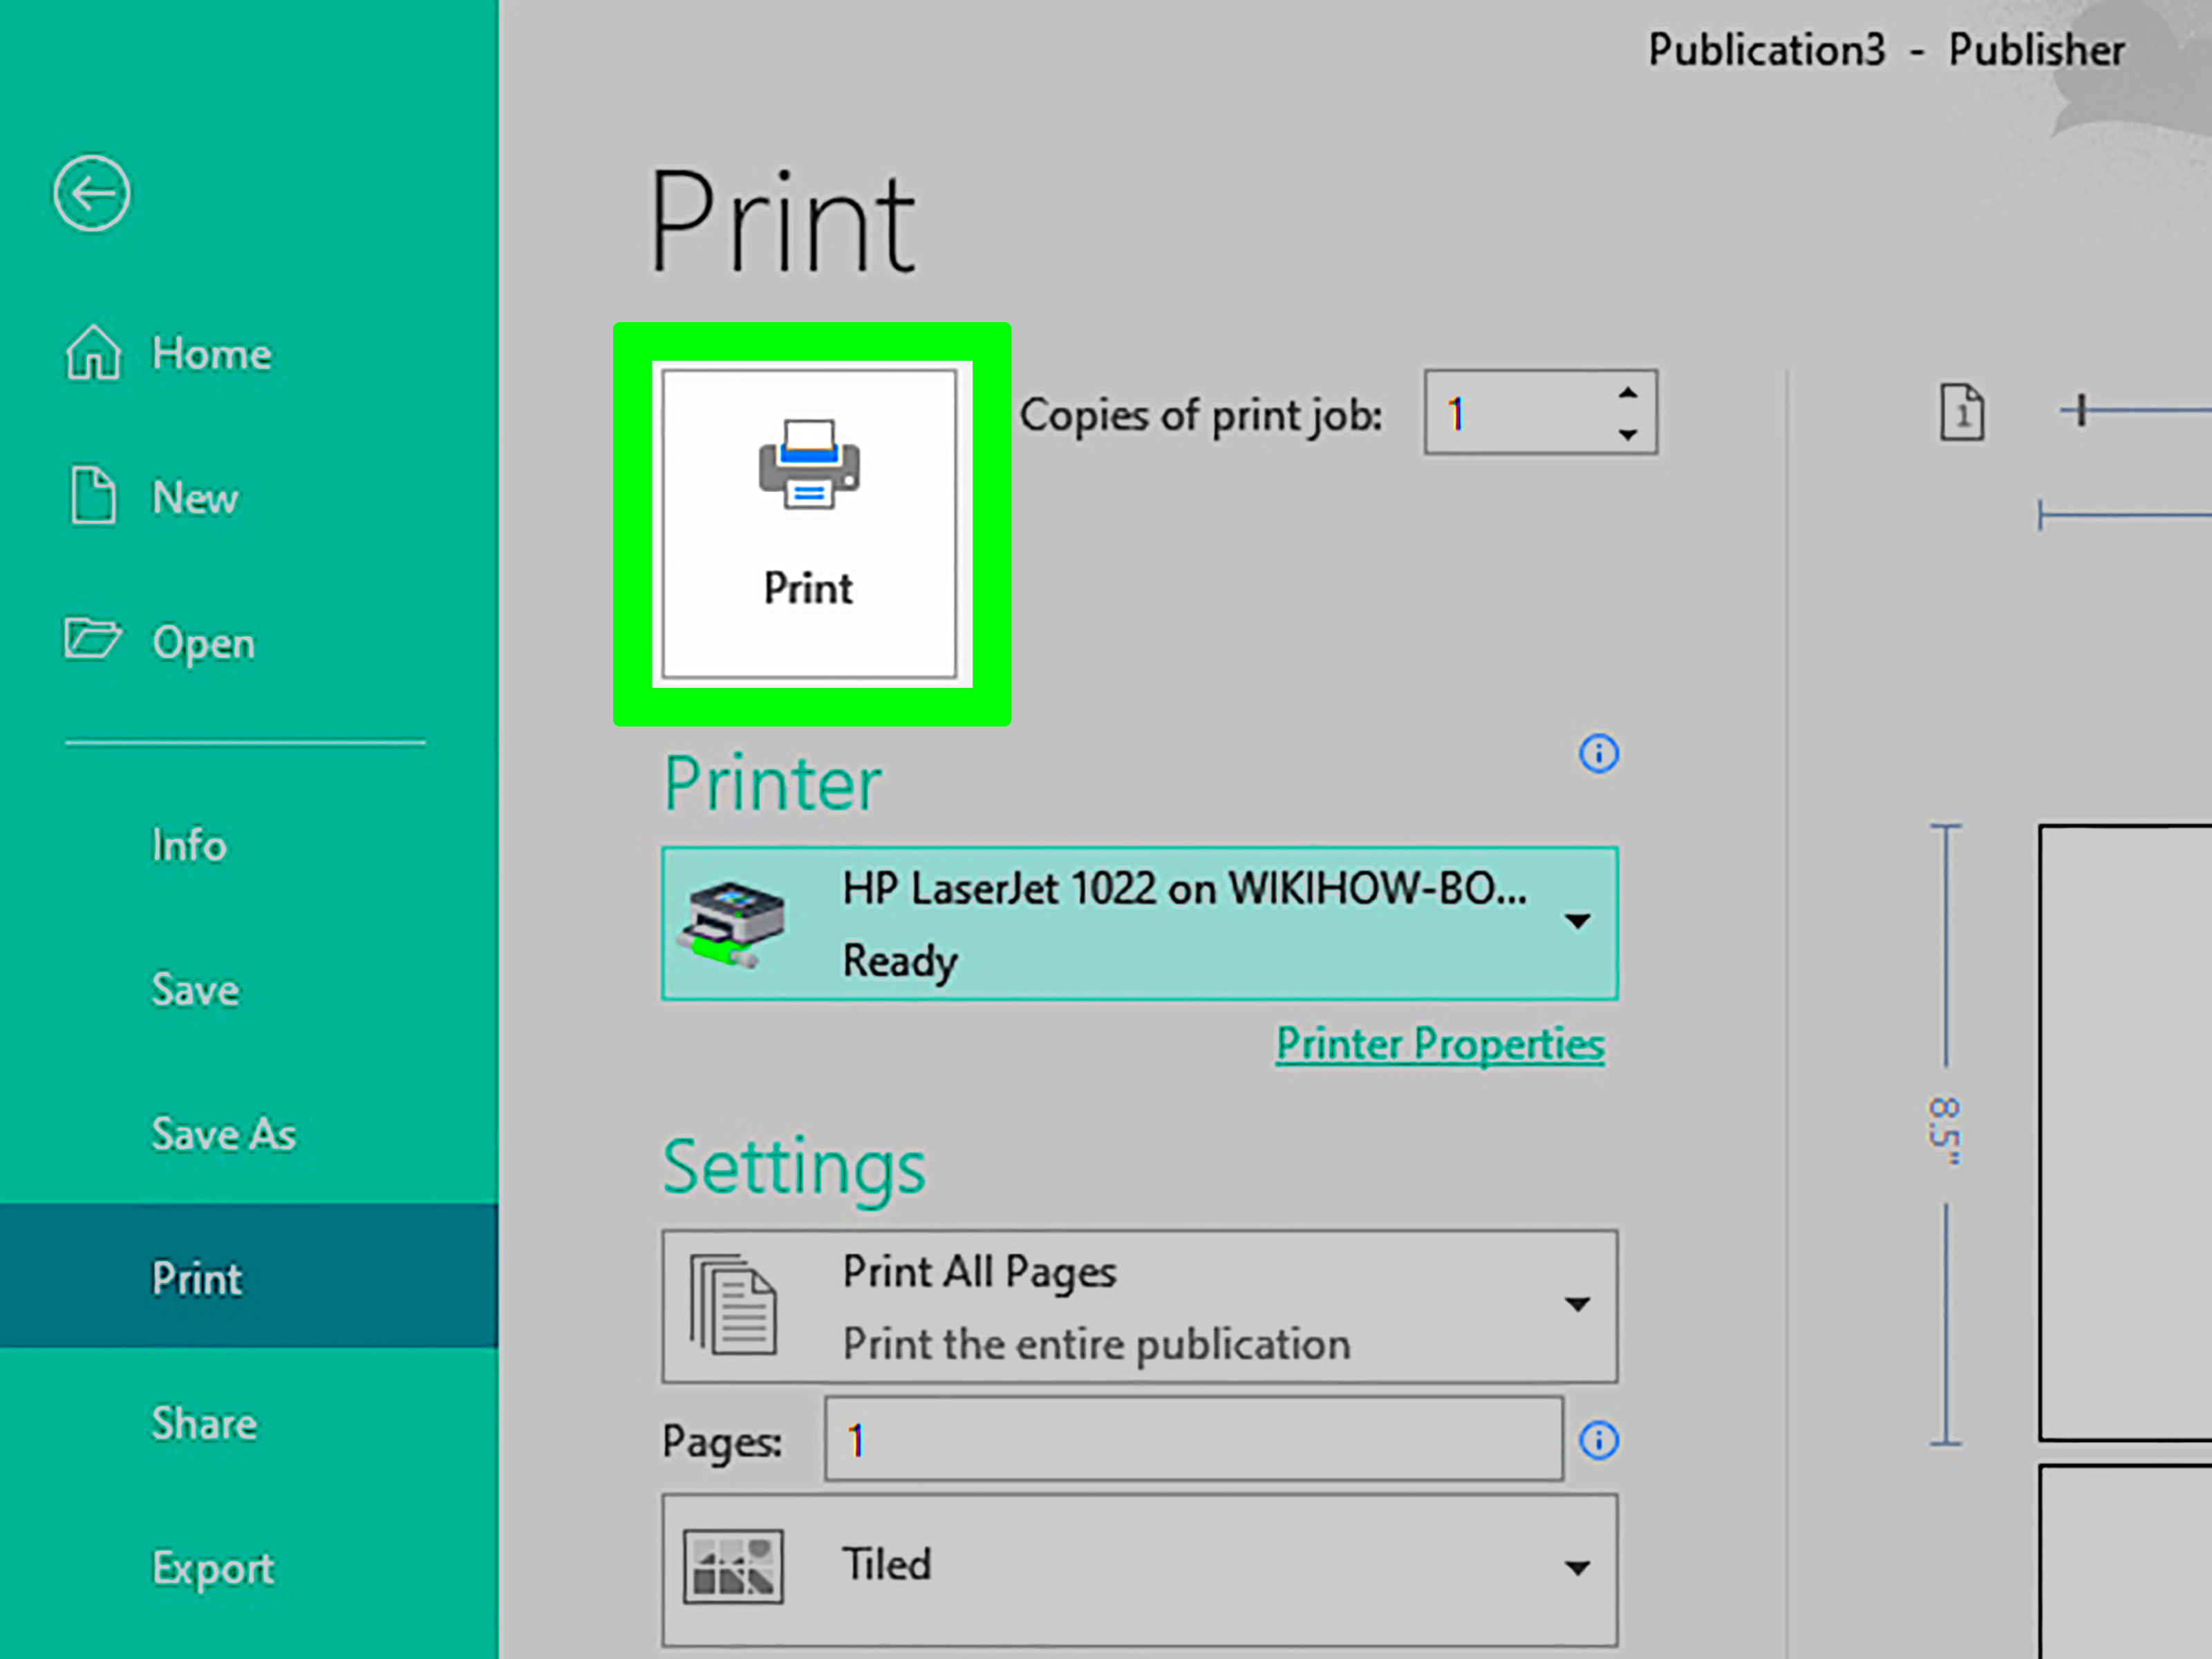
- Click on File in the top menu, then select Print.
- Choose your Epson printer from the list of available printers.
- Click on Printer Properties or Preferences to access the settings.
- For Mac:
- Open the image you want to print.
- Go to File and select Print.
- In the print dialog, select your Epson printer.
- Click on Show Details if the settings are not visible.
By following these steps, you'll be ready to adjust the settings for mirroring your image.
Selecting the Right Image for Mirroring
Choosing the right image for mirroring is a crucial step in the printing process. Not all images will yield great results when mirrored, so it's important to consider a few factors before you hit that print button. In this section, we'll discuss what to look for in an image, the types of images that work best for mirroring, and how to optimize your selections.Here are some tips to help you select the right image:
- Image Clarity: Always start with a high-resolution image. Blurry or pixelated images will look even worse once mirrored.
- Simple Designs: Complex images may not translate well when mirrored. Opt for simpler graphics that retain their impact even when reversed.
- Text Considerations: If your image includes text, make sure it's legible when mirrored. Sometimes, it's better to use a different font that looks good in reverse.
- Color Contrast: Images with strong color contrasts will generally look better when mirrored. Dark images may not stand out as much as brighter ones.
By keeping these factors in mind, you'll be better equipped to choose an image that will look fantastic when printed in a mirrored format. Remember, the right image sets the foundation for a successful printing project!
Adjusting the Image Settings for Mirroring
After selecting your image, the next step is to adjust the settings to prepare for mirroring. Epson printers offer various options to ensure your image is mirrored correctly and printed with the best quality. Let’s take a closer look at how to do this effectively.Follow these steps to adjust your image settings:
- Open the Image: Use your preferred image editing software or the print dialog from your computer.
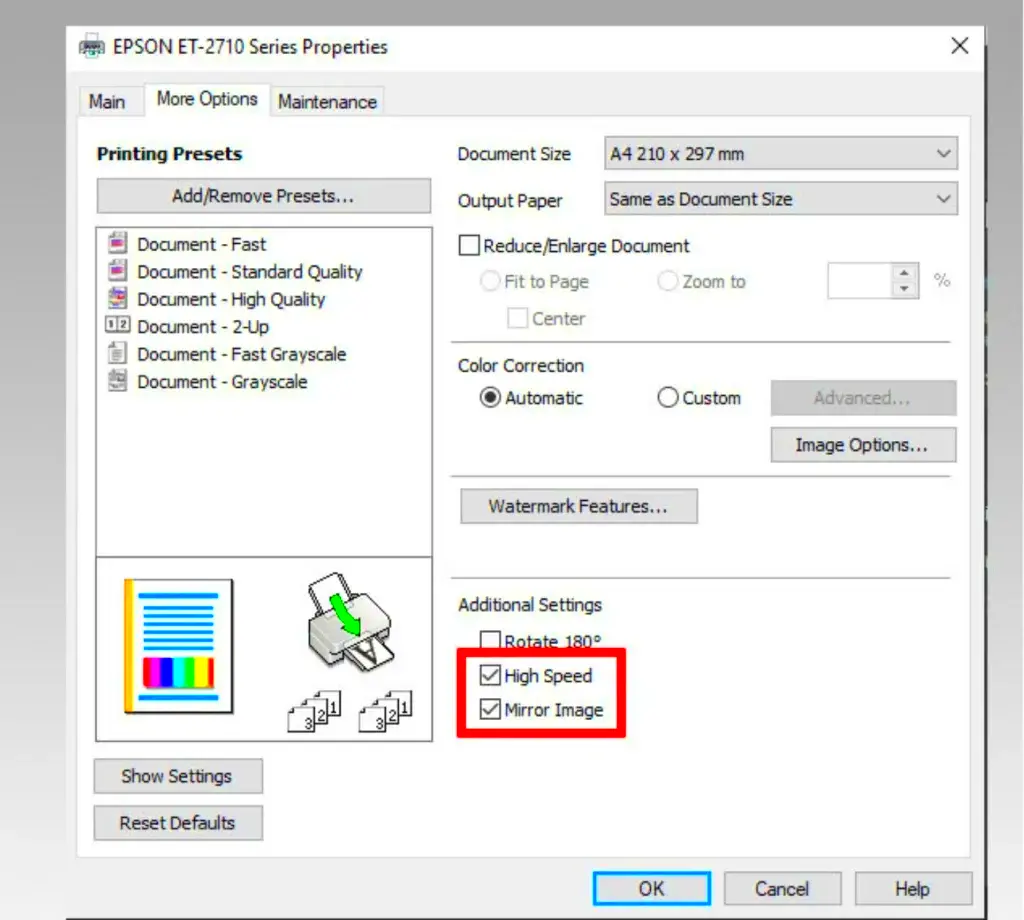
- Find the Mirror Option: In the print settings, look for an option that says “Mirror Image” or “Reverse Image.” This may be located under the “Effects” or “Layout” tab, depending on your software.
- Adjust Image Quality: Set the print quality to a higher setting for a sharper final product. This is usually found under “Quality” or “Print Quality” in the settings.
- Check Color Settings: Ensure your color settings are correct. You might want to choose between color or black and white, depending on your project.
Once you’ve made these adjustments, review everything to make sure it looks right. The key here is to ensure that all settings align with your project goals, leading to a successful mirrored print.
Printing the Mirrored Image on Your Epson Printer
Now that you've selected the right image and adjusted the settings, it’s time to print your mirrored image! This is the final step where everything comes together, so let's ensure that it goes smoothly. Here are some simple steps to follow when printing.Here’s how to get started:
- Load the Paper: Make sure you’ve loaded the right type of paper into your Epson printer. If you’re using transfer paper, double-check that it's inserted correctly.
- Preview the Print: Before printing, use the “Print Preview” feature to see how your mirrored image will look. This helps you catch any last-minute adjustments needed.
- Select the Right Printer: In the print dialog, ensure that your Epson printer is selected. If you have multiple printers, it’s easy to accidentally choose the wrong one.
- Print the Image: Click on the “Print” button and watch your image come to life! Keep an eye on the printer to make sure everything is functioning correctly.
After printing, allow the image to dry completely, especially if you used transfer paper, to avoid smudging. Now, you have a beautifully mirrored image ready for your project. Enjoy the results!
Troubleshooting Common Issues with Image Mirroring
Even with careful preparation, you might encounter some hiccups while trying to mirror an image on your Epson printer. Don't worry—most issues are common and can be resolved with a few troubleshooting steps. In this section, we'll explore some frequent problems you might face and how to tackle them effectively.Here are some common issues and their solutions:
- Image Not Mirrored: If your image isn't mirrored, double-check the settings in your print dialog. Make sure you selected the “Mirror Image” option before printing.
- Poor Print Quality: If the print appears blurry or faded, it could be due to low ink levels or incorrect print quality settings. Ensure your ink cartridges are full and set the quality to high in the print settings.
- Colors Not Printing Correctly: If the colors look off, check your color settings. Sometimes switching between “RGB” and “CMYK” can make a difference. You may also want to run a print head cleaning cycle through your printer software.
- Paper Jams: If the paper jams during printing, check to ensure that it is loaded correctly and that there are no obstructions in the printer. Clear any jams before trying again.
If you run into issues that these tips don't solve, don't hesitate to consult your printer's manual or reach out to Epson support for further assistance. With a little patience, you'll have your image mirrored perfectly in no time!
Frequently Asked Questions About Image Mirroring
When it comes to image mirroring, many users have similar questions. To make your experience smoother, we’ve compiled a list of frequently asked questions and their answers. This can save you time and help clarify any doubts you might have.
- What types of images work best for mirroring? High-resolution images with strong contrasts and simple designs are ideal. Avoid overly complex images or those with small text, as they may not translate well.
- Can I mirror images directly from my phone? Yes! Many mobile apps offer image mirroring features. Just ensure your printer is connected to your device for printing.
- Do I need special paper for mirrored images? It depends on your project. For heat transfer projects, special transfer paper is recommended. For general printing, regular photo or printer paper works fine.
- How can I improve print quality? Ensure you use high-quality images and select the correct print quality settings in your printer’s dialog. Keeping your printer clean and well-maintained also helps.
If you have more specific questions, don't hesitate to check the Epson website or forums, as these are excellent resources for printer-related inquiries!
Conclusion on Mirroring Images with Epson Printers
In conclusion, mirroring images on your Epson printer can be a straightforward process if you follow the right steps. From selecting the appropriate image to adjusting the settings and troubleshooting common issues, each step plays a crucial role in achieving the perfect mirrored print. Whether you’re creating custom t-shirts, stickers, or artistic projects, mastering this technique opens up a world of possibilities.Remember, preparation is key, and understanding your printer’s settings will help you avoid pitfalls along the way. With the right approach, you can create stunning mirrored images that reflect your creativity. Don’t hesitate to experiment and make adjustments as needed to get the results you desire.
 Before diving into image mirroring, it's essential to ensure your Epson printer is ready for the task. Preparation steps include checking the printer's settings, ensuring you have the right media, and making sure your printer is in good working condition.Here’s a checklist to help you prepare:
 Once your printer is prepared, the next step is to access the print settings on your device. This process may vary slightly depending on whether you're using a Windows or Mac operating system. However, the general steps remain the same.Here's how to access the print settings:
 admin
admin


