Google Slides is an incredibly versatile presentation-making tool endowed with the capability of making images transparent. This function can improve your slides since it lets the background elements become visible through the images thus enhancing uniformity in design. The audience’s concentration can be redirected from confusing backgrounds to what they are presenting through the use of transparency. When it comes to effective presentation design, knowing how to play with transparency is fundamental whether you want to emphasize certain points or mix colors with pictures.
Steps to Make an Image Transparent

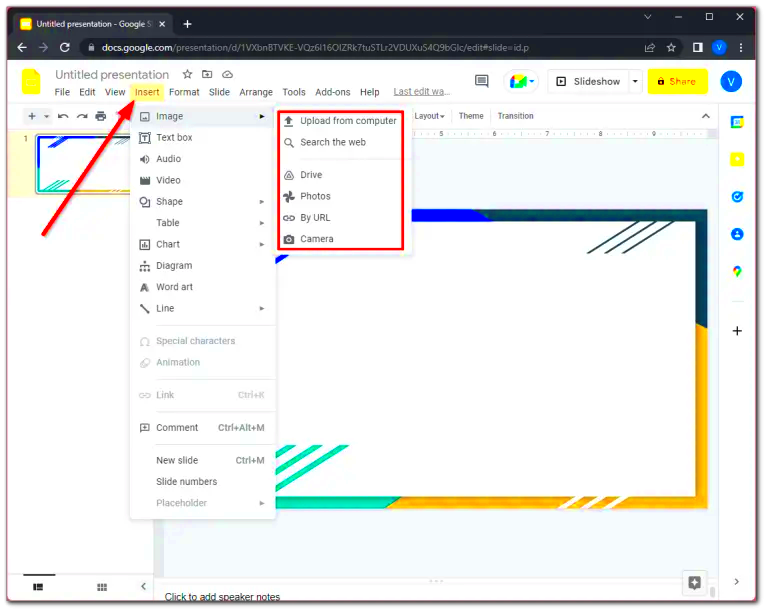
The process for making an image transparent in Google Slides is very simple. Below are the simple processes to acquire the effect you desire:
- Open Google Slides: Launch your presentation in Google Slides.
- Select Your Image: Click on the image you want to modify.
- Access the Format Options: Right-click on the image and choose "Format options" from the dropdown menu.
- Adjust Transparency: In the format panel that appears on the right, find the "Adjustments" section. Here, you'll see a slider for transparency.
- Move the Slider: Drag the transparency slider left or right to increase or decrease the image's transparency until you achieve the desired effect.
- Close the Panel: Once you're satisfied, close the format options panel to see your changes on the slide.
Also Read This: How to Convert an Image to 300 DPI for High-Quality Printing
Using the Format Options for Transparency
Using format options in Google Slides is a straightforward and effective method of changing the transparency of images. Here’s how to go about it:
- Right-Click Menu: Right-clicking on your image opens a variety of options, including the format options that lead to the adjustments you need.
- Adjustments Section: Within the format options, you will find different adjustment settings, including brightness, contrast, and transparency.
- Real-Time Changes: As you move the transparency slider, you can see real-time changes on your slide, allowing you to find the perfect balance.
- Experimentation: Don’t hesitate to experiment with different levels of transparency to see what looks best with your overall design.
Utilizing format choices for changing transparency can actually help improve presentations, allowing images to blend with other elements in the slides better.
Also Read This: Play YouTube Videos Backwards for a Fun New Experience
Adjusting Image Transparency with the Color Tool
One way to enhance your pictures’ transparency levels while controlling them is by using the color tool available in Google Slides. This feature is important when you are looking to blend images that have specific colors or backgrounds so that they appear seamless. The color tool has several options which go beyond just a basic slider, thus helping you improve on image quality.
To adjust the transparency using the color tool:
- Select Your Image: Click on the image you want to edit to activate the format options.
- Open the Format Options: Right-click on the image and select "Format options."
- Navigate to Color: In the format panel, look for the "Color" section.
- Choose a Color: Here, you can select a color overlay for your image, which can help blend it better into your slide.
- Adjust Transparency: Within the color section, you'll also see an option for transparency. Adjust this slider to control how see-through your image will be.
Being able to modify transparency and keeping or altering the entire image color are not only things that this method does, but it also allows one to have more creative freedom designing her slides.
Also Read This: How Much Ideal Image Treatments Cost
Benefits of Using Transparent Images
Using transparent images in your presentations can improve your design and make your message clearer. Here are some of the primary advantages of using transparent images:
- Improved Visual Appeal: Transparent images blend seamlessly with backgrounds, making your slides look more professional and polished.
- Focus on Content: By making images transparent, you guide your audience's attention to the key points rather than distracting backgrounds.
- Enhanced Creativity: You can layer images and colors, allowing for more creative and engaging slide designs.
- Better Integration: Transparent images integrate well with text and other visual elements, creating a cohesive overall design.
- Flexible Design Options: Adjusting transparency can help convey different moods or themes without changing the core message.
In general, it is much better to use transparent images when giving presentations as they are more attractive and persuasive.
Also Read This: How to Make an Image Low Quality for Smaller File Sizes
Common Issues with Image Transparency
Though the adjustment of image opacity can offer benefits, yet it has its related problems. Knowing these may assist you in avoiding them:
- Inconsistent Transparency: Sometimes, different images may not render transparency consistently. This can result in some images appearing washed out or too bold compared to others.
- Loss of Detail: If you increase transparency too much, important details in the image might get lost. This is especially true for images with intricate designs.
- Color Overlays: If you use color overlays along with transparency, the final appearance can be unexpected. Always check how colors mix with transparency levels.
- Editing Limitations: Once an image is made transparent, further edits may become challenging, especially if you want to revert to the original look.
- Background Clashes: Sometimes, transparent images might clash with background colors or patterns, making them hard to see or distracting.
If you know these things, you can fix them and make your presentation better.
Also Read This: How to Submit Pictures to Getty Images From Upload to Licensing
Tips for Enhancing Image Quality
When it comes to doing presentations, pictures of a higher dimension could lead to totally different situations. While adjusting transparency is essential, ensuring that your images are clear and crisp is equally important too. Hence, below are some tips on how to improve image quality in Google Slides:
- Use High-Resolution Images: Always start with high-resolution images. Low-resolution images can become pixelated when resized, making them look unprofessional.
- Optimize Image Size: Before uploading, resize your images to match the dimensions of your slides. This helps maintain quality and reduces loading times.
- Choose the Right File Format: Use file formats that support high quality, like PNG or JPEG. PNG is great for images with transparency, while JPEG works well for photographs.
- Adjust Brightness and Contrast: Use the built-in tools in Google Slides to tweak brightness and contrast, making your images stand out more on the slide.
- Consider the Background: Make sure your images look good against the slide background. Sometimes adding a subtle shadow or outline can help improve visibility.
- Limit Overuse of Effects: While it’s tempting to use filters or effects, too many can detract from the image’s quality. Keep it simple and elegant.
Thus, if you want your photographs to appear fabulous and improve your appealing talks in a right way, take note of them.
Also Read This: Understanding the Decline in Your YouTube Views and How to Fix It
Frequently Asked Questions
There are a lot of inquiries regarding rendering images invisible on Google Slides from various users. The following list contains frequently asked questions with relevant solutions:
- Can I make a video transparent in Google Slides?
Unfortunately, Google Slides does not currently support making video backgrounds transparent. This feature is limited to images. - What file formats are best for transparent images?
PNG files are the best choice for transparent images because they support transparency without losing quality. - Is there a way to revert my image back to original?
Yes, you can undo changes by using the “Undo” button (Ctrl + Z) immediately after adjusting transparency or by re-uploading the original image. - How do I ensure my images remain clear when I resize them?
Always use high-resolution images and try to resize them within Google Slides instead of stretching or compressing them in other software. - Can I use transparent images in all slide layouts?
Yes, you can use transparent images in any slide layout. Just make sure the background complements the image for the best effect.
Conclusion on Image Transparency in Google Slides
In Google Slides, picture transparency is a strong weapon which can uplift your exhibitions greatly. By knowing how to alter transparency well and using great quality images, you will be able to produce slides with good visual appeal that hold the eyes of your listeners. Do not forget to try various levels of opaqueness and take full advantage of the format options available at your disposal.
As time passes, you will be able to come out with the best combination of visibility in images and background integration which would improve your overall message. Being transparent is not merely about allowing people to see through the images; it means that your audience will have an interesting balanced visuals around them. So just get onto Google Slides and make those presentations really pop!
 admin
admin


