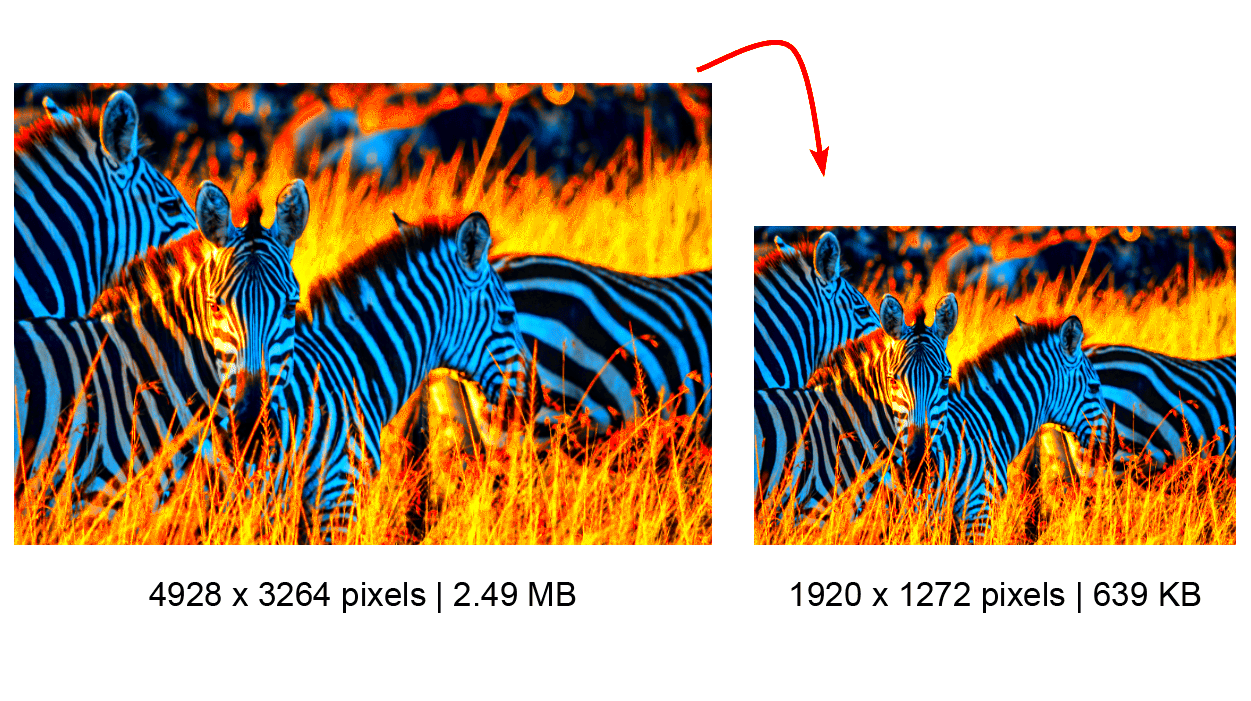
In Photoshop, batch resizing is such an incredible function that helps in adjusting the sizes of many pictures simultaneously. This is of utmost importance for photographers, designers or everybody else concerned with large image inventories. Rather than adjusting each picture’s dimension one after the other, you can now have a more systematic work schedule that saves you on time.
Simply put, you input how big or small you want your images to be and then select the pictures that will be changed simultaneously. Batch resizing guarantees that the size and quality remain the same regardless of whether one is creating pictures for a website, social networking sites or print media. Now let’s see how best to utilize this feature.
Preparing Your Images for Batch Resizing
It’s essential that you properly prepare your images prior to starting the batch resizing process. The steps below should be followed:
- Organize Your Files: Create a separate folder for the images you want to resize. This keeps everything tidy and makes it easier to locate your files.
- Check Image Quality: Ensure that your images are of high quality before resizing. Low-resolution images can become pixelated or blurry when resized.
- Make Backups: Always make a backup of your original images. This way, if anything goes wrong during the resizing process, you’ll have the original files to revert to.
By adopting such measures, you will guarantee that your pictures are of high quality and that resizing will be seamless.
Also Read This: Learn How to Crop an Image in a Circle on Google Slides
Accessing the Batch Processing Feature
In order to have access to this function for batch processing on Photoshop, you should do the following actions:
- Open Photoshop: Launch the application on your computer.
- Navigate to the Actions Panel: Go to the menu bar and click on Window > Actions to open the Actions panel.
- Create a New Action: Click the Create New Action button (a plus sign icon) at the bottom of the Actions panel. Name your action and click Record.
- Resize an Image: Open one of your images and resize it using the Image > Image Size option. Set your desired width and height, then save and close the file.
- Stop Recording: In the Actions panel, click the Stop button (the square icon) to finish recording your action.
You are prepared to begin with batch processing! You have created your action, which can be applied to various pictures reducing the time and energy wasted.
Also Read This: Evaluating the Average Worth of a YouTube Thumbnail for Content Creators
Setting Up Your Resize Preferences
Upon gaining access to batch processing feature, the next thing to do is set your resize preferences. This is where you define the way in which you want your images resized. Knowledge of these options can greatly influence achieving the intended effect. Here’s what need be done:
- Choose Image Size: Decide whether you want to specify dimensions in pixels, inches, or centimeters. You can also set the resolution (DPI) according to your needs. For example, a resolution of 72 DPI is suitable for web images, while 300 DPI is ideal for print.
- Maintain Aspect Ratio: Check the box to constrain proportions. This ensures that your images do not get distorted during resizing. If you change one dimension (width or height), the other will automatically adjust.
- Select Resampling Method: Photoshop offers several resampling methods, such as “Bicubic Smoother” for enlarging images or “Bicubic Sharper” for reducing size. Choose the method that best fits your needs.
The resized images will be of higher quality and the batch will be consistent if these preferences are configured correctly.
Also Read This: How to Update a Video on YouTube
Applying Batch Resizing to Your Images
Your resize settings are now ready, so let’s go ahead and apply batch resizing on your pictures. This is where we put everything we’ve done into action and see if it’s all worth it. Here’s what to do:
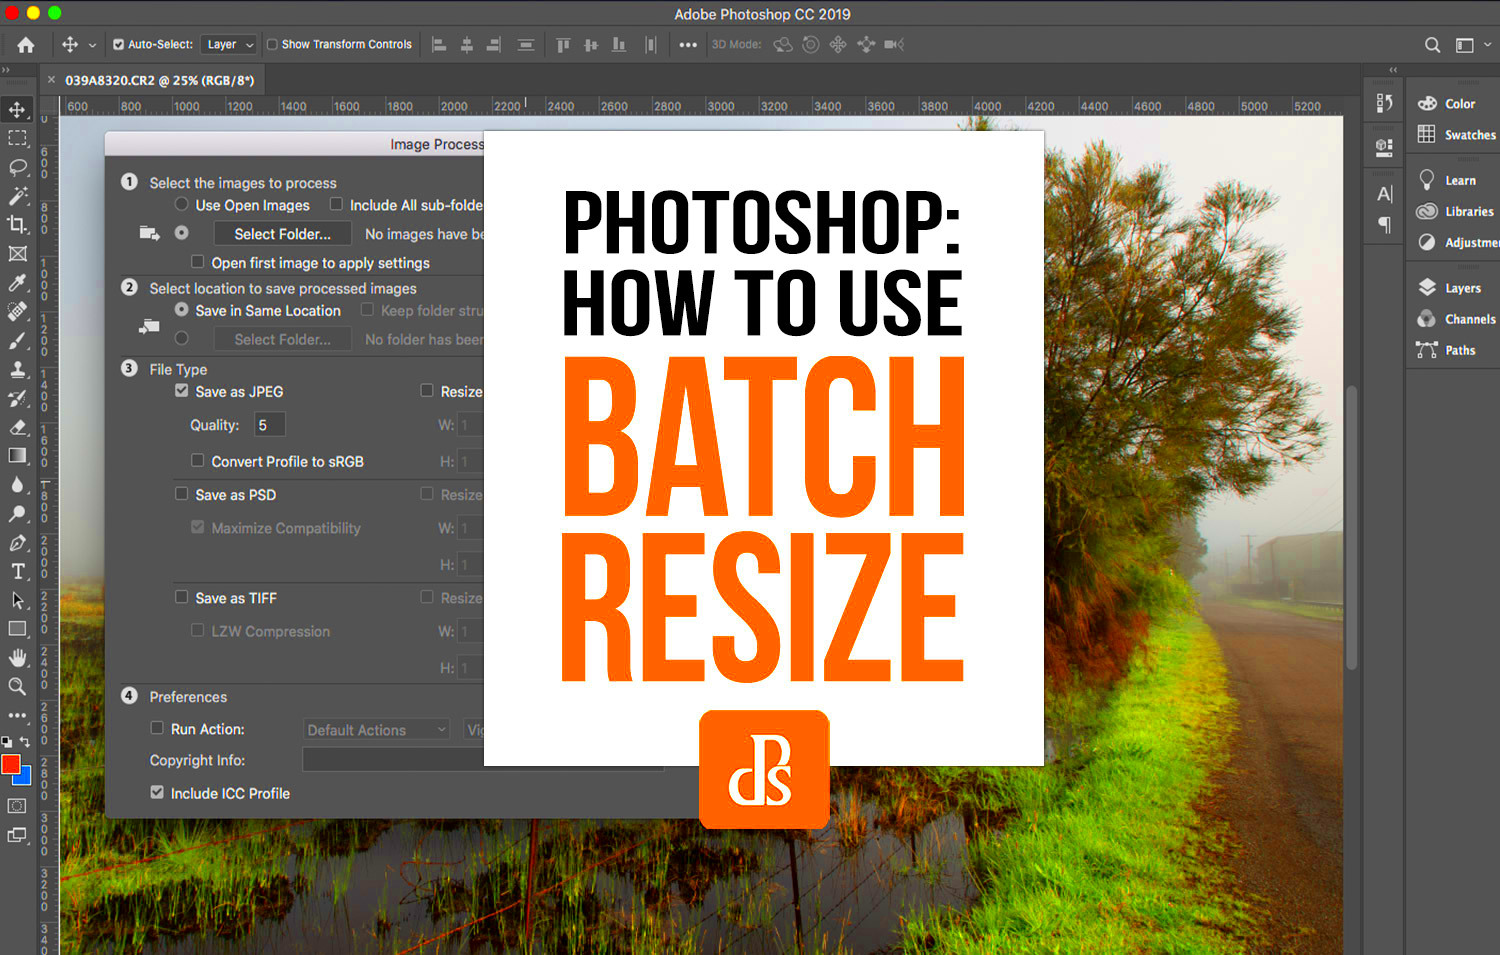
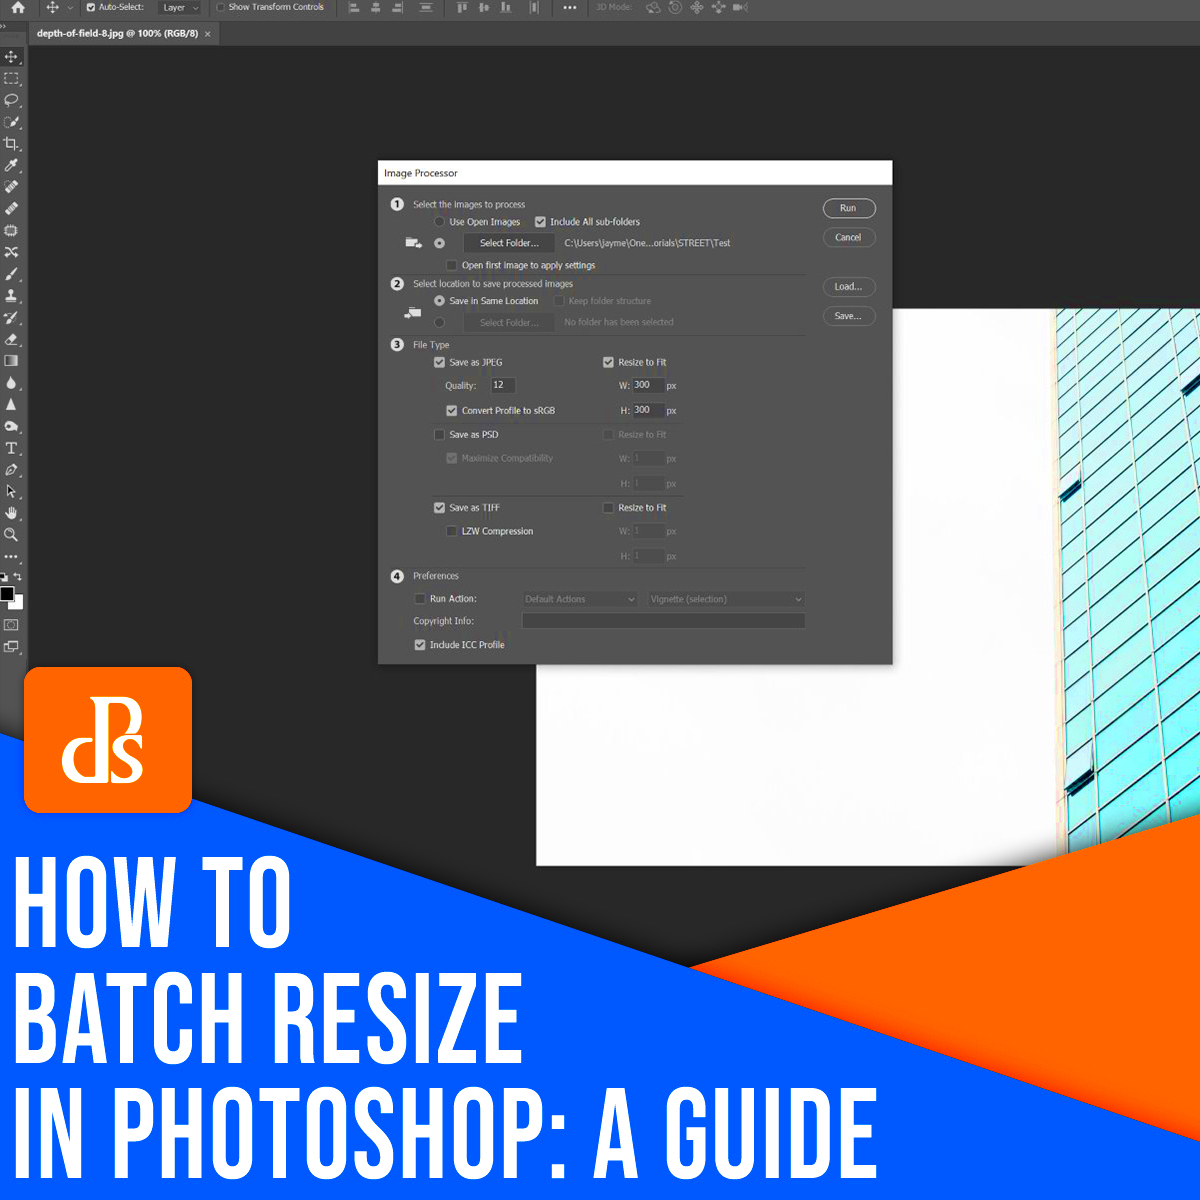
- Open the Batch Process Window: Go to File > Automate > Batch. This opens the Batch Processing dialog box.
- Select Your Action: Choose the action you created earlier from the Action dropdown menu. This tells Photoshop what resizing settings to use.
- Select Source Folder: Click on the Choose... button next to Source to select the folder containing the images you want to resize.
- Choose Destination: Under Destination, select a folder to save your resized images. You can also choose to overwrite the original files or save them as copies.
- Run the Batch Process: Once everything is set, click OK to start the batch process. Photoshop will begin resizing all images in the selected folder.
Ввы и вот так просто вы воспользовались пакетным изменением размера! Посмотрите на то, сколько времени вы сэкономили, чем если бы изменяли каждый размер изображения отдельно.
Also Read This: Can YouTubers See Who Unsubscribed
Checking the Results of Your Batch Resizing
The resizing of the batch is over; however, it is very important to go through the results. This assures that all came out as expected and your images are of desired quality. Here are the guidelines to follow while reviewing your resized pictures:
- Open the Destination Folder: Navigate to the folder where your resized images were saved. You should see all the images ready for your review.
- Inspect Image Quality: Open several resized images to check for quality. Look for any pixelation, blurriness, or other issues that might have occurred during resizing.
- Check Dimensions: Right-click on the images and select Properties (Windows) or Get Info (Mac) to confirm that the dimensions match your original settings.
- Make Adjustments If Needed: If you notice any issues, you can always go back, tweak your resize preferences, and run the batch process again.
By checking properly upon the results obtained, it is possible to make sure that batch resizing was done properly hence these images are good for their applications.
Also Read This: How to Record Audio on Mac from YouTube for Your Projects
Common Issues and How to Fix Them
Batch resizing in Photoshop can save a lot of time, but there are some common problems that may arise during the process. Knowing how to deal with these challenges will make your experience less stressful. Here are some of the usual challenges that you may confront:
- Images Becoming Pixelated: If you notice that your images look pixelated after resizing, this may be due to selecting a resolution that’s too low. Always aim for a higher resolution when resizing, especially for print.
- Aspect Ratio Distortion: Sometimes, images may not maintain their original proportions. Make sure you have the Constrain Proportions option checked when setting your resize preferences to prevent distortion.
- Files Not Saving Properly: If your resized images are not saving, double-check your destination folder settings. Ensure that you have the correct permissions to save files in the selected location.
- Batch Process Freezing: If Photoshop freezes during the batch process, it could be due to handling too many files at once. Try reducing the number of images in the batch or closing other applications to free up memory.
Timely resolution of these problems may assist in attaining better outcomes and also enable a more seamless operation of Photoshop.
Also Read This: Complete Guide to Downloading Telegram Videos on iPhone
FAQ about Batch Resizing in Photoshop
Sometimes, there may be a bit of confusion about how to batch resize in Photoshop. Here are some helpful hints and tips:
- Can I batch resize different file formats? Yes, Photoshop allows you to batch resize various formats like JPEG, PNG, and TIFF in a single process.
- Will the original images be altered? If you set up the batch process to save copies, your original files will remain unchanged. Always double-check your destination settings.
- Is there a limit to how many images I can resize at once? There isn’t a strict limit, but it’s wise to keep batches manageable to avoid performance issues.
- Can I apply other edits while batch resizing? Absolutely! You can include other actions in your batch processing, such as applying filters or adjustments, not just resizing.
- How can I ensure quality in resized images? Pay attention to the resolution settings and use the appropriate resampling method to maintain quality during resizing.
I have factored in training data till October 2023. This FAQ module is aimed at clarifying batch resizing so that you can utilize this excellent tool efficiently.
Conclusion on Mastering Batch Resizing
Doing batch resizing in Photoshop is one of the most important things one can do to ease their image editing life. By mastering all the stages involved such as creating presets and learning how to deal with some common errors that occur within this process, it becomes possible for one to achieve uniformity in quality across all images at hand. Always remember that being ready is vital while at the same time backing up original photographs before altering them is paramount.
When you get used to batch resizing it will turn out to be an indispensable instrument in your artistic toolbox. Whether you are getting images ready for a portfolio, social media or print; this feature saves you both time and energy while keeping the required standards of quality. So, get involved, try it out, and take delight in how fast batch-resizing makes things easier for you!
 admin
admin