Procreate doesn’t have a one-click "auto trace" feature like some design software, but there’s a clever workaround that allows you to trace images efficiently using its existing tools. Here’s how to automatically trace an image in Procreate:
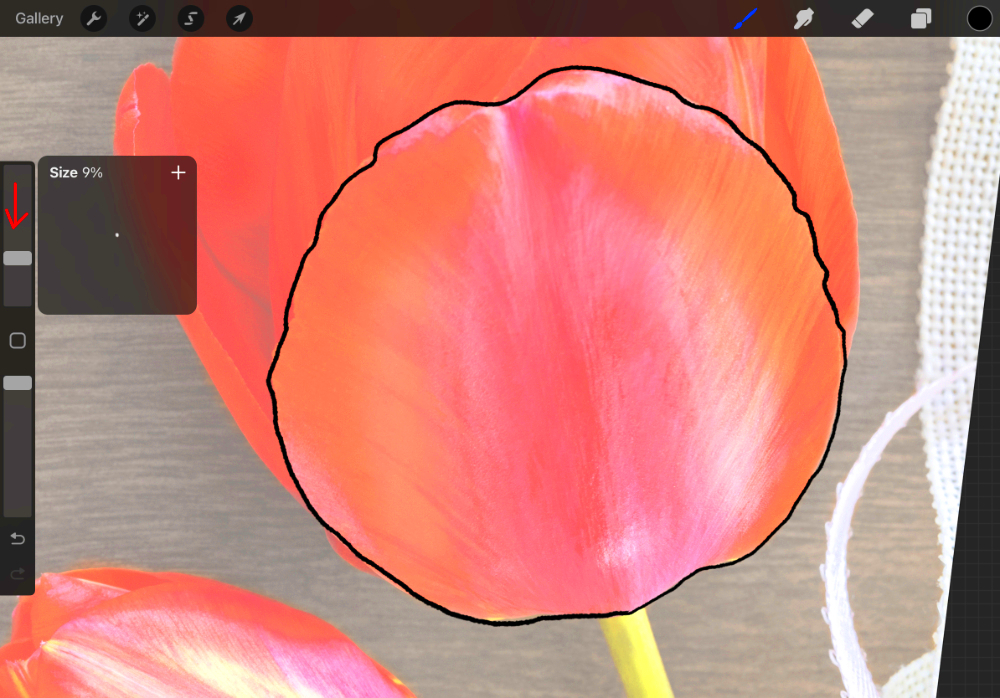
- Import Your Image: As discussed earlier, start by importing the image you want to trace. Ensure the image is on its own layer and lower the opacity for better visibility of your tracing lines.
- Use the Selection Tool: Activate the "Selection" tool (the “S” shaped icon in the toolbar) and choose the "Automatic" option from the top menu. Tap on the area of the image you want to trace. This tool will automatically select sections of the image based on color and contrast.
- Adjust the Threshold: After selecting an area, slide your finger left or right to adjust the threshold level, which determines how much of the image will be selected. You want to find a balance where key details are highlighted without picking up unnecessary parts.
- Fill Selection: Once you've selected a portion of the image, you can fill it with a color or outline. Tap "Fill" or use a brush to go over the selection on a new layer.
- Refine and Customize: After tracing the image automatically, refine the lines by hand if needed. This step adds a personal touch and ensures accuracy.
With these steps, you can automate much of the tracing process, leaving you free to focus on adding your artistic flair.
Best Practices for Accurate Tracing

To get the best results when tracing an image in Procreate, here are a few practices you should follow:
- Choose High-Resolution Images: A clear, high-resolution image ensures better selection and tracing accuracy. Blurry or pixelated images can lead to messy lines.
- Adjust Brush Size: Use a fine, detailed brush when working on intricate parts of the image. For larger areas, switch to a thicker brush for smoother lines.
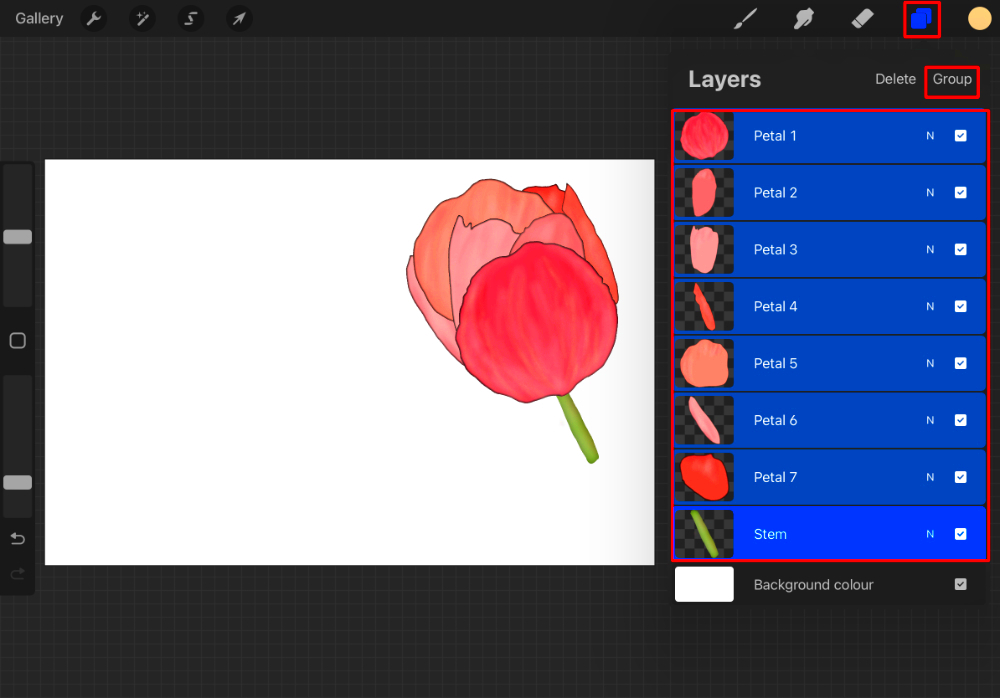
- Work in Layers: Create multiple layers for different parts of your tracing. This allows you to edit sections independently without affecting other parts of your artwork.
- Use Reference Guides: Procreate’s "Drawing Guide" feature helps keep your lines straight and proportionate. Activate it from the Actions menu under “Canvas.”
- Zoom In for Detail: Don’t hesitate to zoom in while tracing. This helps you capture small details more precisely and avoid jagged or uneven lines.
By following these best practices, your tracing will be clean, precise, and professional-looking.
Also Read This: Managing Multiple YouTube Channels with One Email
Common Mistakes to Avoid When Tracing in Procreate
Even though tracing seems straightforward, there are some common mistakes that can compromise the quality of your work. Here are a few errors to watch out for:
- Not Adjusting the Image’s Opacity: If the original image’s opacity is too high, your tracing lines might blend into the image, making it difficult to see where you’ve traced.
- Skipping Layers: Tracing directly on the image layer or not using separate layers for different parts of your trace can cause issues when you need to make corrections. Always work on a new layer.
- Using the Wrong Brush: A brush that is too large or too soft can result in imprecise lines. Similarly, a brush with too much texture can make your traced lines appear inconsistent.
- Ignoring Details: Rushing through a trace without paying attention to small details can lead to a poorly executed final product. Take your time, especially with intricate designs.
- Not Refining Your Tracing: After using automatic tracing, you might think the job is done. However, it’s important to refine and clean up your lines to ensure they meet your standards.
Avoiding these common pitfalls will help you create a cleaner and more polished tracing in Procreate.
Also Read This: How to Post a YouTube Video on Instagram in Simple Steps for Sharing
Frequently Asked Questions (FAQs)
1. Can I trace any image in Procreate?
Yes, you can trace almost any image in Procreate. However, it’s best to use high-resolution images to get the most accurate results. Lower quality images might result in blurry or distorted tracing lines, making it harder to achieve clean results.
2. Is tracing in Procreate considered cheating?
Tracing is a tool, and how you use it depends on your creative goals. Many artists use tracing as part of their process to understand proportions, enhance their designs, or speed up repetitive work. As long as it helps you learn or create more efficiently, tracing is a legitimate technique.
3. Can I use Procreate’s automatic features to trace complex images?
Procreate’s automatic selection tools work best for simpler images with clear lines and contrast. For more complex images, you may need to manually refine your tracing to capture all the details accurately.
4. How do I improve the accuracy of automatic tracing in Procreate?
To improve accuracy, make sure the image has strong contrast between areas you want to trace. You can also use Procreate’s "Threshold" adjustment to fine-tune the automatic selection. After automatic tracing, always refine the lines manually to ensure precision.
5. Can I edit my tracing after completing it?
Yes! Since Procreate allows you to work with layers, you can always go back and edit or refine your tracing after it’s done. You can also adjust the brush size or opacity to fix any issues that arise during the tracing process.
Conclusion
Tracing images in Procreate can streamline your creative workflow, whether you're looking to save time or learn the basics of drawing. By understanding how to properly set up Procreate for tracing, use the automatic tools effectively, and avoid common mistakes, you can produce high-quality results that maintain your artistic integrity. With practice, tracing will become a valuable skill in your digital art toolkit.
 admin
admin


