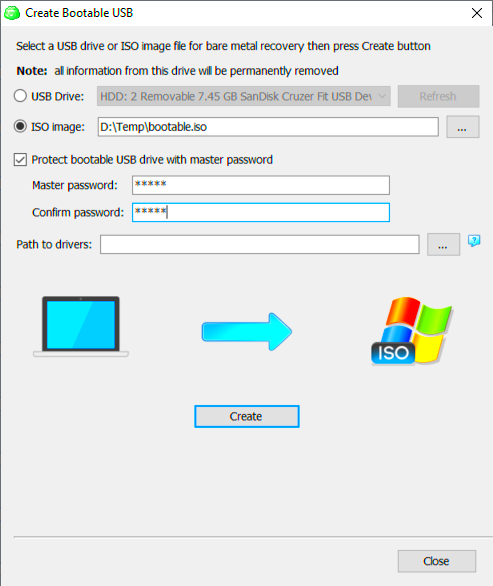
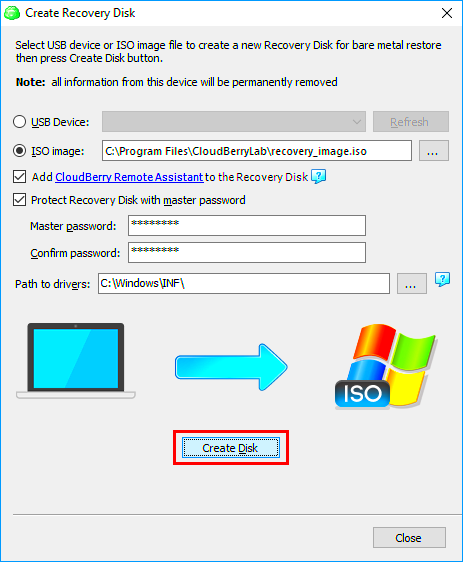
A bootable ISO image file is essentially a digital version of a physical disk, like a CD or DVD, but stored on your computer. It contains all the necessary data needed to start up an operating system or software. When you create a bootable ISO file, you're preparing a package that can be used to install or run software on a computer without needing a physical disc. This process is incredibly useful for system installations, backups, or recovery tasks.
ISO stands for "International Organization for Standardization," and this format helps ensure compatibility across different systems. When you burn an ISO to a USB or DVD, it becomes bootable, allowing your computer to load the software directly from that drive.
Why You Might Need a Bootable ISO Image

There are several scenarios where having a bootable ISO image can be incredibly handy. Here are some reasons why you might need one:
- Operating System Installation: Easily install or reinstall an OS on a computer without a CD drive.
- System Recovery: Boot into a recovery environment to troubleshoot or fix issues.
- Testing Software: Try out new operating systems or software without making permanent changes to your system.
- Creating Backup Drives: Make a backup of your current system or software installations.
Having a bootable ISO image gives you the flexibility and convenience to manage your software and operating systems more effectively.
Choosing the Right Software for ISO Creation

When it comes to creating a bootable ISO image, choosing the right software can make a big difference in your experience. There are various options available, and each comes with its own set of features. Here’s what to consider:
- User-Friendliness: Look for software that is easy to navigate, especially if you’re new to creating ISO images.
- Compatibility: Ensure that the software supports the type of ISO you need, whether it’s for Windows, Linux, or another operating system.
- Features: Some tools offer advanced features like partitioning, file system selection, or additional backup options.
- Cost: There are both free and paid options available. Free tools can be very effective, but premium options may offer more features and better support.
Here’s a quick list of popular software options for creating bootable ISO images:
- Rufus
- UNetbootin
- Etcher
- PowerISO
- UltraISO
Take your time to explore these options and choose one that suits your needs best!
Preparing Your USB Drive for Bootable ISO
Before you can create a bootable ISO image, you need to prepare your USB drive. This step is crucial because it ensures that your USB is ready to receive the ISO file and can boot your computer correctly. Proper preparation also helps prevent data loss and ensures a smooth installation process.
Here’s how you can get your USB drive ready:
- Select the Right USB Drive: Ensure you have a USB drive with enough storage space. Generally, a drive with at least 8 GB is recommended for most operating systems.
- Backup Important Files: If your USB drive contains data, make sure to back it up. Preparing the USB will often erase everything on it.
- Format the USB Drive: Formatting will clear the drive and set it up for the bootable image. You can do this easily:
- Make Sure It’s Ready: After formatting, safely eject the USB drive and plug it back in to check that it’s working properly.
| Operating System | Steps to Format |
|---|---|
| Windows | Right-click on the USB drive in File Explorer > Select "Format" > Choose FAT32 or NTFS > Click "Start." |
| Mac | Open Disk Utility > Select your USB drive > Click "Erase" > Choose MS-DOS (FAT) > Click "Erase." |
Once your USB drive is prepared, you're all set to create your bootable ISO image!
Step-by-Step Process to Create Bootable ISO Image Files
Creating a bootable ISO image file is easier than you might think! Follow these simple steps to get started:
- Download the ISO File: First, you need to have the ISO file you want to use. Download it from a reliable source, ensuring it's the correct version for your needs.
- Launch Your Chosen Software: Open the software you selected for creating the bootable ISO, like Rufus or Etcher.
- Select the USB Drive: In the software, select your USB drive from the dropdown menu. Make sure you choose the correct one to avoid erasing the wrong drive.
- Load the ISO File: Click on the option to browse and select the ISO file you downloaded earlier.
- Configure Settings: Adjust any settings if necessary, like partition scheme (MBR or GPT) or file system (FAT32 or NTFS). Most software will have default settings that work well.
- Start the Process: Click the “Start” button to begin creating the bootable USB. Confirm any warnings about data loss.
- Wait for Completion: The process might take a few minutes. Once done, you will see a message indicating success.
- Safely Eject Your USB Drive: After the process is complete, don’t forget to safely eject your USB drive to avoid any data corruption.
And just like that, you have a bootable ISO image ready to use!
Troubleshooting Common Issues During Creation
Sometimes, things might not go as smoothly as expected when creating a bootable ISO image. But don’t worry; here are some common issues and their solutions:
- USB Drive Not Recognized: If your USB drive isn’t showing up in the software, try unplugging and plugging it back in. Ensure it’s formatted correctly, as mentioned earlier.
- ISO File Not Loading: Make sure the ISO file isn’t corrupted. You can verify the file by checking its hash value against the original source.
- Errors During Writing Process: If you receive errors while creating the bootable image, try using a different USB drive or software. Sometimes, compatibility issues arise.
- Bootable USB Doesn’t Work: If your USB boots but doesn’t work as expected, ensure your computer's BIOS/UEFI settings are configured to boot from USB. You may need to change the boot order.
If you encounter persistent issues, searching online forums or the software's support page can provide additional guidance. Remember, every problem has a solution, so don't hesitate to ask for help if needed!
Using Your Bootable ISO Image for Installation
Now that you've created your bootable ISO image, it’s time to put it to good use! Using this image for installation is straightforward, but it’s essential to follow the right steps to ensure everything goes smoothly. Whether you’re installing a new operating system or running recovery tools, having a bootable USB can be a lifesaver.
Here’s how to use your bootable ISO image:
- Insert the USB Drive: Plug your bootable USB drive into the computer where you want to install the software.
- Access the BIOS/UEFI Settings: Restart your computer and enter the BIOS or UEFI settings. This is usually done by pressing a key like F2, F10, DEL, or ESC immediately after powering on.
- Select Boot Options: In the BIOS settings, find the boot order menu. Here, you need to set your USB drive as the primary boot device.
- Save and Exit: Save your changes and exit the BIOS. Your computer will restart, and it should boot from the USB drive.
- Follow the Installation Prompts: Once the bootable ISO loads, follow the on-screen instructions to install the operating system or software. This usually involves selecting language preferences, accepting terms, and choosing installation locations.
After the installation completes, your system may restart. Remove the USB drive when prompted to avoid booting from it again. That’s it! You’ve successfully used your bootable ISO image for installation.
FAQs about Bootable ISO Image Files
It’s common to have questions when dealing with bootable ISO images. Here are some frequently asked questions to help clarify any doubts:
- What is a bootable ISO image?
A bootable ISO image is a file that contains a complete copy of a disk, including all necessary files for installing an operating system or software.
- Can I create a bootable ISO from an existing OS?
Yes, you can create a bootable ISO from an existing operating system using various software tools designed for this purpose.
- Is it possible to create a bootable USB from a DVD?
Absolutely! You can use software to extract the ISO from a DVD and then create a bootable USB from that ISO file.
- Do I need special hardware to use a bootable USB?
No special hardware is required, but your computer must support USB booting, which is common in most modern machines.
- What if my USB drive becomes corrupted?
If your USB drive is corrupted, you may need to format it and create the bootable ISO image again. Make sure to back up any important data first!
Conclusion and Final Thoughts
Creating and using bootable ISO images can seem daunting at first, but with the right steps, it becomes an easy and effective way to manage your software installations. Whether you're setting up a new operating system, troubleshooting a computer issue, or testing new software, a bootable ISO gives you the flexibility you need.
Remember, preparation is key. Ensure your USB drive is properly formatted, and choose the right software for creating the bootable image. If you encounter any issues along the way, don’t hesitate to refer back to the troubleshooting tips or FAQs provided.
In summary, having a bootable ISO image at your fingertips is a valuable tool in your tech toolkit. Embrace the process, and you'll find it to be a straightforward solution for your installation needs. Happy installing!

 admin
admin


