In AutoCAD, scaling refers to resizing an object or an image while maintaining its original proportions or dimensions. When you scale an image, you adjust its size, but it keeps the same overall shape and look. This is especially important when working on architectural plans, engineering designs, or any kind of technical drawing, where precision is critical.
For example, if you have a drawing of a building and you need to scale it down to fit on a smaller sheet, you can reduce the size of the drawing without losing any detail. Scaling ensures that your images or objects fit within your design space while maintaining accuracy.
Scaling also allows you to work with large images and drawings without needing to recreate them from scratch, saving time and effort.
Importance of Properly Scaling Images in AutoCAD
Properly scaling images in AutoCAD is crucial for several reasons. First, it ensures that your design stays accurate and proportional, which is vital in fields like engineering, architecture, and construction. A slight miscalculation in scaling can lead to significant errors in the final project.
Here are some key reasons why scaling images accurately is important:
- Accuracy: Correct scaling keeps measurements true to life, ensuring that distances and dimensions are correct.
- Consistency: When multiple images or drawings are scaled accurately, they can be combined into one coherent design.
- Professionalism: Properly scaled images demonstrate attention to detail and precision, which is important for client presentations and technical documentation.
- Time-saving: Scaling helps in fitting large images into design layouts without having to redraw or adjust every element individually.
In summary, properly scaling images in AutoCAD is about maintaining accuracy, consistency, and professionalism, which are all essential in any design process.
Different Methods for Scaling Images in AutoCAD
There are several methods you can use to scale images in AutoCAD, depending on your needs and the complexity of the task. Let’s look at the most common methods:
- Scale by a Factor: This method allows you to resize an image by multiplying its size by a specific factor. For example, scaling by a factor of 2 will double the size of the image, while a factor of 0.5 will reduce it to half its original size.
- Reference Scaling: This method lets you scale an image based on a reference length. You choose a known distance in the image, and AutoCAD scales the entire image proportionally based on that length.
- Non-Uniform Scaling: In this method, you can scale an image differently along different axes (X, Y, or Z). This is useful when an image needs to be stretched in one direction while keeping the other dimensions the same.
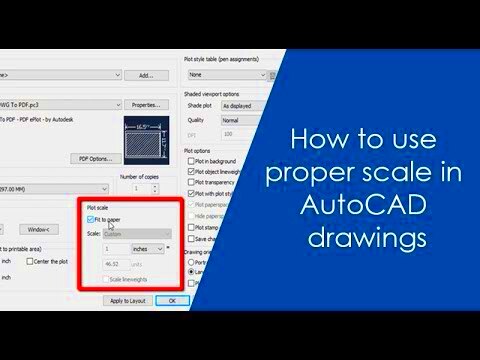
- Fit to Layout: If you need to fit an image within a specific layout or frame, AutoCAD offers the option to scale an image automatically to fit the space you’ve designated for it.
Each of these methods has its own specific use case. By understanding them, you can choose the right method for your project and ensure your images are properly scaled.
Step-by-Step Guide to Scale Images in AutoCAD
Scaling images in AutoCAD can be simple if you follow the right steps. Whether you're adjusting an image to fit a drawing or resizing an entire project, here's a step-by-step guide to help you scale images easily and accurately:
- Open your image in AutoCAD: Start by importing the image you want to scale into AutoCAD. You can do this by using the “Insert” command or dragging and dropping the file directly into your workspace.
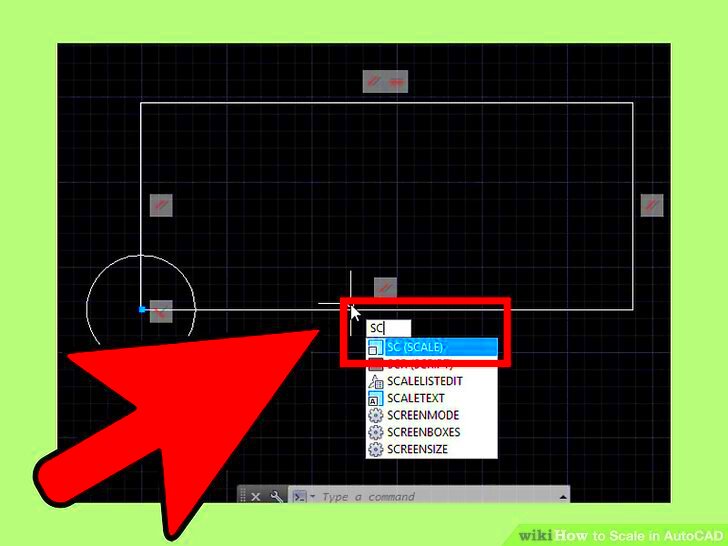
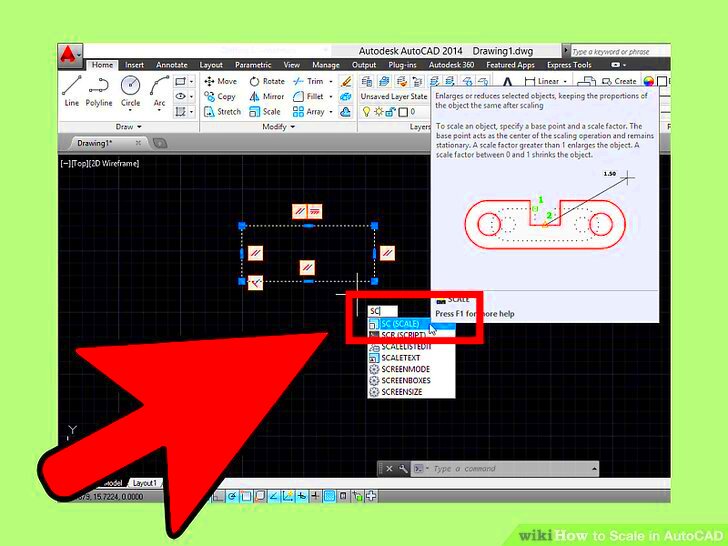
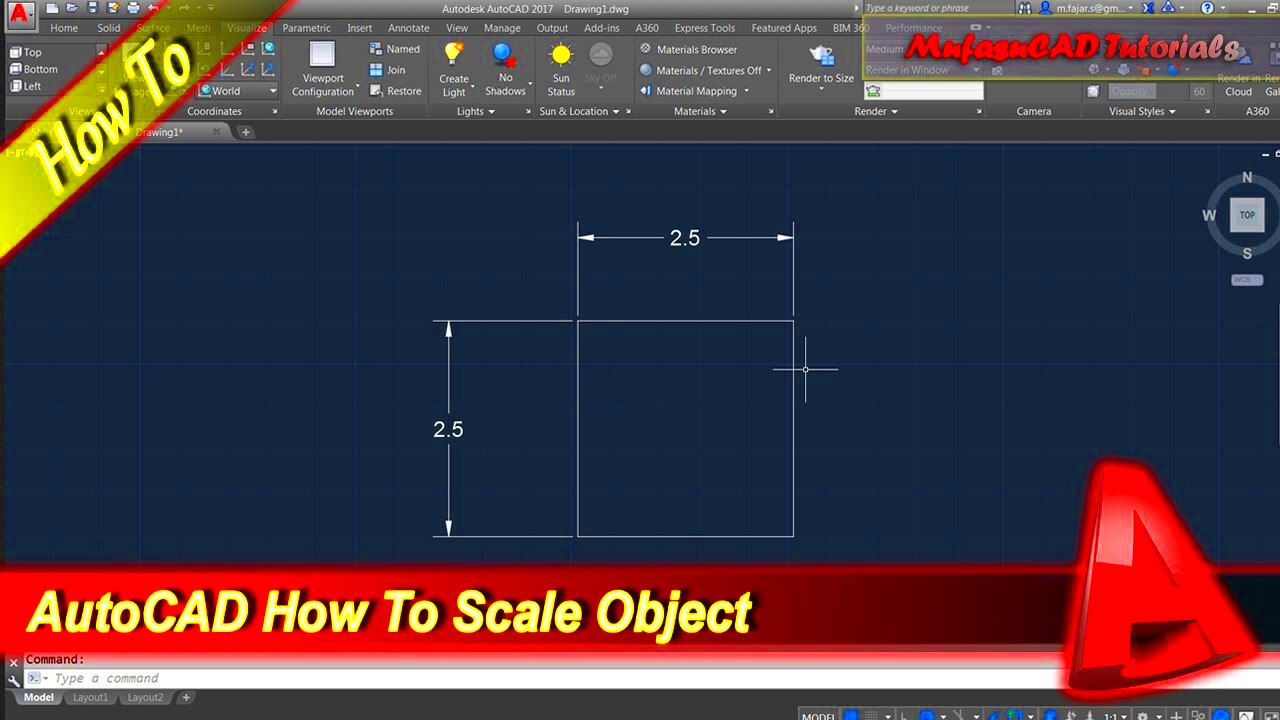
- Choose the Scale Tool: Type SCALE in the command line or select the scale tool from the toolbar. This tool is used to resize objects or images.
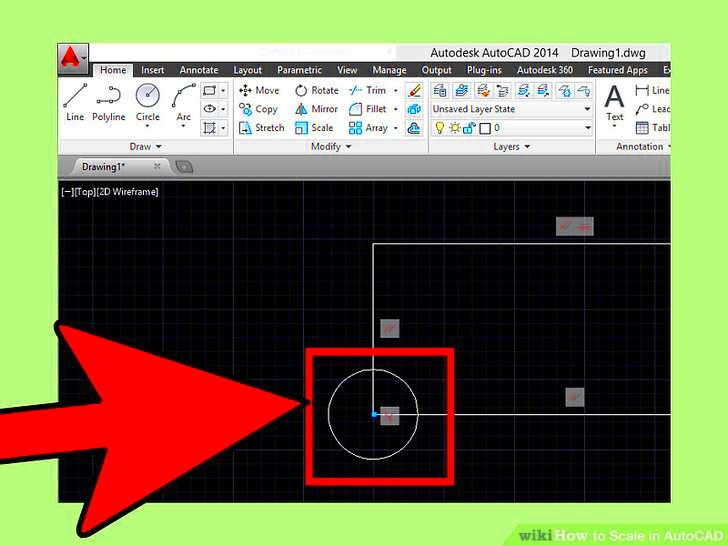
- Select the Image: Click on the image you want to scale. Once selected, you will see the image highlighted, indicating that it’s ready to be adjusted.
- Specify the Base Point: After selecting the image, AutoCAD will ask you to specify a base point. The base point is the anchor from which your image will scale. Choose a point that makes sense for your design, often a corner or central part of the image.
- Enter Scale Factor: You can now enter a scale factor. A factor greater than 1 will enlarge the image, while a factor less than 1 will reduce it. For example, entering "2" will double the size of the image, and "0.5" will reduce it by half.
- Reference Option: If you prefer to scale based on a specific measurement, use the Reference option. You can specify a reference length, and AutoCAD will scale the image proportionally to match the desired dimension.
- Check the Result: Once scaled, check the image to ensure it looks right within your design. You can always repeat the process if you need further adjustments.
Following these steps ensures your images are scaled precisely without distorting the original proportions.
Common Issues When Scaling Images and How to Fix Them
While scaling images in AutoCAD is generally straightforward, there are a few common issues that users may encounter. Here’s a breakdown of these issues and tips on how to fix them:
- Image Distortion: One of the most common issues is image distortion, where the image becomes stretched or compressed. This usually happens when using non-uniform scaling. To fix this, make sure you use uniform scaling options or double-check the scale factors for each axis.
- Loss of Detail: Sometimes, scaling down an image too much can result in a loss of important details, especially in technical drawings. To avoid this, use the Reference Scaling method to ensure you maintain critical dimensions.
- Incorrect Base Point: If the base point is not chosen carefully, the image may not scale as expected. Always select a meaningful base point, such as a corner or a known reference point within the image.
- Scaling Outside the Drawing Area: If you accidentally scale an image too large, it might extend beyond the drawing area. In this case, either undo the action (CTRL + Z) or use a smaller scale factor to bring the image back within view.
By being aware of these issues and how to address them, you can scale images efficiently while avoiding common pitfalls that lead to errors in your designs.
Tips for Maintaining Image Quality While Scaling
When scaling images in AutoCAD, maintaining quality is essential, especially for detailed drawings or high-resolution images. Here are some tips to help preserve image quality during the scaling process:
- Use High-Resolution Images: Start with a high-quality, high-resolution image. Scaling a low-resolution image will result in pixelation and poor clarity. The better the starting image, the more flexibility you’ll have with scaling.
- Stick to Proportional Scaling: Always aim for uniform scaling (same factor for both X and Y axes) to avoid distorting the image. This helps maintain the aspect ratio, ensuring that the image looks natural and not stretched or squished.
- Avoid Scaling Too Much: If you need to scale an image by a large factor, it’s better to do it in smaller increments. Scaling too much at once can cause the image to lose sharpness, so gradual adjustments help preserve clarity.
- Use the Reference Option: When scaling based on measurements, use the Reference option to ensure that key elements of the image are scaled accurately without losing details.
- Check Image Quality After Scaling: After scaling, zoom in to check for any blurring, pixelation, or loss of detail. If the quality has degraded, consider using a higher-quality image or adjusting your scale factors.
By following these tips, you can scale your images in AutoCAD without sacrificing quality, ensuring that your designs stay crisp and detailed.
Frequently Asked Questions (FAQ)
Here are some common questions that come up when working with image scaling in AutoCAD:
- Can I scale an image non-uniformly in AutoCAD?
Yes, you can scale an image differently along the X, Y, or Z axes. However, non-uniform scaling may distort the image, so it’s important to use it only when necessary. - What is the difference between scaling by a factor and reference scaling?
Scaling by a factor allows you to increase or decrease the size of an image by a specific multiplier (e.g., scaling by 2 doubles the size). Reference scaling, on the other hand, lets you scale based on a known distance in the image, which ensures precise adjustments based on measurements. - Why is my image becoming blurry after scaling?
Blurriness can occur if the original image is low resolution or if the image is scaled too much. To avoid this, start with a high-resolution image and scale it gradually. You can also check your display settings and ensure that your image quality is set to high in AutoCAD. - How do I scale an image to fit a specific area?
To fit an image into a specific space, use the Fit to Layout option or scale it using reference points that match the dimensions of the area where the image needs to fit. This ensures the image scales proportionally and fits the design space. - Can I scale 3D models in the same way as images?
Yes, you can scale 3D models in AutoCAD using the same scaling tools. The process is similar, but you need to ensure the scaling is applied uniformly to maintain the proportions of the 3D object.
Conclusion: Mastering Image Scaling in AutoCAD
Mastering image scaling in AutoCAD is essential for maintaining the accuracy and professionalism of your designs. By understanding the different methods, addressing common issues, and following best practices, you can ensure that your images are properly scaled without compromising quality. Whether you're working with simple sketches or complex architectural plans, scaling efficiently will save you time and ensure your projects come out perfect.
 admin
admin


