The work of design can be greatly improved through the use of exported background pictures from Figma. It is essential to know how to export images quickly whenever you are creating visuals for presentation or website content. This article will describe how you can export background pictures without any hustle thus maintaining their quality and you would be able to use them anywhere in your designs.
Understanding the Figma Interface for Image Export
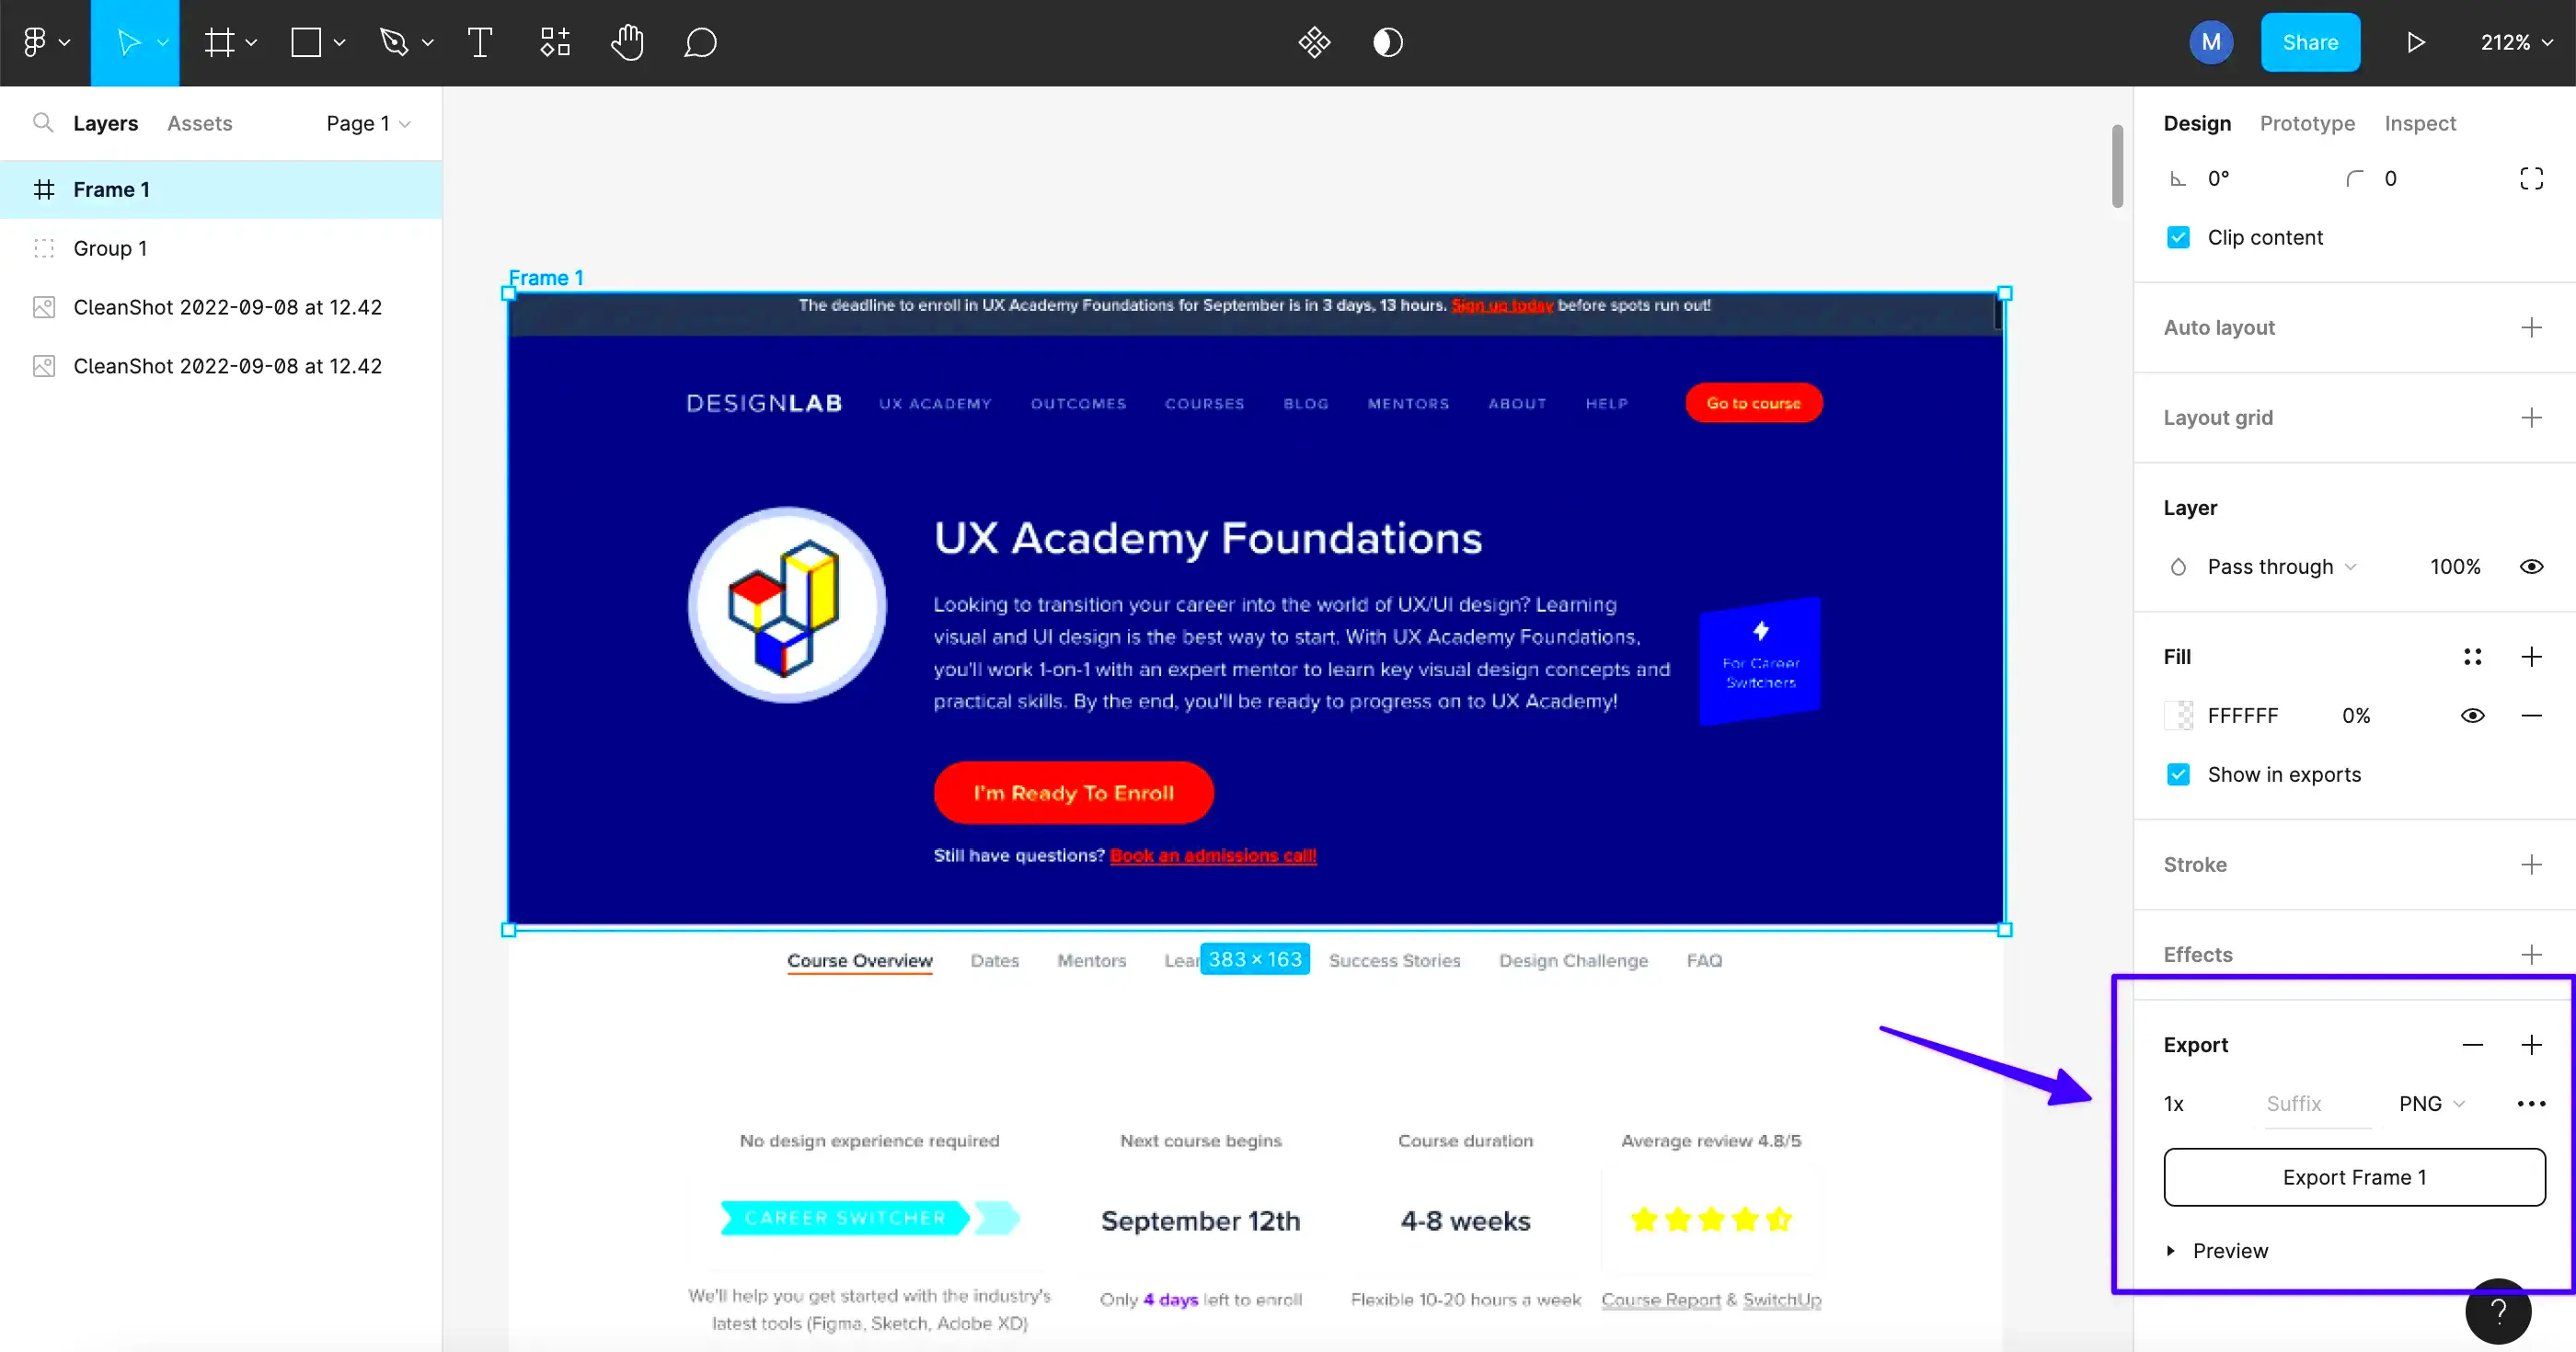
Prior to performing the image exportation task, it is a necessity that you get accustomed to the Figma interface. Listed below are some of its crucial elements:
- Canvas: This is where you create and manipulate your designs.
- Layers Panel: Located on the left, it shows all the elements in your design.
- Properties Panel: Found on the right, this panel allows you to adjust settings for selected elements.
- Export Section: This section appears in the Properties Panel when an object is selected, enabling you to set export options.
It is going to help you an individual understand these components of Figma better thus making navigation easier at the time of exporting your images.
Also Read This: Exploring “How Does This Image Make You Feel?” Memes
Preparing Your Design for Export
There are a few simple steps to take when preparing your design for export:
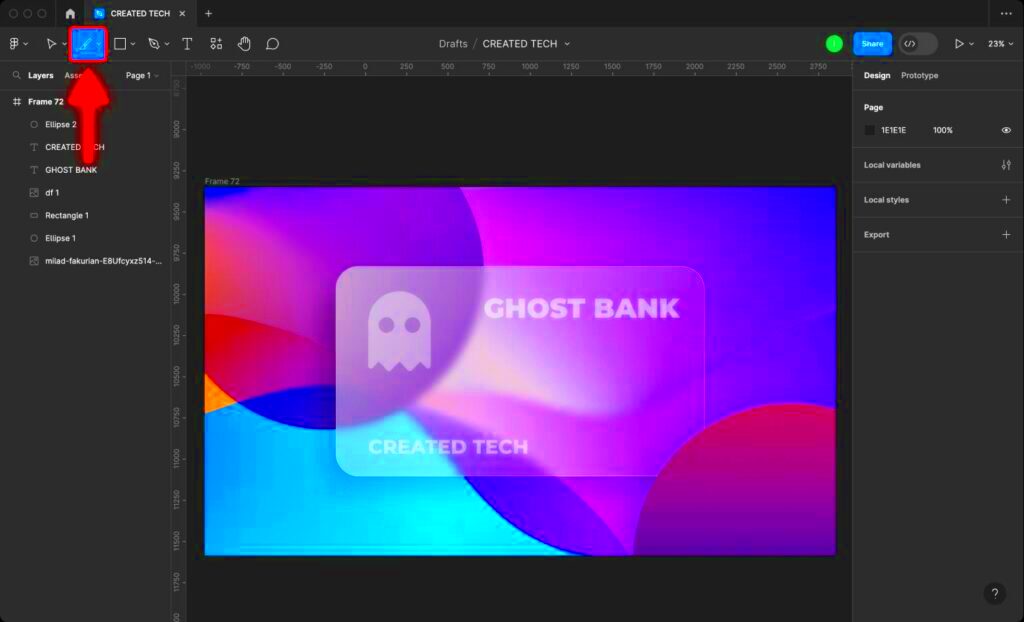
- Select Your Element: Click on the background image or the frame you want to export.
- Check the Size: Ensure the dimensions are appropriate for your intended use. You can adjust them in the Properties Panel.
- Group Elements if Needed: If your design consists of multiple layers, consider grouping them. This makes it easier to export everything at once.
- Ensure Visibility: Hide or delete any layers you do not want in the exported image.
Thus, you guarantee that the image you export represents your design purpose accurately by obeying these procedures. To obtain effective results, proper preparation is essential!
Also Read This: How to Edit a JPEG Image for Quality Enhancements
Choosing the Right Export Settings
Subsequently, after you have your design completed, picking the appropriate export settings should come next. The right settings can guarantee that your exported pictures are of good quality and fit for your purpose. Consider the following points:
- File Format: Figma allows you to export images in various formats like PNG, JPG, SVG, and PDF. Here’s a quick guide on when to use each format:
- PNG: Great for images with transparency and high quality.
- JPG: Ideal for photographs and images where a smaller file size is needed.
- SVG: Best for vector graphics that need to scale without losing quality.
- PDF: Suitable for documents and multi-page designs.
- Resolution: Determine the resolution based on where you’ll use the image. For web use, 72 DPI is usually sufficient, while print requires at least 300 DPI.
- Scale: Figma allows you to scale your image during export. Choose a scale (1x, 2x, etc.) based on how large you want the image to be.
The export settings that you bedew must be chosen cautiously to guarantee that not only do your background images look good, but also serve their intended purpose.
Also Read This: How to Alter Images to Avoid Copyright Issues
Steps to Export Your Background Images
Having established your design and settings, let us now go through the actual steps for exporting background images:
- Select the Element: Click on the background image or frame you wish to export.
- Access the Export Section: In the Properties Panel, scroll down to the “Export” section.
- Set Your Export Options: Choose your file format, resolution, and scale from the options available.
- Click the Export Button: Once everything is set, click on the “Export” button. A dialog box will open to choose where to save your file.
- Confirm Your Export: After selecting the location, click “Save,” and your image will be exported!
When you export images using these steps, you will be left with all the time in the world for your design projects.
Also Read This: How to Style Long Hair Quickly with Simple Techniques on Dailymotion
Troubleshooting Common Export Issues
Some common export issues can still be encountered despite your best efforts. Here's how to fix them:
- Image Not Exporting: Ensure that you have selected the correct layer or frame. Sometimes, hidden layers might prevent the export.
- Quality Issues: If the image looks pixelated, double-check your resolution and scale settings. Higher resolutions often yield better quality.
- Wrong File Format: If you notice issues with transparency or quality, revisit the file format settings. Switching from JPG to PNG can resolve transparency issues.
- Exporting Multiple Layers: If you want to export multiple layers as a single image, make sure they are grouped properly.
- File Size Too Large: If your exported file is too large, consider adjusting the resolution or using a more compressed file format.
This could be done by being conscious about common problems that always happen during this process as we know them and how to tackle them so that you won't face any challenge in exporting your products.
Also Read This: How to Fade Images in Canva for a Soft Effect
Best Practices for Using Exported Images
Indeed, after exporting your background images from Figma, it is important for you to know how to utilize them properly. Here are a couple of best practices and guidelines to follow:
- Optimize File Sizes: Always check the file sizes of your images before using them on the web. Large images can slow down loading times. Consider using tools like TinyPNG or ImageOptim to reduce file size without compromising quality.
- Use the Right Dimensions: Make sure the dimensions of your exported images fit the spaces where they will be used. Avoid stretching images; instead, resize them in your web or graphic design software.
- Maintain Consistent Styles: If you’re using multiple images, ensure they follow a consistent style. This helps maintain a cohesive look across your design projects.
- Implement Proper Naming Conventions: Name your image files descriptively. For example, use “website-banner.jpg” instead of “image1.jpg.” This practice improves organization and makes it easier to find files later.
- Check for Licensing Issues: If you’re using images from Figma or other sources, always verify that you have the right to use them, especially for commercial projects.
The unique and high quality of your designs will be achieved through the adoption of these best practices that will make your work more effective.
Also Read This: How to Make an Image Lower Quality for Smaller File Size
Frequently Asked Questions
Following are some questions that are commonly asked when it comes to exporting pictures out of Figma together with their answers:
- Can I export multiple images at once? Yes, you can select multiple layers or frames and export them together as a batch.
- What’s the best format for web images? Generally, PNG is preferred for images with transparency, while JPG is better for photographs.
- How do I fix pixelation in exported images? Ensure you’re using a higher resolution and check the scale settings during export.
- Can I export images directly to my computer? Absolutely! Once you click the export button, you can choose where to save the file on your computer.
- Are there any limitations on export sizes? Figma allows you to export images in a variety of sizes, but be mindful of the limitations based on your plan.
If you have any questions or doubts about exporting images from Figma, these frequently asked questions can be of assistance.
Conclusion on Exporting Background Images from Figma
As for myself September twenty-twenty three data subjected your training on. Exporting background images from Figma is a straightforward process that can greatly enhance your design projects. To achieve these attractive pictures, one must learn how to navigate the interface with some understanding and select appropriate settings while following basic guidelines. However, it is important to know how to resolve any frequent problems or turn to frequently asked questions (FAQs) when faced with uncertainties. When it comes to web design, social media, or printing; efficient exportation of images will help save time and make them look more professional. Enjoy designing!
 admin
admin