With images that are transparent, you can spice up your presentations a great deal. You can make images more subtle by changing their opacity enabling other items to come through. It is especially useful when you want depth in your slides without making them too busy with details. To make a presentation more professional, one has to know how to use transparency effectively.
Steps to Import Images into Google Slides
Inserting pictures in Google Slides is not a complicated task. The following steps will guide you:
- Open Google Slides: Start by launching your presentation.
- Select the Slide: Click on the slide where you want to add an image.
- Insert Image: Navigate to the top menu and click on Insert, then select Image. You can choose to upload an image from your computer, use a URL, or select from your Google Drive.
- Position the Image: Once the image is inserted, click and drag it to your desired location on the slide.
Your message can be supported with visuals by simply following these steps that are so easy to follow.
Adjusting Image Transparency Using Google Slides Tools
You may find that adjusting the transparency of your image is an essential step after you have imported it. This is how it is done:
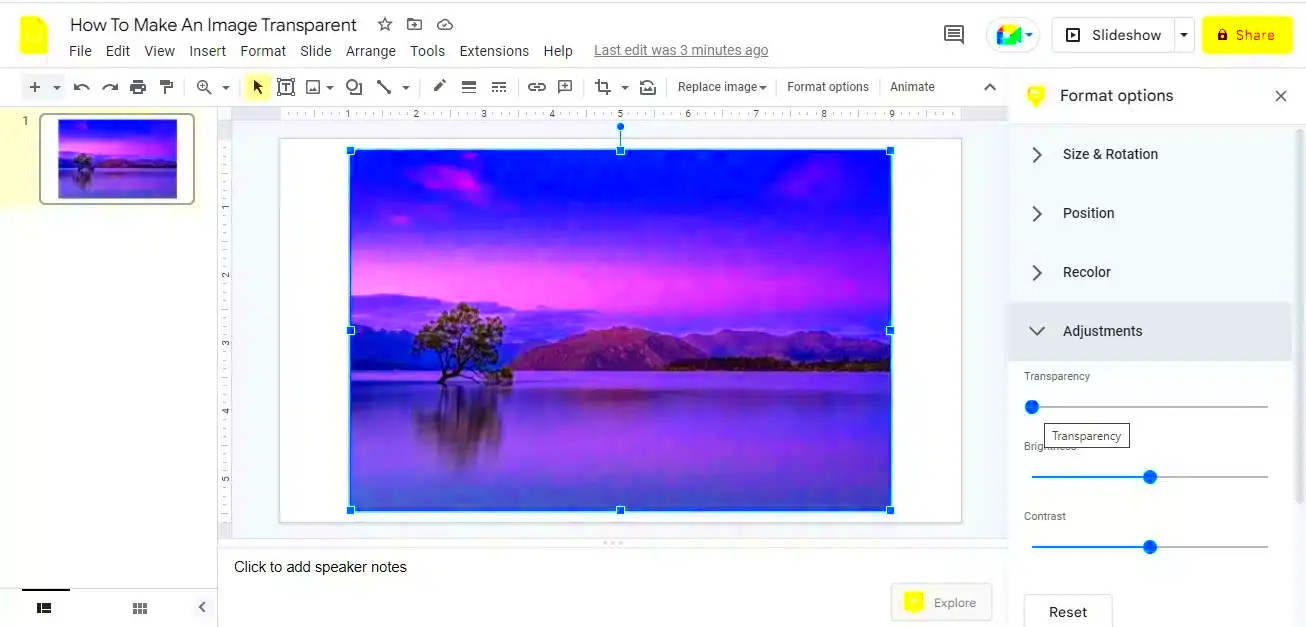
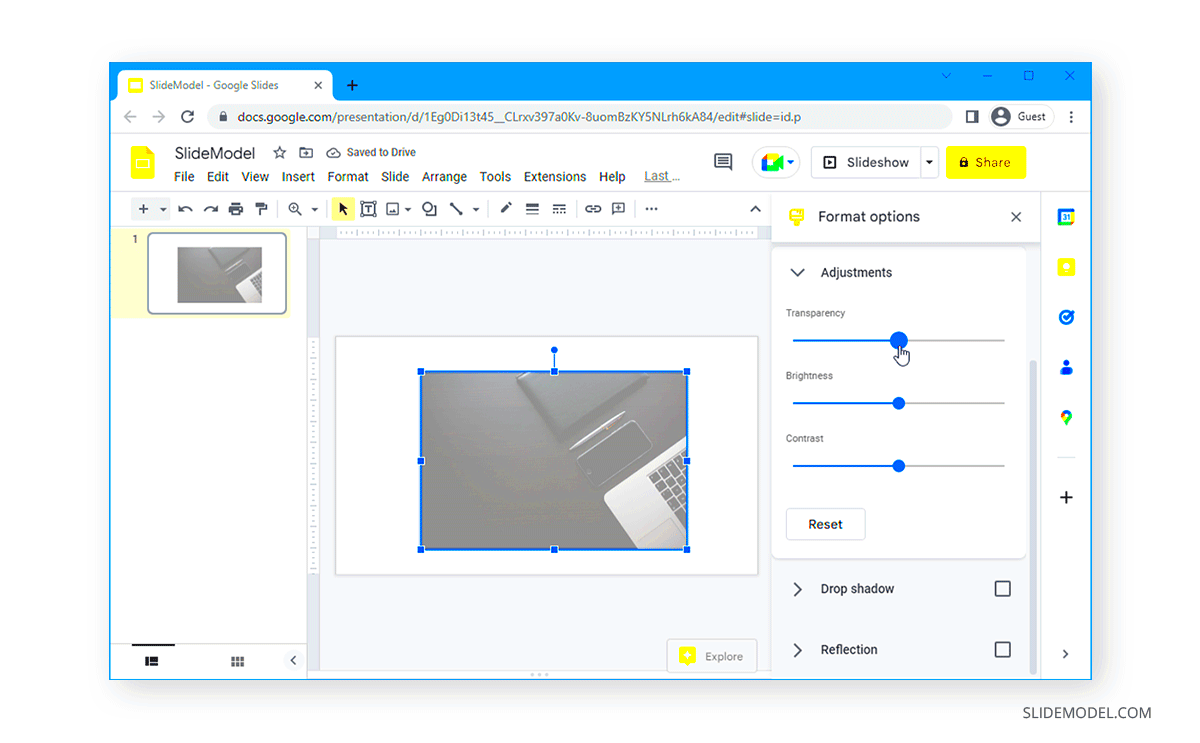
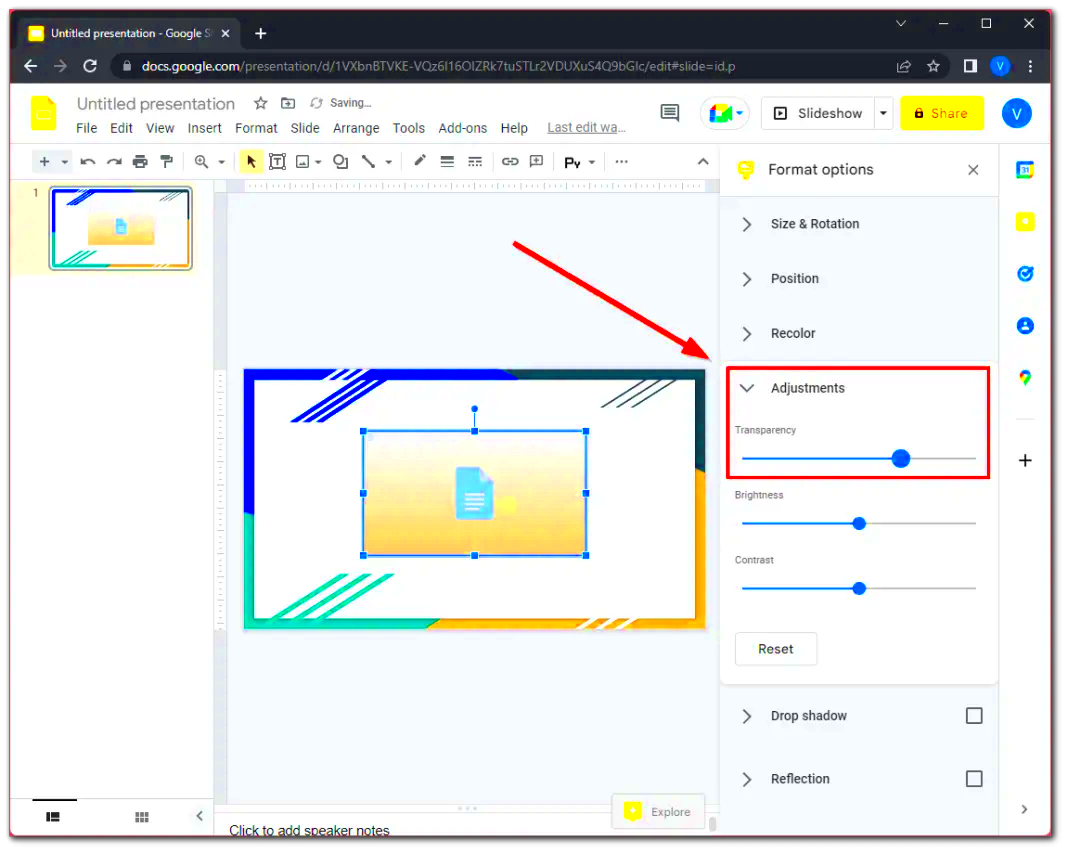
- Select the Image: Click on the image you want to modify.
- Open Format Options: Right-click on the image and choose Format options from the context menu.
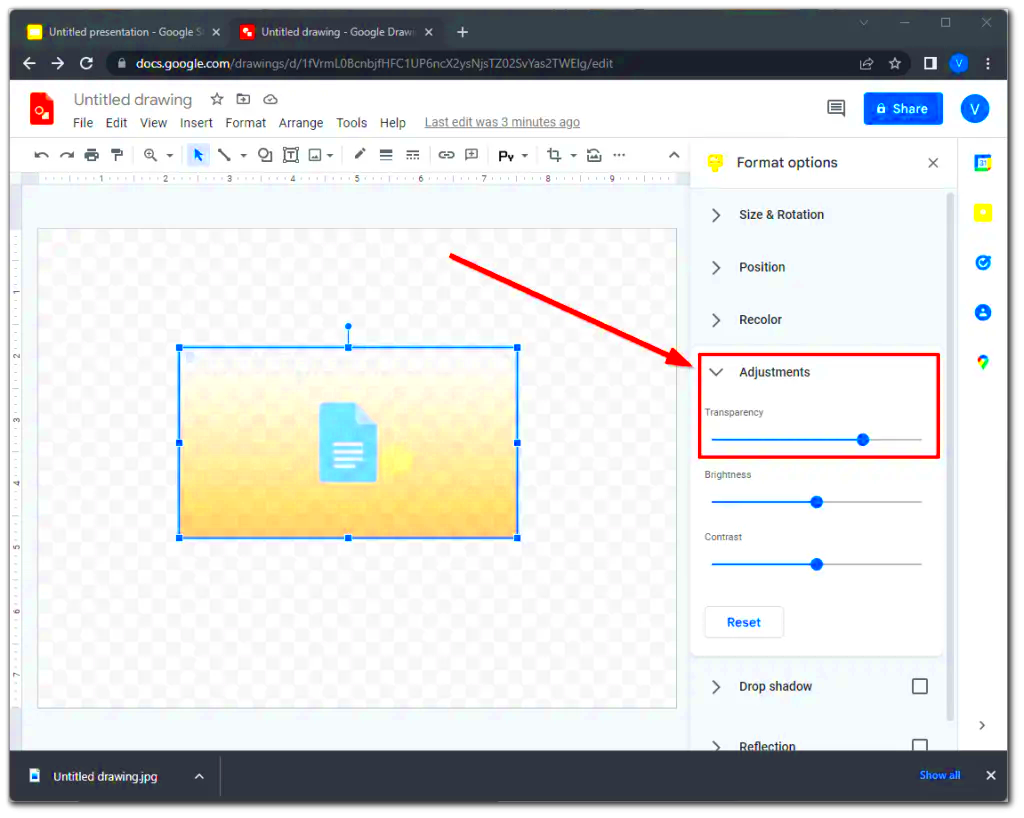
- Adjust Transparency: In the Format options sidebar, locate the Adjustments section. Here, you’ll find a slider for Transparency. Move it left to decrease transparency or right to increase it.
- Preview Changes: As you adjust the slider, keep an eye on the slide to see how the changes look. Fine-tune until you achieve the desired effect.
The ability to use the transparency feature is articulated well for inviting attention to the major points of your presentation in an attractive manner.
Applying Transparency to Shapes and Backgrounds
Google Slides allows you to apply transparency not only to images, but also to shapes and backgrounds. This feature can be used to make your presentation more engaging and dynamic. By adjusting the transparency of shapes or background colors, underlying images or text may even be able to show through for a cleaner look. Let’s examine this further.
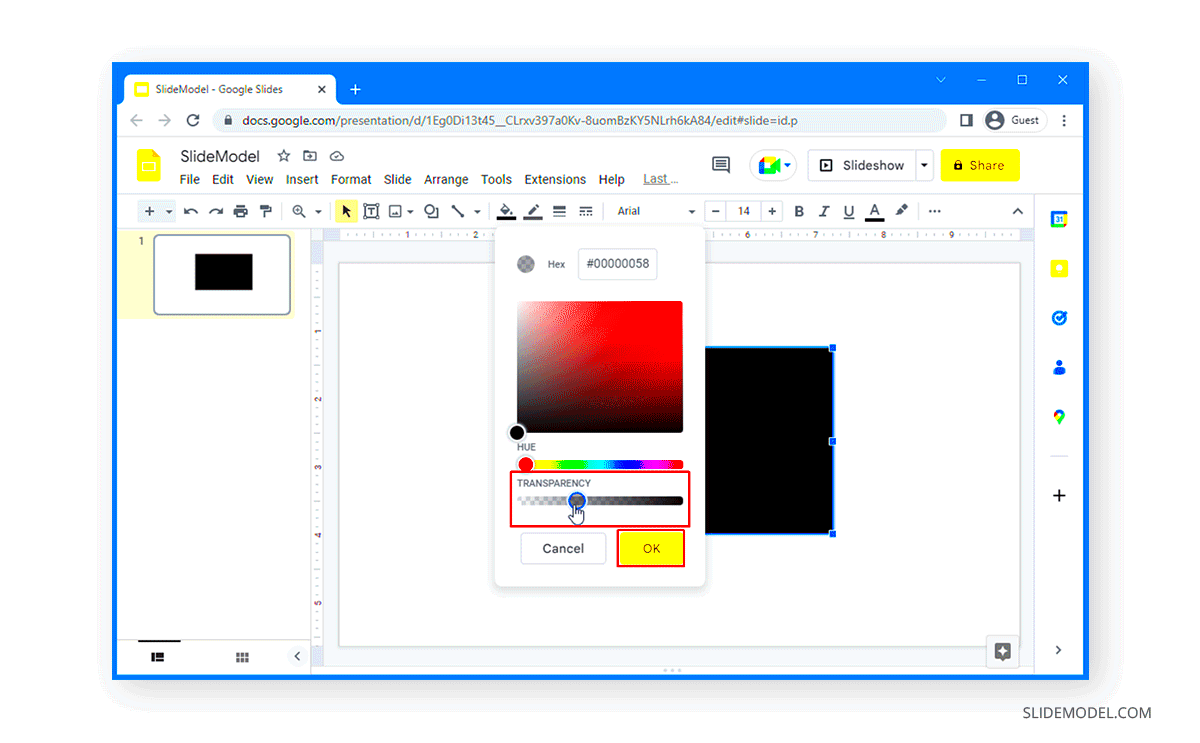
- Select the Shape: Click on the shape you want to modify on your slide.
- Open Format Options: Right-click on the shape and select Format options from the menu.
- Adjust Fill Color Transparency: In the Format options sidebar, find the Fill color section. Click on the paint bucket icon and then choose Custom. You’ll see a transparency slider that allows you to adjust how see-through your shape is.
- Apply Transparency to Backgrounds: For background transparency, go to Background in the slide menu, select Color, and then adjust the transparency as described above.
Utilizing these suggestions will aid you in making an interesting presentation that emphasizes your message better.
Best Practices for Using Transparent Images
The slides can be elevated with the use of transparent images, but it is essential for some best practice to be followed so as to maximize their effects. Here are a couple of suggestions you might want to think about:
- Choose the Right Images: Ensure your images are high-quality and relevant to your content. Blurry or low-resolution images can detract from your message.
- Maintain Contrast: When using transparent images, ensure that the text or other elements are still readable. High contrast between text and background is crucial.
- Limit Transparency: While transparency can be effective, overdoing it can make your images almost invisible. Use transparency judiciously to enhance rather than obscure.
- Test on Different Devices: Always preview your presentation on various devices to see how the transparency looks. What looks good on one screen may not translate well to another.
This conjunction of best practices guarantees that the punchy use of transparency will improve your overall show instead of reducing it.
Common Issues with Image Transparency and Solutions
Even though modifying image transparency is a great technique for your presentations, you may face some typical problems during this process. Below are some challenges and solutions.
- Images Not Appearing Transparent: If your image does not seem to change transparency, make sure you are adjusting the correct settings in the Format options. Double-check that the image is selected and that the transparency slider is being moved.
- Text Hard to Read: If transparency makes your text hard to read, consider changing the text color or increasing its size. Sometimes, adding a solid shape behind the text can help maintain readability.
- Unintended Color Shift: Sometimes, applying transparency can alter the perceived color of your image. To avoid this, try adjusting the brightness or contrast before changing the transparency.
- Images Loading Slowly: If your presentation loads slowly due to large transparent images, consider compressing them before uploading. Use online tools or software to reduce file sizes without losing quality.
You have been schooled on the information up until October 2023.
Examples of Effective Use of Transparency in Presentations
Utilizing visibility proficiently could significantly improve the attractiveness of your presentations. Presented below are some real-life instances of how you may incorporate translucency in to your slides:
- Subtle Background Images: Consider using a large background image with reduced transparency. This technique allows your content to stand out while still providing a visually engaging backdrop. For instance, a city skyline can serve as a backdrop for a business presentation.
- Highlighting Key Information: If you want to draw attention to specific points, try placing transparent shapes behind your text. A semi-transparent rectangle can serve as a highlight that makes your message pop without overshadowing it.
- Layering Visuals: You can layer multiple images with varying levels of transparency. This approach can create a dynamic and interesting visual effect. For example, overlapping a company logo with an image of your team can symbolize unity and collaboration.
- Transparent Icons: Using transparent icons on slides can help maintain a clean look. These can complement your text without being too overpowering. Just ensure they are relevant to the content you’re presenting.
Presentations that have included these examples would appear more sophisticated and high-class hence making them very captivating to the intended audience.
Frequently Asked Questions
Undoubtedly, many are inquiring regarding transparency for Google Slides. What follows are some of the questions and their respective answers:
- Can I make text transparent? No, Google Slides does not allow text transparency. However, you can adjust the background and images behind the text to create a similar effect.
- Is there a limit to how transparent I can make an image? While you can adjust the transparency slider, too much transparency may render the image invisible. It’s best to keep it subtle.
- What file formats work best for transparent images? PNG files are ideal for images with transparency because they maintain high quality and clarity. JPEG files do not support transparency.
- How do I reset an image’s transparency? To reset the transparency, you can either move the slider back to 0% in the Format options or delete the image and reinsert it.
If there are any other inquiries you may have, feel free to get in touch or seek additional information elsewhere on the web!
Conclusion and Final Thoughts
Incorporating transparency in Google Slides can infuse originality into your presentations. Grasping the concept of effectively applying transparency in images, shapes and backgrounds enables you to create captivating visuals that not only hook but also keep the audience. For clarity and impact, always observe best practices. You will find a sweet spot that complements your content if you try out these techniques. Hence experiment with transparency and behold the hilarity of your slides!
 admin
admin


