Image resizing is an essential skill for anyone who works with digital images. Whether you're a blogger, a social media manager, or just someone who loves photography, knowing how to resize images can help you optimize your content. Resizing allows you to change the dimensions of an image without losing its quality, making it perfect for various uses, such as web design, printing, or sharing on social media.
When resizing an image, there are a few key factors to consider:
- Aspect Ratio: This is the ratio of the width to the height of an image. Maintaining the aspect ratio is crucial to prevent distortion.
- Resolution: This refers to the amount of detail an image holds, often measured in pixels. Higher resolution means better quality.
- File Format: Different formats (like JPEG, PNG, or GIF) can affect how your resized image looks and how much space it takes up.
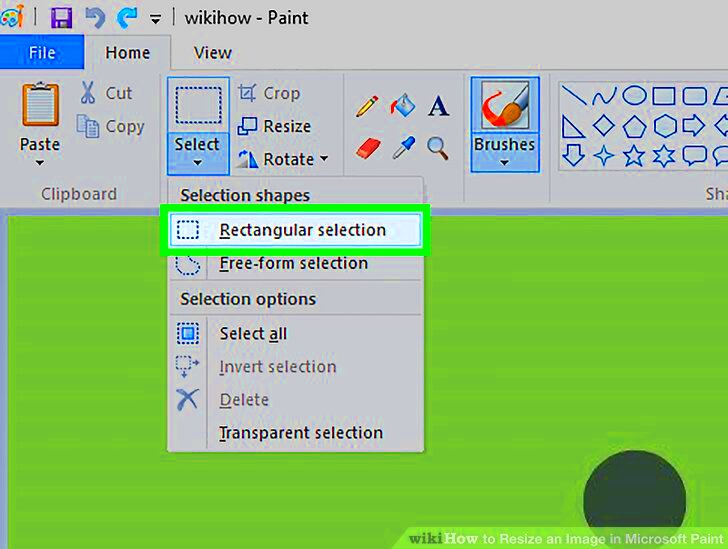
Accessing Microsoft Paint
Microsoft Paint is a straightforward tool that comes pre-installed on most Windows computers. It’s user-friendly and perfect for basic image editing tasks like resizing. Here’s how you can access it:
- Click on the Start button or press the Windows key.
- Type Paint in the search bar.
- Click on the Paint app that appears in the results.
Once Paint is open, you're ready to start resizing your images!
Also Read This: Mastering Adobe Stock Templates in Premiere Pro
Opening Your Image in Paint
To resize an image, the first step is to open it in Microsoft Paint. This process is quick and easy:
- In Paint, click on the File menu in the upper left corner.
- Select Open from the dropdown menu.
- Browse through your folders to find the image you want to resize.
- Click on the image file, then click Open.
Your image will now appear in the Paint workspace, ready for resizing. Make sure to check that it's the right image before proceeding!
Also Read This: How to Download Images with Transparent Backgrounds
Choosing the Right Resizing Option
When it comes to resizing images in Microsoft Paint, you have a couple of options to choose from. Understanding these options is key to ensuring your images look just the way you want them. The two main methods are using the percentage option and the pixel option.
Here’s a quick breakdown of each method:
- Percentage: This option allows you to resize your image based on a percentage of its original size. For instance, if you want to make your image half its original size, you would enter "50" in both the width and height boxes. This method keeps the aspect ratio intact, preventing distortion.
- Pixels: With this option, you can specify the exact width and height in pixels. This is useful if you need your image to fit specific dimensions. However, be careful not to enter dimensions that would change the aspect ratio unless that's what you want.
To access these options:
- Click on the Resize button in the toolbar.
- Choose either Percentage or Pixels.
Picking the right option depends on your needs, so think about where you plan to use the image before making a decision!
Also Read This: How to Use Leading Lines to Create Powerful Images
Adjusting Image Size Manually
Once you've chosen the right resizing option, it’s time to adjust your image size manually. This step is straightforward and gives you control over the final dimensions. Here's how you can do it:
- With your image open in Paint, click on the Resize button.
- Select either the Percentage or Pixels option, based on your earlier choice.
- For percentage resizing, enter the new width and height as a percentage of the original size. For pixels, enter the exact dimensions you want.
Don’t forget to check the box labeled Maintain aspect ratio if you want the width and height to scale together. This will help prevent any stretching or squishing of the image. After entering your new dimensions, click OK to see the changes.
Also Read This: Teams Screen Share: Sharing Screen on Microsoft Teams on Mac
Maintaining Image Quality While Resizing
One of the biggest concerns when resizing images is maintaining quality. Nobody wants a blurry or pixelated image, especially if it’s for a blog or social media post. Here are some tips to help ensure your resized image remains sharp and clear:
- Use High-Resolution Images: Starting with a high-quality image will give you better results when resizing. Low-resolution images often lose quality when scaled.
- Avoid Large Increases in Size: If you enlarge an image too much, it can become blurry. Try to keep your resizing within a reasonable range.
- Check the File Format: Different file formats handle quality differently. JPEG is great for photos but may lose quality with multiple saves. PNG is better for graphics and images that require transparency.
- Preview Before Saving: Always preview your resized image before saving it. Zoom in to check if it looks clear and sharp.
By following these tips, you can resize your images without sacrificing quality, ensuring they look great no matter where you use them!
Also Read This: How to Crop an Image in Lightburn Software
Saving Your Resized Image
After you’ve resized your image in Microsoft Paint, the next important step is to save it. If you skip this, all your hard work will go to waste! Saving an image is pretty straightforward, but there are a few things to keep in mind to ensure it meets your needs.
Here’s how to save your resized image:
- Click on the File menu in the upper left corner of Paint.
- Select Save As from the dropdown menu. This option lets you choose a new name or format for your file.
- Choose the desired file format from the list. Common formats include:
- JPEG: Best for photographs and images with gradients.
- PNG: Ideal for images requiring transparency or when preserving quality is important.
- BMP: A basic format that retains quality but results in larger file sizes.
- Type a new name for your image if you want to keep the original. Make sure to remember where you're saving it!
- Click Save to finalize the process.
Now your resized image is saved and ready for use! Whether you’re posting it online or using it in a presentation, ensuring it’s saved correctly is crucial.
Also Read This: Mastering the Art of Reading Blurred Text in Images
Frequently Asked Questions
When it comes to resizing images, many people have questions. Here are some common inquiries and their answers:
- Can I resize an image without losing quality?
- Yes, as long as you start with a high-resolution image and resize it carefully. Avoid making dramatic increases in size.
- What’s the best format to save a resized image?
- It depends on your needs. JPEG is great for photos, while PNG is better for graphics and images needing transparency.
- How do I know if the aspect ratio is correct?
- If you check the box for "Maintain aspect ratio" while resizing, Paint will automatically keep the ratio intact, preventing distortion.
- Is it better to resize images before or after editing them?
- It’s generally best to resize before doing any heavy editing. This way, you’re working with a manageable file size.
Conclusion
Resizing images using Microsoft Paint is a simple yet powerful skill that can enhance your digital content. By understanding how to resize effectively, maintain quality, and save your images properly, you can ensure your visuals look their best. Remember to choose the right resizing options, adjust sizes manually, and always keep an eye on quality. With these tips in mind, you’re now equipped to handle any image resizing task with confidence!
So go ahead, give it a try! Your images will thank you for it.
 admin
admin


