In web design,
image buttons are a vital component. The first role of these buttons is to improve the look of websites while the latter one is to make them more comfortable for use by people. When you compare the traditional text links with
image buttons, it is clear that they can redirect visitors to certain actions such as downloads, submission of forms and movement from one section to another within the site. The justification for this lies in:
- Attract Attention: A well-designed image button can grab a visitor's attention and encourage interaction.
- Visual Communication: Images can convey messages more effectively than text alone, making it easier for users to understand what action to take.
- Branding: Custom image buttons can help reinforce your brand identity, ensuring consistency across your website.
Gathering Required Tools for Creating Image Buttons
Adobe Photoshop or GIMP or an equivalent
image editing program (for creating the button graphics).
Image formats such as PNG or JPG (for storing your button images). A hex code chart (for determining the color of each part). Optionally (but recommended), you could use a drawing tablet to create the design more easily.
- A Code Editor: Choose a code editor like Visual Studio Code, Sublime Text, or Notepad++. These editors provide syntax highlighting and other useful features.
- Image Editing Software: Software like Adobe Photoshop, GIMP, or Canva can help you create and edit your button images to fit your design needs.
- Web Browser: Use any modern web browser like Chrome, Firefox, or Safari to test your image buttons and see how they function on different devices.
With these devices at your disposal, you will be able to work more efficiently and design
image buttons that are sure to be effective.
Writing the HTML Code for Your Image Button
Now that you’ve got your instruments set up, it’s high time for you to create an HTML code for your
image button. The script is pretty elementary. To assist you get started off with, here is a simple frame:
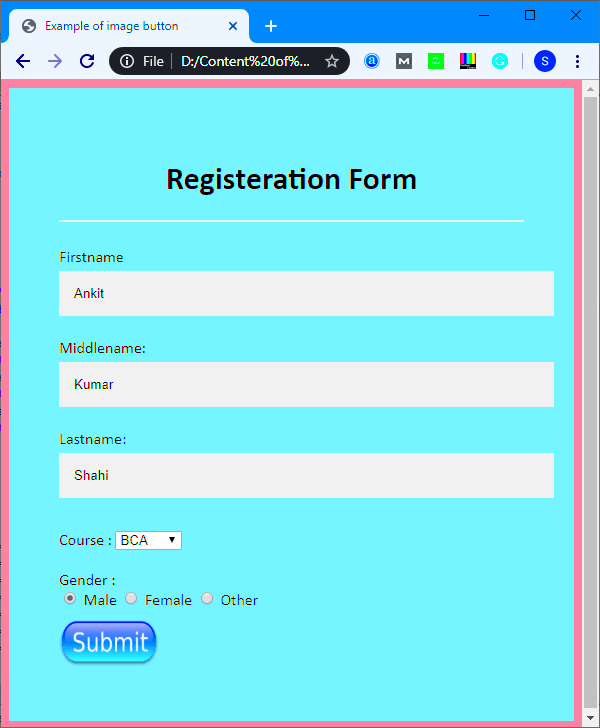
<a href="URL">
    <img src="image-path.jpg" alt="Button Description" />
</a>
To put it another way:
- <a href="URL">: This creates a link. Replace URL with the destination you want users to go to when they click the button.
- <img src="image-path.jpg">: This tag inserts the image. Replace image-path.jpg with the path to your button image.
- alt="Button Description": Always include an alt attribute for accessibility. This text appears if the image fails to load and helps visually impaired users understand the button's purpose.
Upon completion of the HTML script, just save it and lauch your file in a web browser so that you may actually visualize how an
image button would work.
Adding CSS for Styling Your Image Button
Having set up your image button, it’s now time to apply CSS styling so that it can look attractive. The purpose of all these design modifications is to enhance the appearance of the button as well as increase user engagement. Below is a guide on adding CSS to an image button:
- Basic Styling: Start by defining the size and border for your button. Here’s a simple CSS snippet:
img {
    width: 150px; /* Set the width */
    height: auto; /* Maintain aspect ratio */
    border: 2px solid #007BFF; /* Add a border */
    border-radius: 5px; /* Round the corners */
    transition: transform 0.3s; /* Smooth transition effect */
}
- Hover Effects: Adding hover effects can make your button more interactive. For example:
img:hover {
    transform: scale(1.05); /* Enlarge the button on hover */
}
- Background and Shadow: You can add a background color or a shadow for depth:
img {
    background-color: #f0f0f0; /* Light background */
    box-shadow: 2px 2px 5px rgba(0,0,0,0.5); /* Add shadow */
}
It’s not just about making it look good; it’s also about providing an improved user experience. The image button will seem attractive and tasteful after being appropriately styled. Consider trying out other styles until you come across the one that suits your website perfectly!
Making Your Image Button Responsive for Different Devices
In today's digital age, users navigate through websites using different devices hence it is important to make your image button responsive. A responsive button alters its size according to the screen it is viewed on. Here are several ways to ensure that your button looks appealing on any device you use:
- Use Percentage Width: Instead of setting a fixed width, use a percentage. This allows your button to scale with the screen size:
img {
    width: 50%; /* Adjusts with screen size */
    max-width: 200px; /* Sets a maximum width */
}
- Media Queries: You can also use media queries to change styles based on screen size:
@media (max-width: 600px) {
    img {
        width: 100%; /* Full width on smaller screens */
    }
}
In spite of the device used by your users, the image button will work well and look beautiful when these strategies are followed.
Testing Your Image Button for Functionality
After your image button has been created, you must check its functionality. This is to make sure everything is working as it should and that there will be a pleasant experience for the people using it. Below are the procedures that should be followed:
- Check Links: Make sure the URL linked to your button is correct. Click on the button to verify that it takes you to the right page.
- Inspect in Different Browsers: Test your button in multiple web browsers (like Chrome, Firefox, and Safari) to see if it appears and works consistently.
- Use DevTools: Open your browser's developer tools to check for any console errors or issues with your HTML or CSS. You can also see how your button behaves when resized.
- Mobile Testing: Use responsive design tools or real devices to ensure your button works well on mobile and tablet screens.
Through thorough examination of your picture button, possible problems may be identified and the best experience for the user guaranteed by all means. Indeed, without any confusion it is important that buttons work well so as to steer users effortlessly across a site!
This is necessary to assist them have more knowledge about what they are interacting with on this platform.
Considering its significance let them act as maps which will guide people however they are lost when visiting those pages because navigation might have reached such complexities or simply become unmanageable due to different reasons among others.
A properly functioning button enhances user experience by making sure our visitors know where exactly they are at any given moment hence learning about our website on their own without even realizing it!
Common Issues When Creating Image Buttons
There may be some challenges in the creation of image buttons at times. It is important to note down some of the common problems so as to quickly rectify them and maintain user satisfaction. Some of these include:
- Image Not Loading: One of the most common issues is the image not appearing. This could be due to an incorrect file path or the image being in the wrong format. Always double-check your
src attribute and ensure your image file is accessible.
- Accessibility Issues: If you forget to include the
alt attribute, users with visual impairments may not understand what the button does. Always include descriptive alt text to make your buttons more accessible.
- Inconsistent Sizing: If your button looks great on one screen but not on another, you might be dealing with sizing issues. Using fixed pixel values can lead to problems. Instead, use relative units like percentages or employ CSS media queries for responsiveness.
- Poor Clickability: Sometimes, users might find it hard to click your image button. Make sure it's large enough to be easily clickable, especially on mobile devices. A good rule of thumb is to ensure it’s at least 44x44 pixels.
If you know about the common problems, you can make image buttons that not only appear to be great but also run smoothly for every user.
Best Practices for Using Image Buttons in Your Projects
The best way to improve applications on websites is by using image buttons. When including image buttons in your projects, it is good to know some of the best practices to follow:
- Keep It Simple: Avoid overly complex designs. Your button should be easy to understand at a glance. A clear, simple design communicates its purpose effectively.
- Use High-Quality Images: Ensure that the images you use are of high quality. Low-resolution images can look unprofessional and may deter users from clicking.
- Consistent Branding: Use colors and styles that align with your brand. Consistent branding helps users feel familiar and comfortable on your site.
- Provide Feedback: Implement hover effects or color changes when users interact with the button. This visual feedback helps users know their click is registered.
- Test Different Designs: Don't hesitate to experiment with different button designs and placements. A/B testing can provide valuable insights into what works best for your audience.
Adhering to these best techniques, one can design image buttons that improve both the appearance of your website and its usability as well as involvement levels.
Frequently Asked Questions About Image Buttons in HTML
When we talk about making image buttons in HTML, many users have queries. Here are a few of the commonly asked questions which will help clear up frequent doubts:
- What is the best image format for buttons? Generally, PNG and JPEG are the most commonly used formats. PNG is great for images with transparency, while JPEG works well for photographic images.
- How do I make my image button accessible? To ensure accessibility, always use the
alt attribute to describe your button's purpose. Additionally, ensure that it can be navigated using a keyboard.
- Can I add links to image buttons? Absolutely! Wrap your
<img> tag in an anchor tag <a> to link it to another page or resource.
- How can I make my button responsive? Use percentage widths or CSS media queries to adjust the size of your button based on the user's screen size.
- What should I do if my button isn’t clickable? Make sure there are no overlapping elements on your webpage and that the button has sufficient size for clicking, especially on mobile devices.
By addressing these frequently asked questions, you will be able to design image buttons that work as they should, are easy to understand by any kind of user and are accessible for everyone who visits your site.
Conclusion on Creating Effective Image Buttons
To incorporate effective buttons from images is a critical aspect of web designing which will drastically improve user experience.
Based on what’s contained in this post, you will be sure that your image buttons are not just appealing but also serve their intended purpose and are user friendly. Remember consisitency in branding helps strengthen website identity while the use of quality images promotes accessibility.Carry out tests on different devices and browsers to find out if there are any problems with the button that may potentially affect your users’ experience.
If properly done, image buttons can help to guide users all over the site smoothly thus enhancing interaction and engagement.Their design may differ but they have similar objectives; to ensure that they do the work for the users, as well as make the entire web site operate more perfectly.
 admin
admin


