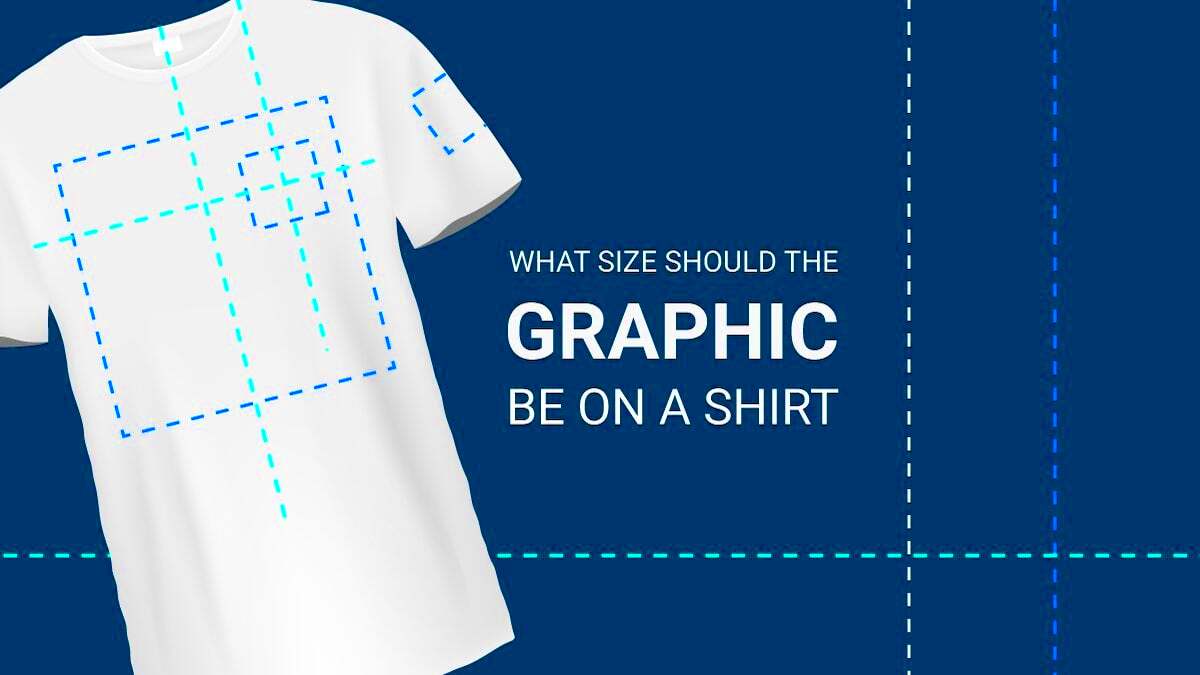
When creating a design for a t-shirt, the size of the image is crucial. It affects not only how the design looks but also the quality of the print. Whether you're creating a simple logo or an intricate design, understanding the ideal image size for your t-shirt project can make a big difference. Getting it wrong can lead to blurry prints or awkwardly placed designs, so it’s important to get it just right.
In this section, we’ll explore how to select the right image size for your shirt and what factors to consider before printing.
Why Image Resolution Matters for T-Shirts
The resolution of your image plays a big role in how sharp and clear the design appears when printed on a shirt. Image resolution refers to the number of pixels per inch (PPI) or dots per inch (DPI) in an
Here are some important points to remember:
- For t-shirt printing, aim for at least 300 DPI to get a crisp design.
- Lower resolution images, such as 72 DPI, may look fine on screen but will appear blurry or pixelated when printed on fabric.
- High-resolution images ensure that all details, especially in complex designs, are well represented on the shirt.
Choosing the right resolution is especially important if you're printing a detailed design with intricate patterns or text. Always check the DPI before sending the design for printing to ensure high quality.
Also Read This: How to Extract an Outline from an Image for Different Projects
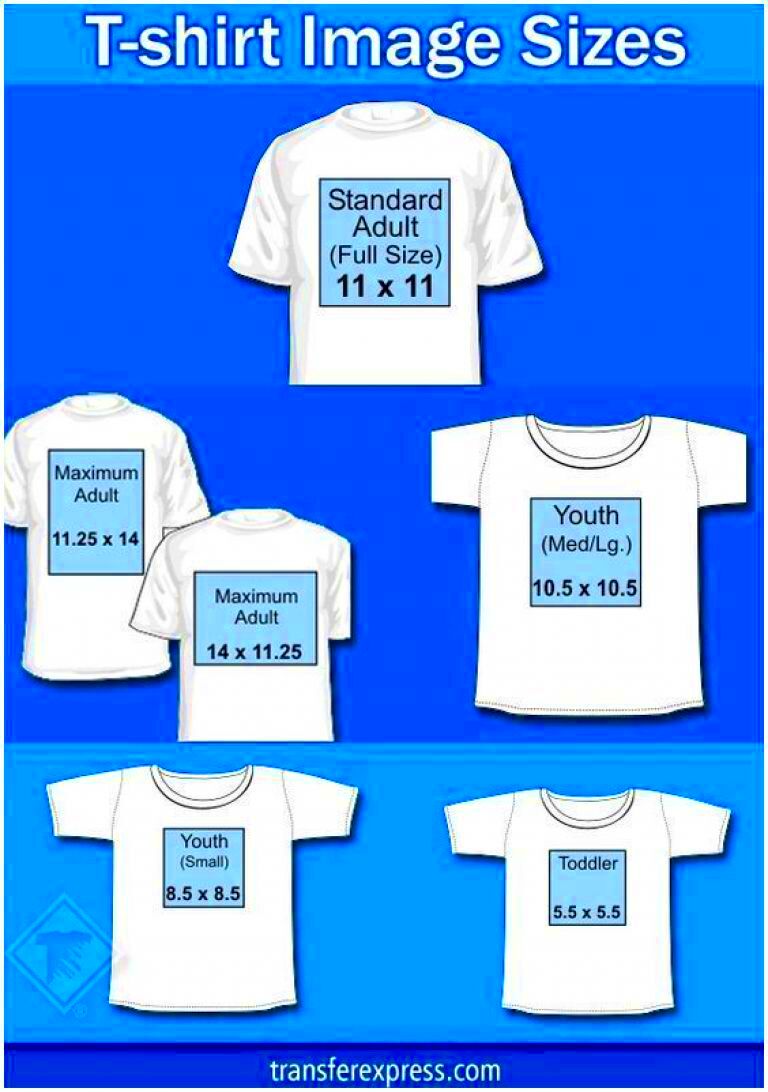
Choosing the Right Dimensions for Different Shirt Sizes
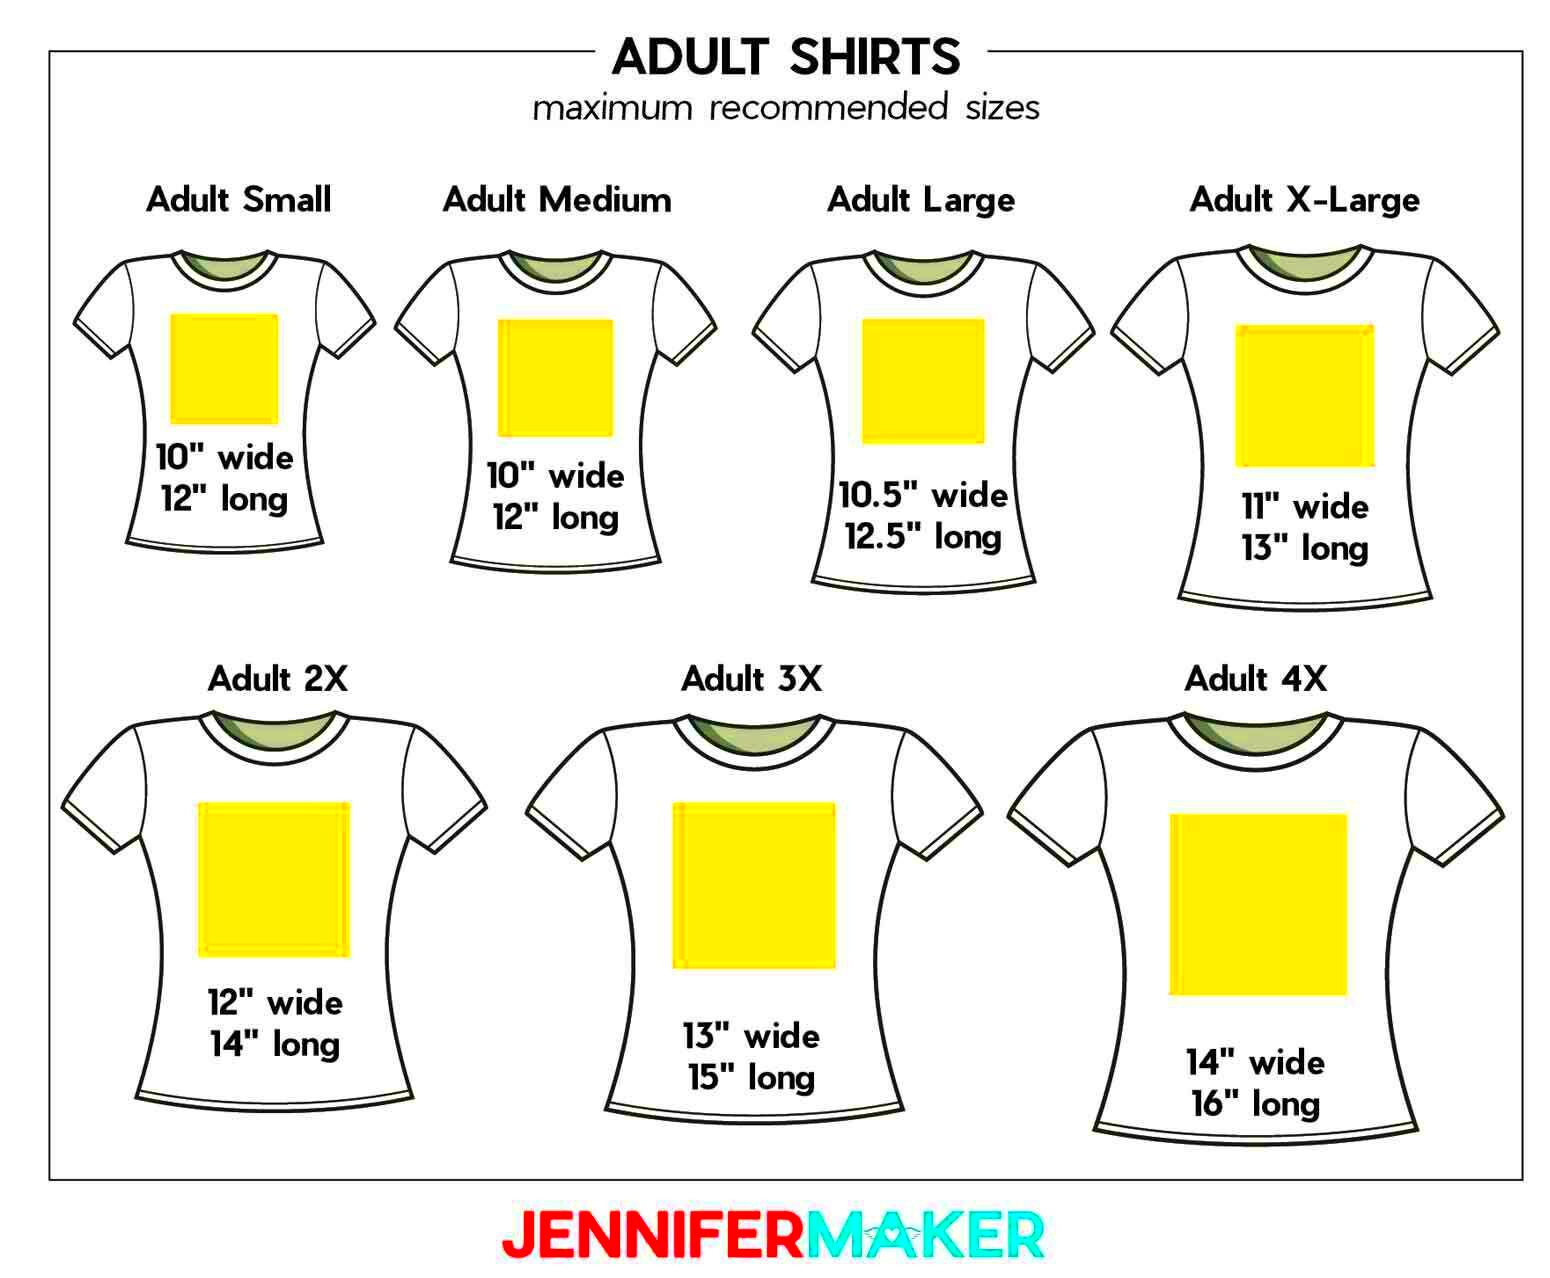
The dimensions of your image should align with the size of the shirt you're printing on. Printing a small design on a large t-shirt, for instance, might look out of proportion. Similarly, a large image on a small shirt may be overwhelming or look cramped.
Here’s a basic guideline for image dimensions:
| Shirt Size | Image Size (Width x Height) |
|---|---|
| Small (S) | 8" x 10" |
| Medium (M) | 10" x 12" |
| Large (L) | 11" x 14" |
| Extra Large (XL) | 12" x 16" |
These dimensions are a general guide, but depending on the design and the placement, you might want to adjust accordingly. Make sure to preview your design on a shirt mock-up before finalizing it to ensure it looks balanced.
Also Read This: Does Your Photoshop or Premiere Subscription Include Adobe Stock?
Best File Formats for Shirt Printing
Choosing the right file format is critical for t-shirt printing. The format you use determines the quality of the image and how well it translates onto fabric. Not all file types are created equal when it comes to printing, so it's important to understand which formats work best for this purpose.
Here are the most recommended file formats for t-shirt printing:
- PNG: This is one of the most commonly used formats for t-shirt printing because it supports high resolution and transparent backgrounds. PNG files retain a lot of detail, making them ideal for designs with multiple colors.
- SVG: As a vector format, SVG files can be resized without losing quality. This makes them perfect for logos and designs that need to be scaled to different shirt sizes.
- EPS: Similar to SVG, EPS files are vector-based, meaning they maintain high quality at any size. They are often used in professional printing environments.
- PDF: PDF files are versatile and can include both vector and raster images. They are widely accepted by print shops and can preserve design quality.
- AI (Adobe Illustrator): If you’re working with a professional designer, AI files are commonly used. They are vector-based and allow for detailed adjustments.
Avoid using file formats like JPEG or GIF for printing, as they tend to compress the image and result in lower quality prints, especially on fabric.
Also Read This: How to Open Your Adobe Stock Pictures
Common Mistakes to Avoid in Image Sizing for Shirts
Designing for t-shirt printing is not as simple as slapping an image onto a shirt. There are several pitfalls that can affect the final result if you’re not careful about image size and quality. Here are some common mistakes to avoid:
- Using Low-Resolution Images: One of the biggest mistakes is using images with a low DPI. As mentioned earlier, always use at least 300 DPI for clear, sharp prints.
- Wrong Image Dimensions: Oversized or undersized designs can make the shirt look awkward. Ensure that the image dimensions are proportional to the shirt size.
- Ignoring Margins and Bleeds: Some designs require extra space for trimming or adjusting during printing. Make sure your design has appropriate margins to avoid losing important elements.
- Choosing the Wrong File Format: As discussed, avoid using compressed formats like JPEG that lower the quality of your print. Stick to formats that maintain image clarity.
- Not Previewing the Design: Before sending the design for printing, always preview it on a shirt mock-up. This helps in checking the placement and scale of the design to ensure it looks great.
By being aware of these mistakes, you can save yourself from reprinting costs and get the perfect design on your shirt the first time around.
Also Read This: How to Make Money from Getty Images and Build a Successful Photography Business
How to Prepare Images for Printing on Shirts
Before sending your design off to be printed, it’s essential to properly prepare the image. Taking the time to get the details right ensures the final product looks professional and high-quality.
Follow these steps to prepare your image for printing:
- Set the Correct Resolution: Always make sure your image has at least 300 DPI to maintain sharpness and clarity when printed.
- Choose the Right File Format: Save your image in a print-friendly format like PNG, SVG, or PDF to avoid quality loss.
- Adjust the Color Mode: Most t-shirt printers use CMYK color mode. If your image is in RGB (used for digital screens), convert it to CMYK to ensure the colors print correctly.
- Size Your Design Properly: Resize the image to match the dimensions required for the shirt size. Reference the size chart you’re using to ensure the design is proportional.
- Remove Unwanted Backgrounds: If your design needs a transparent background, make sure to remove any unwanted elements. Use PNG format to preserve transparency.
- Check for Bleeds and Margins: Ensure that your design has enough margins and bleeds (extra space) for the printer to work with. This prevents any important parts of the design from being cut off during the process.
- Preview on a Mock-Up: Always do a test run by placing your image on a mock-up of the t-shirt to see how it looks in real life. This will help you adjust the placement and size if needed.
Following these steps ensures that your image is fully ready for a professional print, resulting in a high-quality t-shirt design.
Also Read This: Making Images Transparent in Illustrator for Stunning Designs
FAQs About Image Sizes for Shirts
When it comes to getting the right image size for t-shirts, there are some common questions that often come up. Here, we’ll answer the most frequently asked questions to help clear up any confusion.
1. What is the ideal image size for a t-shirt design?
The ideal size depends on the shirt and design placement. Generally, for a standard t-shirt design on the front, an image size of around 10" x 12" works well. However, for smaller designs, like a chest logo, 4" x 4" is sufficient.
2. What DPI should I use for t-shirt printing?
Always aim for 300 DPI or higher. This ensures the design is clear and sharp when printed. A lower DPI, such as 72, can result in pixelated or blurry images.
3. Can I use a JPEG file for t-shirt printing?
While it’s possible to use JPEG, it’s not recommended. JPEG compresses images, reducing quality. It’s better to use PNG, SVG, or PDF to retain the image’s details and clarity.
4. How do I ensure the image size is proportional to the shirt size?
Check the dimensions of the shirt and adjust your design accordingly. You can use a mock-up to visualize how the image will look on different shirt sizes and make adjustments if necessary.
5. Should I design in RGB or CMYK for t-shirt printing?
Most print shops use CMYK color mode for t-shirts. If your design is in RGB (which is common for digital screens), make sure to convert it to CMYK to get accurate color representation.
Conclusion: Getting the Perfect Image Size for Your Shirt Design
In summary, achieving the perfect image size for your shirt design involves considering factors like resolution, file format, and shirt dimensions. By carefully preparing your design and avoiding common mistakes, you can ensure that your final print looks professional and high-quality.
 admin
admin


