Projector image flipping is one of the basic functions that can be used to modify the orientation of projected images according to your installation. This procedure ensures that images are well-corrected when the projector has a peculiar position or when you want to change from a standard to an inverted display. When you understand how image flipping functions, you can have a better viewing experience and make sure the picture appears exactly as you want it.
A good number of projectors usually come with options included that enable them to flip images either horizontally or vertically. This aspect is critical when it comes to ceiling mounted projectors as they normally project upside-down videos. In addition, understanding how to rotate your projector image can save your time and energy since you do not need to move the device itself around.
Why You Might Need to Flip a Projector Image
Flipping a projector image is a necessity in several situations. Below are some usual cases:
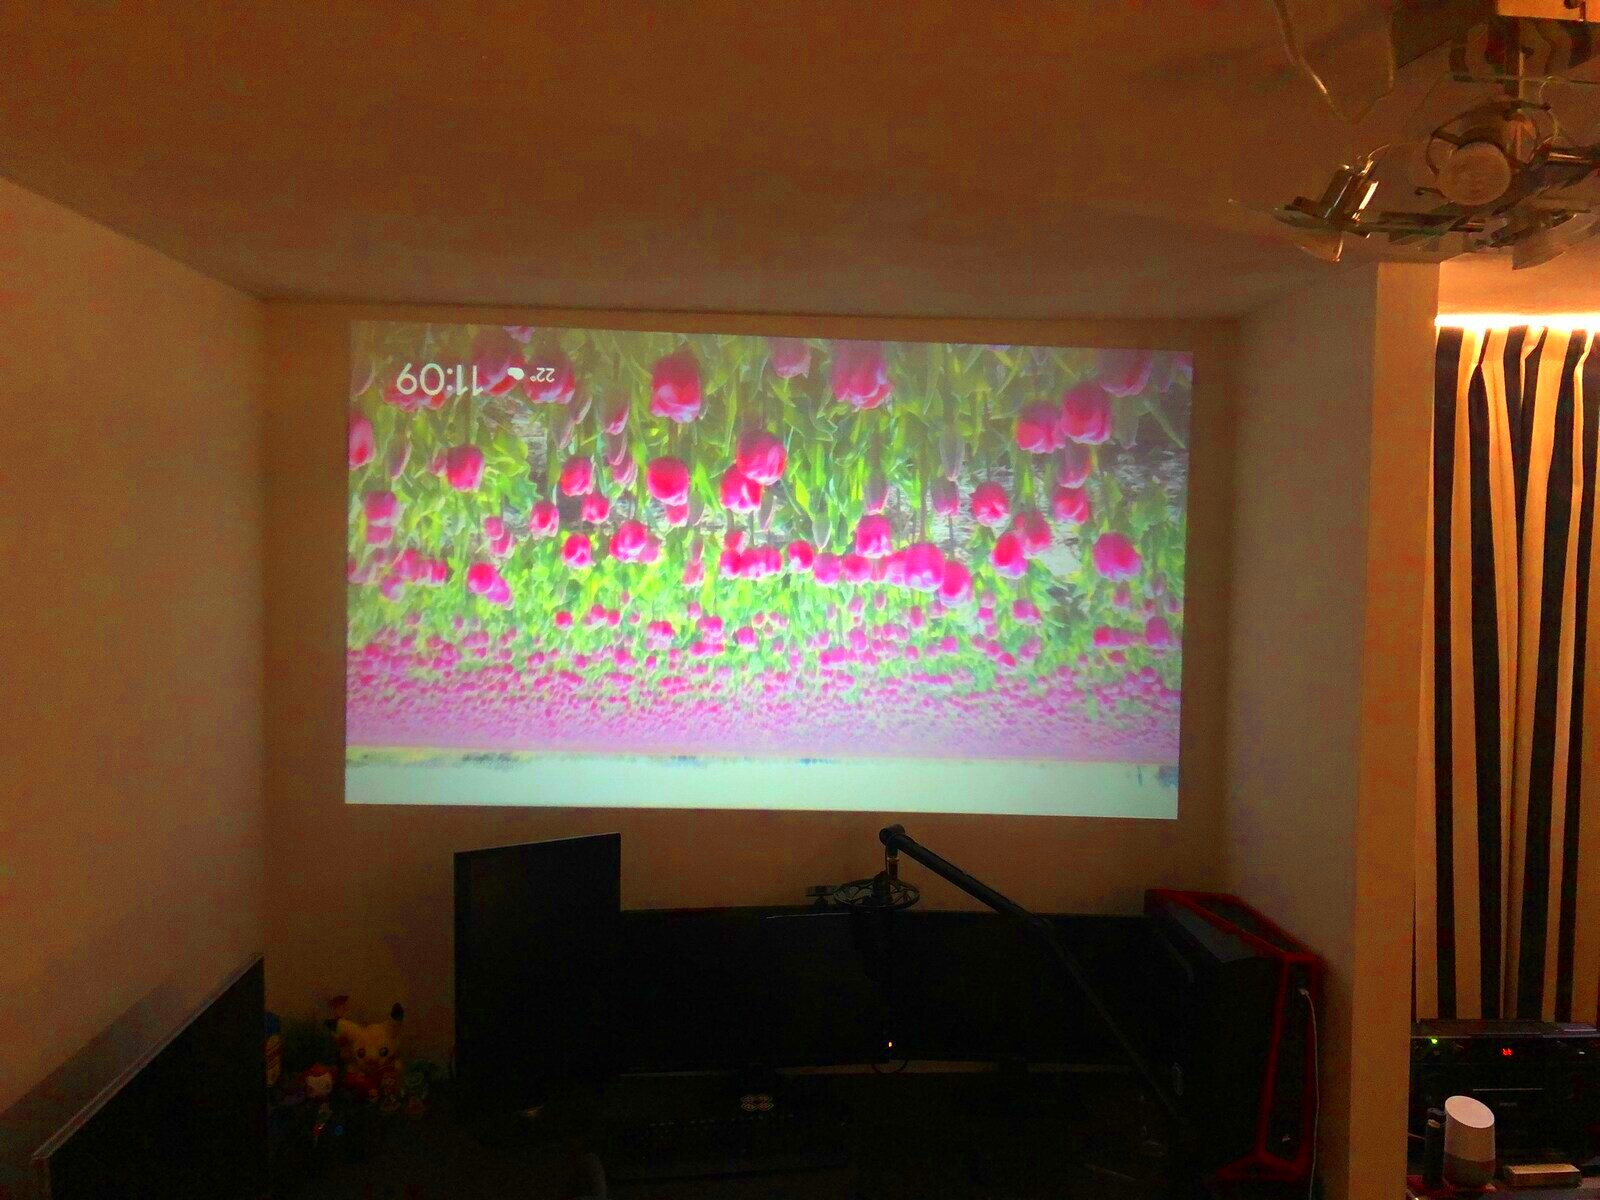
- Ceiling Mounting: If your projector is mounted on the ceiling, the image will typically appear upside down. Flipping it will correct the orientation.
- Alternative Setup: If you’re using the projector in a non-traditional way, like projecting onto a wall or surface that is at an angle, flipping the image can make it viewable.
- Reflective Surfaces: Sometimes, you might project onto a reflective surface, which may require flipping the image to avoid confusion.
Recognizing the appropriate time for projector image flipping may remarkably improve clarity and quality of the presentation as a whole.
Also Read This: Saving an Image from Cricut to Your Computer
Step-by-Step Guide to Flip a Projector Image on Different Devices
Depending on the device, flipping a projector image may vary just a little bit. Below is a very simple guide to help you do it right:
1. Flipping on a Standard Projector:
- Turn on the projector and access the menu.
- Look for the “Settings” or “Setup” option.
- Select “Image” or “Display” settings.
- Choose “Image Flip” or “Orientation” options.
- Select the desired flip option (horizontal, vertical, or both).
- Save your settings and exit the menu.
2. Flipping on a Laptop or Computer:
- Connect your laptop to the projector.
- Right-click on the desktop and select “Display settings.”
- Scroll down to “Display orientation.”
- Choose “Landscape (flipped)” or “Portrait (flipped)” as required.
- Click “Apply” to save the changes.
3. Flipping on Smart Devices:
- Open the projection app or settings.
- Look for image adjustment options.
- Choose the flip setting that suits your needs.
- Save the settings and project.
To ensure that the projector image is reversed effectively, and thereby improving the viewing experience, follow these steps.
Also Read This: how to transfer image onto paper
Common Mistakes to Avoid When Flipping a Projector Image
It may appear that turning around a projector’s image is a simple task, but there are some traps that commonly ensnare people and lead off to confusion or just not as enjoyable an experience with the display. However, identifying these blunders will save you from instances of gruffness view into your screen right from inception, thus benefiting everything else you plan on doing with it.
- Not Checking the Projector Manual: Each projector is different. Failing to refer to the user manual can lead to overlooking specific settings unique to your model.
- Forgetting to Adjust Aspect Ratio: Flipping the image without adjusting the aspect ratio can result in a distorted image. Make sure the ratio matches your content.
- Ignoring Keystone Correction: Keystone issues can occur when the projector is not aligned properly. Not correcting this can affect image quality, even after flipping.
- Not Testing the Image: After making adjustments, always project a test image or video to ensure everything looks right before your presentation.
- Overlooking Light Source: If the projector is not bright enough, flipping it might not resolve issues with visibility. Always check the lamp’s condition.
By steering clear of these usual blunders, there can be major enhancement in how you set up your projector representing that it will not interfere with delivering a good presentation.
Also Read This: How to Make Image Cards
Projector Settings: Adjusting Image Orientation
It’s essential to ensure proper orientation of an image for better viewing experience. In most cases, projectors have various settings which users can manipulate in order to change display options. Thus, here are the best ways of doing it properly.
Accessing Projector Settings:
- Power on your projector and press the “Menu” button on the remote or projector itself.
- Navigate to the “Settings” or “Setup” menu using the arrow keys.
- Look for the “Display” or “Image” section.
Adjusting Orientation:
- Find the “Image Flip” or “Orientation” option.
- Select from options like “Normal,” “Reverse,” “Vertical,” or “Horizontal.”
- After selecting, confirm the change.
Keep in mind that the projection surface needs to be considered also. For instance, if you’re using a wall as your projection, ensure that its orientation conforms to the orientation of the surface in order to avoid having distortions.
Also Read This: How to Make Cake Fondant at Home with Easy DIY Tutorial
Tips for Ensuring a Clear and Correctly Flipped Image
It is essential to get the image perfectly for an incredible viewing experience. Just ensure clarity and accuracy after flipping your projector image with these few tips.
- Adjust Focus: After flipping the image, always check the focus settings to ensure everything appears sharp and clear.
- Use the Right Surface: A smooth, white projection surface will yield the best results. If you're projecting onto a textured wall, consider using a projector screen.
- Test Different Settings: Don’t hesitate to experiment with different settings to find what works best for your space and equipment.
- Ensure Proper Alignment: Position the projector so that the image is straight and not skewed. Use keystone correction if necessary.
- Monitor Ambient Light: Reduce ambient light in the room to enhance image clarity. The less light, the better the image quality.
For your audiences’ experience to be great, follow these guidelines and make your visuals congruent which shall enhance clarity of presentation.
Also Read This: Stunning Watch Party Makeup Tutorials on Dailymotion
Frequently Asked Questions
Some frequently asked queries about turning projector pictures upside down are mentioned below together with accommodating responses in order to avert perplexity.
1. How do I know if my projector supports image flipping?
Many contemporary projectors come equipped with image flipping capabilities. To find out whether your particular projector has this function, consult its manual or explore through the menus under Settings. Search for phrases such as “Image Flip,” “Orientation,” or “Setup.”
2. What are the benefits of flipping a projector image?
Projector image flipping caters for different setups eliminating discomfort in viewing angle by avoiding distortion thus improving on viewers experience. It also enables projection on ceiling mounted devices as well as angled versions.
3. Can I flip the image on my computer before projecting?
Absolutely, you may switch around the picture in your computer’s display properties before linking it to the projector if you want an idea on how it will appear during the actual presentation.
4. What should I do if the flipped image is still unclear?
Following a flip, If the image still looks blurred then check to see if focus settings are correct, if projector is in its right position and to do all necessary alterations in aspect ratio. It would also be appropriate to undertake an examination of projection surface issues that could affect quality of displayed graphs as well.
5. Is there a way to flip an image in presentation software?
There are various presentation programs that allow users to rotate pictures in their slides, PowerPoint and Google Slides being among them. Check the options in the image formatting settings.
Conclusion: Flipping Your Projector Image for the Best Viewing Experience
Turning a projector picture improves your speaking by assuring clarity and proper alignment. Understanding the flipping process, avoiding common mistakes and making necessary adjustments makes presentations more appealing and fun for your audience. Provided one has the correct settings in place, you would be able to captivate viewers with amazing visual effects.
 admin
admin


