When you're working on a presentation in Google Slides, you might find yourself wanting to arrange images in a certain order, with one image appearing in front of another. This is where understanding how to bring an image forward becomes important. Whether you're creating a simple slide or a more complex visual layout, controlling the position of your images can make a huge difference in how your slides look and feel. In this guide, we will show you how to move images forward in Google Slides to help you create visually appealing presentations.
Understanding Layers in Google Slides
Google Slides operates with a concept of layers, where each element—be it text, shapes, or images—exists on its own separate layer. These layers can be moved forwards or backwards to control how they appear relative to other objects on the slide. Understanding this concept is crucial when you want to stack images or arrange multiple objects in a specific order.
Here are a few key things to remember about layers:
- Top Layer: The item on the top layer will always be visible above other objects.
- Bottom Layer: The item at the bottom will be hidden behind anything placed above it.
- Group vs. Ungroup: If objects are grouped, they will move as one, so you may need to ungroup them to change their order.
Layers help create a visual hierarchy in your presentation, allowing you to arrange content in a meaningful and organized way. By mastering this, you can craft professional slides with multiple overlapping objects while keeping the slide easy to follow.
Also Read This: How to Delete Shorts on YouTube and Clean Up Your Content
Step-by-Step Guide to Moving an Image Forward
Now that you understand layers, moving an image forward in Google Slides is simple. Follow these steps to bring any image to the front of your slide:
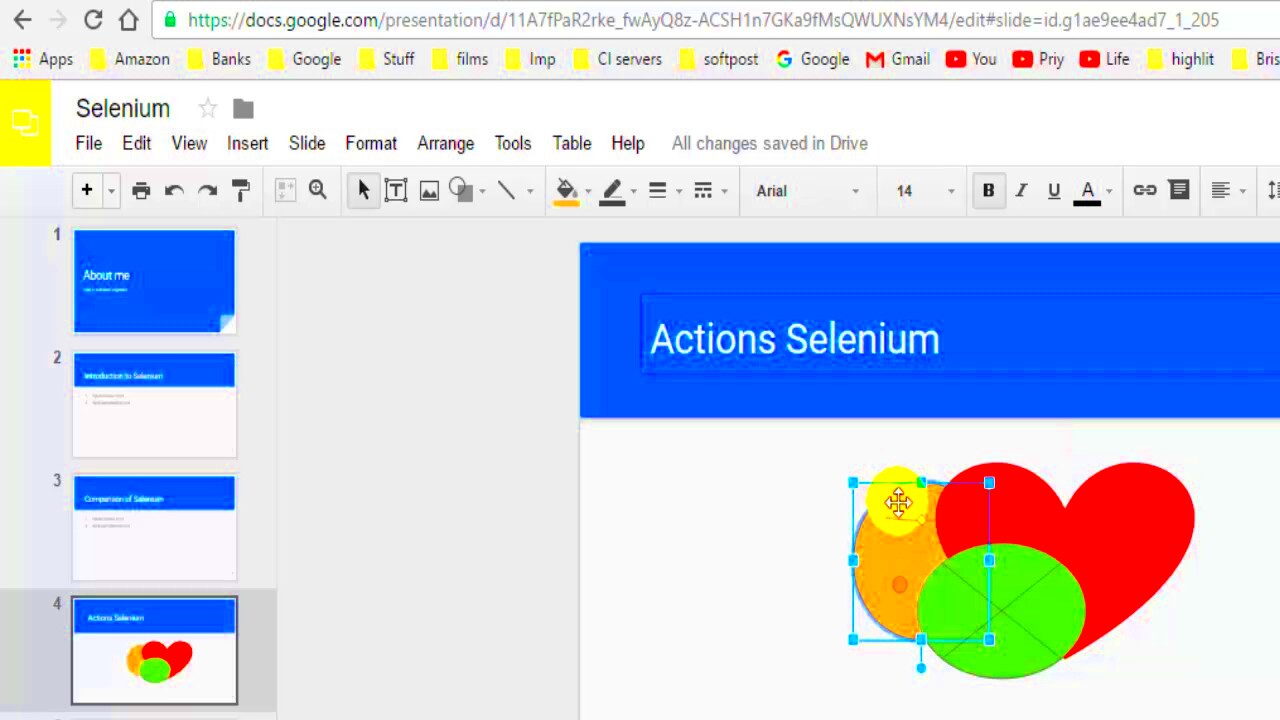
- Select the image you want to move. Click on the image so that it’s highlighted by a blue box.
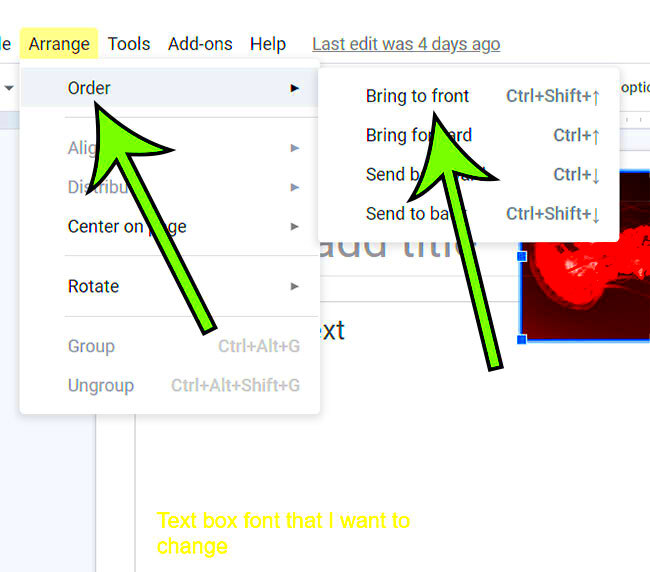
- Go to the menu bar at the top and click on Arrange.
- In the drop-down menu, hover over Order. You will see several options: "Bring to front," "Bring forward," "Send to back," and "Send backward."
- To move the image one layer forward, select Bring forward. If you want to move it to the very front, choose Bring to front.
- Your image will now appear above the other objects on the slide.
If you’re working with multiple images or elements, you can repeat these steps to arrange them in the desired order. Experiment with both "Bring forward" and "Send backward" options to adjust how your elements are layered until your layout looks just right.
Also Read This: Chromebook Convenience: Selecting Multiple Songs on Spotify – Chromebook Edition
Common Mistakes and How to Avoid Them
When working with images in Google Slides, there are a few common mistakes that can disrupt your presentation's flow. Luckily, they’re easy to avoid with a little guidance. Here are some of the most frequent errors and tips on how to fix them:
- Not understanding the layering order: One of the biggest mistakes is not knowing how layers work. This can cause images to overlap in a confusing way. Make sure to use the Arrange and Order options to control which image sits on top.
- Resizing without maintaining proportions: When resizing an image, dragging from the edges without holding the Shift key can lead to distortion. Always hold Shift to maintain the aspect ratio of your images.
- Overlapping text and images: Another common mistake is allowing images to overlap with text, making both hard to read. Ensure that you arrange your images in a way that complements the text instead of covering it.
- Forgetting to group related elements: If you are working with multiple images or shapes that should stay together, forgetting to group them can cause problems when you move them around. Use Group (under Arrange) to keep elements in place as a single unit.
Avoiding these mistakes will not only save time but will also ensure that your presentations look polished and professional.
Also Read This: How to Lock Images in Google Slides
Tips for Arranging Multiple Images on a Slide
Arranging multiple images on a single slide can be tricky, especially when you want the layout to look organized and visually appealing. Here are some tips to help you manage multiple images effectively:
- Use alignment tools: Google Slides has alignment guides that automatically show when an image is centered or aligned with other elements. Use these to create a balanced layout.
- Group images when necessary: If you have multiple images that belong together, group them. This helps when resizing or moving them as a single unit.
- Maintain consistency in size and spacing: To keep your slide looking professional, make sure your images are evenly spaced and consistently sized. Use the built-in Distribute and Align options for precision.
- Layer with purpose: When layering images, think about the visual flow. Place the most important images on top and the less critical ones behind, using the Order menu to arrange them.
With a bit of practice, arranging multiple images on a single slide will become second nature, allowing you to create slides that are both attractive and functional.
Also Read This: Editing Your LinkedIn Posts After Publishing
Benefits of Using Google Slides for Image Editing
Google Slides isn’t just for creating presentations—it also offers a variety of tools for basic image editing that can help improve your visuals without needing external software. Here are some benefits of using Google Slides for image editing:
- No need for extra software: You can make simple adjustments like cropping, resizing, and rotating images directly in Google Slides, eliminating the need for other editing tools.
- Layering and arrangement tools: Google Slides allows you to easily move images forward or backward, helping you create complex visual layouts with multiple images.
- Collaboration in real-time: One of the biggest advantages of Google Slides is the ability to collaborate with others in real-time. You and your team can work on image placement and editing simultaneously, which is a big time-saver.
- Integration with Google Drive: Google Slides is integrated with Google Drive, making it easy to import images directly from your cloud storage, saving you time and effort.
In short, Google Slides is a powerful tool for quick and effective image editing, perfect for users who want to manage images within their presentations without using advanced software.
Also Read This: 2024 YouTube Shorts Duration Guidelines for Creators
FAQs About Moving Images in Google Slides
Here are some common questions users have when working with images in Google Slides:
- How do I bring an image forward in Google Slides?
- Can I move multiple images forward at once?
- Why can’t I see my image after I insert it?
- Is it possible to lock an image’s position?
- How do I move an image behind text?
To bring an image forward, select the image, then click on Arrange in the menu, hover over Order, and choose Bring forward or Bring to front to move it above other elements on the slide.
Yes, you can select multiple images by holding the Shift key and clicking on each image. Then, go to Arrange > Order and choose to bring them forward or backward as needed.
If your image seems to be missing after inserting it, it might be behind other elements on the slide. Use the Bring forward option to move it in front of other layers.
Google Slides doesn’t have a native "lock" feature for images, but you can group the image with other elements to keep it from moving out of place accidentally. This is especially useful when you’ve finished arranging your slide.
Select the image, go to Arrange > Order and choose Send backward or Send to back to place it behind text or other elements.
Conclusion: Mastering Image Positioning in Google Slides
Mastering the positioning of images in Google Slides is an essential skill for creating professional, visually appealing presentations. By understanding how to work with layers, use the Arrange and Order tools, and avoid common mistakes, you can easily control how your images appear on your slides. With practice, you'll be able to arrange images in a way that enhances your message and improves the overall flow of your presentation.
 admin
admin


