The minute I made my first foray into stock photography; I was exhilarated and a little baffled at the same time. I vividly recall one time when I uploaded a beautiful picture of a sunset only for it to be rejected because of not meeting the dimension requirements.
This experience showed me that it was very crucial to know about size restrictions on images meant for
Shutterstock or any other online based photo stock platform. In this post, we shall examine these limitations and their potential consequences on image uploads.
Why Picture Size Matters for Quality
Size of image has in fact critical role that one needs to consider cautiously because it affect the quality of pictures are uploaded. In this sense, more file indicates better details hence necessary for individuals who search for high quality images related to various things. Whenever you’re looking througha gallery of pixels, would you rather look at a blurred picture or a clear one?
Through my own experiences, I have come to know that size variations – even if just a few – can make an impact on the chances of getting approved. These requirements are meant to ensure that customers receive only the best quality images from
Shutterstock. The level of your photo’s clarity actually plays a big role in the way it is received by possible clients.
Consider these points:
- High-quality images attract more attention.
- Properly sized images enhance user experience.
- Large files can often be used across different formats without loss of quality.
Maximum File Size Requirements for Shutterstock
 Shutterstock
 has got its own particular requirements for file sizes that are supposed to be adhered to by all contributors. Usually, the maximum allowable file size for you to upload is around 30 MB, which might appear too much at a glance. However, it is crucial to note that the size of a file does not only depend on image dimensions but also on the file format and compression techniques.
As an illustration, because of its complexity, a highly detailed landscape can be more extensive than a plain portrait. It is always a juggling act between how big it is and how well it looks. Most times, I try to make images bigger or smaller, and reduce them before uploading them so that they can comply with the measurements yet still remain good-looking.
Here are some key takeaways regarding file sizes:
- Max file size: 30 MB
- Preferred formats: JPEG, TIFF, and PNG
- Compression helps, but be cautious—too much can ruin the image.
Remember, if you upload documents over the set limit they will be automatically denied, so always confirm before you press that button. That is what I discovered from my own experience!
Recommended Dimensions for Images
In uploading my puncturing images to
Shutterstock I realized soon enough that size of file is equally important as dimensions. This is similar to making a bespoke suit; if it fits properly then there can be significant improvement in aesthetics. According to
Shutterstock, images should have minimum resolution of 4 mega pixels but their measurements differ based on what they will be used for. It might seem daunting but with some assistance, it wouldn’t appear that way anymore.
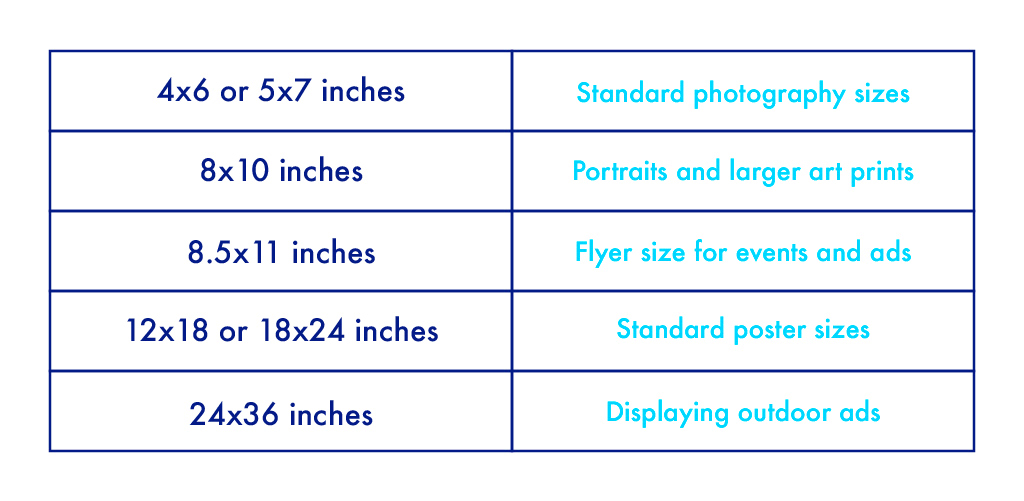
For illustration, here are various suggested measurements:
- For general use: 3000 x 2000 pixels
- For editorial use: 5000 x 3500 pixels
- For large prints: 6000 x 4000 pixels
These dimensions help in not only understanding but making sure that your pictures could be used for different purposes by buyers, for instance on different social domains or portfolios. When I saw my photos in a magazine, it was so much fun, and all my hard work paid off!
Here’s a quick checklist:
- Check the megapixel count before uploading.
- Adjust your dimensions according to the intended use.
- Always preview how your image looks at different sizes.
It’s true that opportunity will knock when you reach the right size! The work you produce is valuable and should be exhibited prominently for all to see it!
File Formats Accepted by Shutterstock
A perfect file format for your images sometimes seems to be like a one-way street. In my younger days, I was too much of a JPEG person. Despite being widely embraced, I have come to realize that
Shutterstock allows different kinds of formats which have their different know advantages.
Below is a description of the forms that can be utilized:
- JPEG: Ideal for most photographs. It balances quality and file size well.
- TIFF: Offers higher quality but results in larger file sizes, perfect for intricate designs.
- PNG: Great for images with transparency, often used for graphics and logos.
When I first started uploading content, I encountered rejection because my file format was wrong. That is when I realised the importance of checking Shutterstock’s guidelines before hitting “submit.” It is such a small thing, yet it saves you from so much hassle.
Never forget that sorting out parts is very important since an appropriate choice can increase the attractiveness of our displayed pictures. Before submitting anything, think about it seriously and pick a file type that shows off your capabilities best.
Common Issues with Size Limitations
Often, restrictions on size seem to be an invisible obstacle that inhibits artistic expression. I have experienced similar problems myself when I must have submitted beautiful portraits only to be automatically rejected, or when the image looked good but was too little for the size required.
Here are a few things that we often experience:
- File Too Large: Exceeding the maximum size can lead to instant rejection. It’s crucial to check your file size before uploading.
- Low Resolution: Submitting images that lack clarity can result in disappointment. Always aim for that 4-megapixel mark.
- Incorrect File Format: Uploading in a format that Shutterstock doesn’t accept is a common mistake. Familiarize yourself with their guidelines.
Though daunting, these challenges afford each setback as a chance to learn something new. I remember one specific image I cherished that required me to modify it multiple times before it was approved. Great results can come from being patient and having determination!
You're sharpening up your focus on them for there's a chance of evading them when approaching them something like mine and become more likely to have you work accepted. Believe me; it’s worth trying to let more people see what your art is all about!
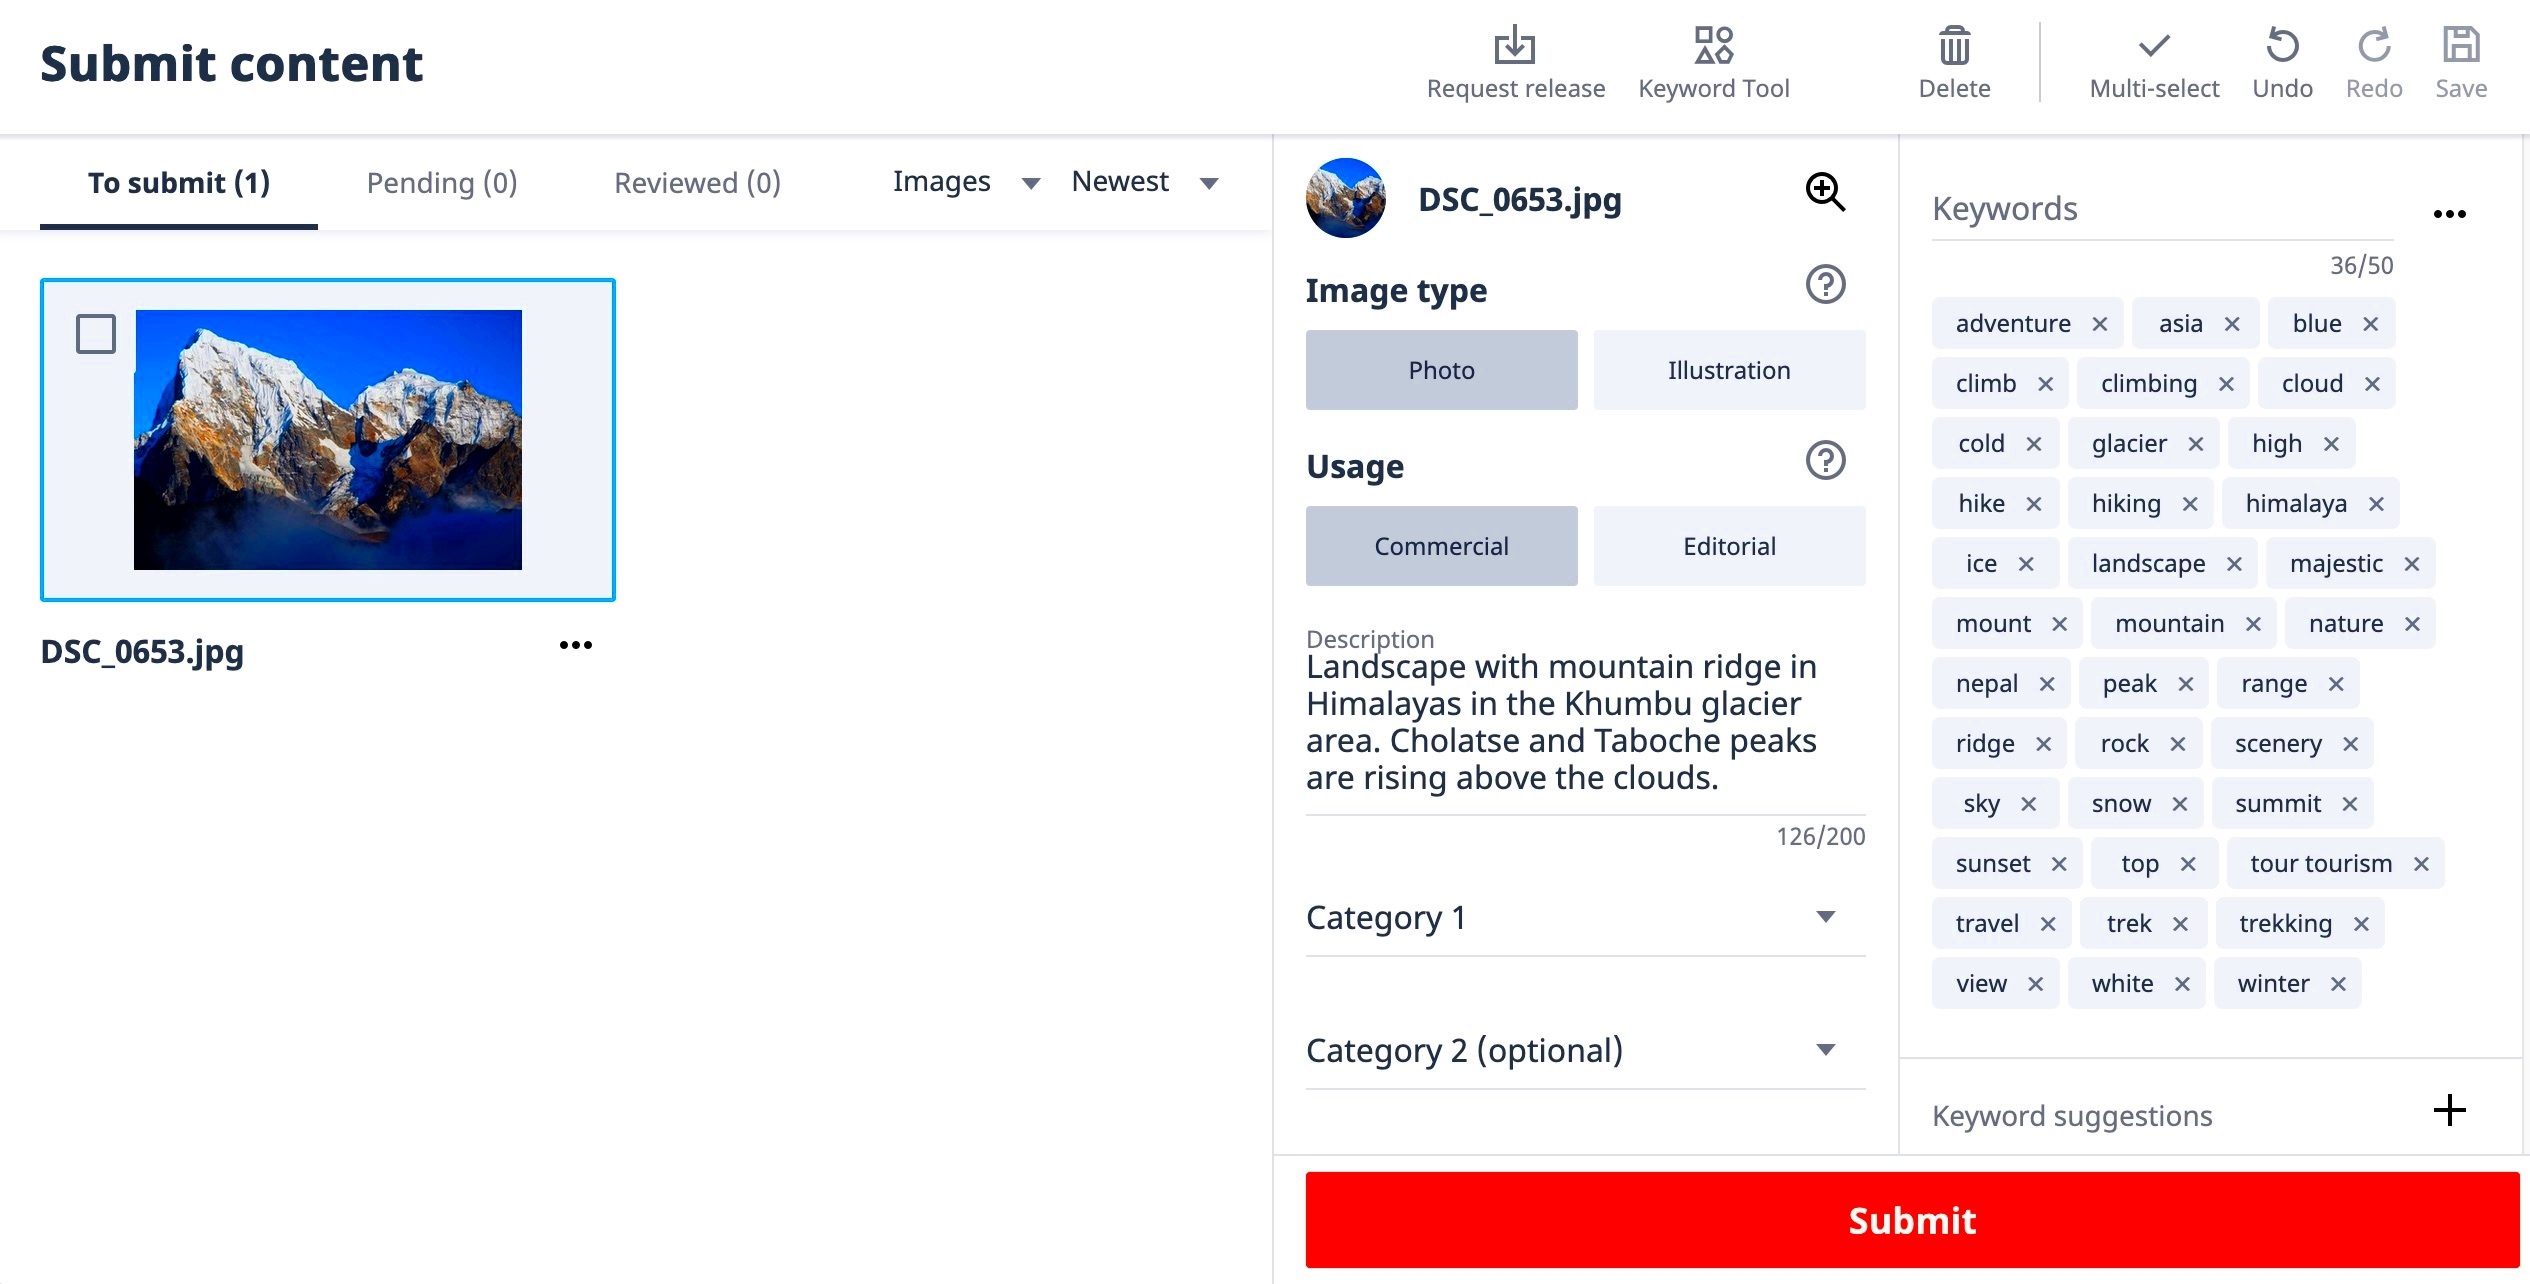
Tips for Optimizing Your Images for Upload
Tweak your photos for Shutterstock sounds better than preparing for an important examination. Prior to sending in your work, one has to make sure that everything appears to be best. When I started off, my first interesting picture was rejected because it was not well optimized although it looked great of a busy market. To assist you steer clear of such blunders here are certain useful points that I have learned from personal experience.
Most importantly, you need to take heed of your resolution. For instance, print is best with 300 or more DPI. This makes sure that quality remains the same even when image enlargements are made. Also, pay attention when cropping your pictures. Rather than just slicing away edges, it’s important to think about composition- eliminate whatever takes away the focus from what’s most important.
Here are some more optimization tips:
- Use editing software: Tools like Adobe Lightroom or Photoshop can help you enhance colors and sharpness.
- Compress your images: Use tools like TinyPNG to reduce file size without losing quality.
- Check the format: Ensure your file is in an accepted format, such as JPEG or TIFF.
In conclusion, before uploading your pictures always preview them first. On some occasions, what seems attractive on your display may not look the same once compressed. I always check an image once more just to ensure that it portrays my feelings aright prior to hitting the submit button!
Frequently Asked Questions About Shutterstock Size Limitations
Having dealt with several queries while using Shutterstock, I can understand the disorientation that comes with size restrictions. It is understandable to ponder about how these requirements can still conform to one’s own artistic expression. Here are answers to some of the most common concerns for your peace of mind.
What is the maximum file size for uploads?
The maximum file size for images is generally around 30 MB. Keeping your files within this limit is crucial to avoid rejections.
What are the recommended dimensions for images?
Shutterstock suggests a minimum resolution of 4 megapixels, but going for higher dimensions like 6000 x 4000 pixels can be beneficial for various uses.
Can I upload RAW files?
No, Shutterstock does not accept RAW files. You need to convert them into accepted formats like JPEG or TIFF.
How can I know if my image meets the quality standards?
Use editing tools to check resolution and sharpness. If it looks good to you and meets the technical requirements, it’s likely ready for submission.
These frequently asked questions (FAQs) just scratch the surface, however while getting ready to present your masterpiece they might be able to offer some clarification for you.
Conclusion on Picture Size for Shutterstock Uploads
In summary, comprehending image dimensions and restrictions on jewelry such as Shutterstock is crucial for making your artwork visible. Personally, I’ve faced lots of rejections, however every single case has taught me something important. Being wary on file sizes, advisable measurements as well as allowed formats can boost your success rates to a great level.
Never forget that your visuals are the embodiment of your artistic expression. Devoting time to photogenic enhancement and preparation can unlock fresh pathways for visibility and commerce. While traversing this captivating adventure in stock photos, continue to do new tests and acquire knowledge from what you have gone through. It is reasonable to assume that it’s only an issue of time before we witness the triumph of your talent!
 admin
admin


